Make sure this part fits

GM 12597151
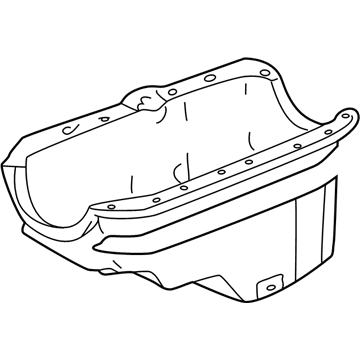
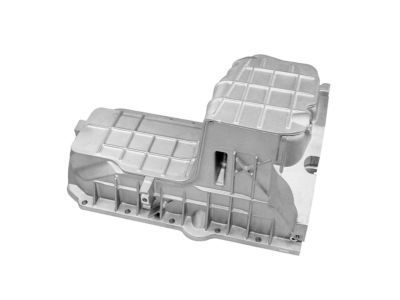
Oil Pan

1999-2005 GM

Customer Questions & Expert Answers (12)
GM 12597151 Oil Pan
GM 12597151 Oil Pan
  • Part Description
    Pan, Engine Oil
  • Replaces
    12556541
  • Manufacturer
    General Motors
Make sure this part fits
$253.39 MSRP: $343.77
You Save: $90.38 (27%)
Ships in 1-2 Business Days
1
ADD TO CART
  • Related Parts
  • Product Specifications
  • Vehicle Fitment
  • Customer Questions & Expert Answers
  • Product Specifications

    BrandGenuine GM
    Manufacturer Part Number12597151
    Part DescriptionPan, Engine Oil
    Item Dimensions18.4 x 19.4 x 12.6 inches
    Item Weight17.40 Pounds
    ConditionNew
    Fitment TypeDirect Replacement
    Replaces12556541
    ManufacturerGeneral Motors
    SKU12597151
    Shipping & ReturnShipping Policy Return Policy
    Warning: California's Proposition 65
  • Vehicle Fitment

    Year Make Model Trim Engine
    1999-2005 Chevrolet AstroBase, LS, LT6 Cyl 4.3 L GAS
    1999-2005 Chevrolet BlazerBase, LS, LT, Trailblazer, Xtreme, ZR26 Cyl 4.3 L GAS
    1999-2004 Chevrolet S10Base, LS, Xtreme, ZR2, ZR56 Cyl 4.3 L GAS
    1999-2001 GMC JimmyDiamond Edition, Envoy, SL, SLE, SLS, SLT6 Cyl 4.3 L GAS
    1999-2005 GMC SafariBase, SL, SLE, SLT6 Cyl 4.3 L GAS
    1999-2004 GMC SonomaSL, SLE, SLS6 Cyl 4.3 L GAS
    1999-2004 Oldsmobile BravadaBase6 Cyl 4.2 L GAS, 6 Cyl 4.3 L GAS
  • Customer Questions & Expert Answers

    Q:
    Is this 12597151 designed for my car? Posted by ChevyPartsGiant Specialist
    A:
    Please Select Your Vehicle model to see if part number 12597151 is suitable before ordering.
    Posted by ChevyPartsGiant Specialist
    Q:
    How to replace the oil pan on Chevrolet Astro? Posted by Customer
    A:
    Start by disconnecting the battery negative cable followed by removing the oil level indicator for Oil Pan replacement work. Raising the vehicle allows you to drain engine oil through removing the Oil Pan Drain Plug while placing the drain into a suitable container followed by Oil Filter removal. Start by removing the bolt securing the oil cooler pipes bracket to the Oil Pan then extract the Oil Filter adapter. First eliminate the Starter wiring harness bracket bolt then separate the transmission cooler pipes bracket from their mount before unplugging the crankcase position sensor wiring harness from its holder. Start by removing the Starter and transmission cover then extract access plugs for the Oil Pan rear nuts and transmission to Oil Pan bolts to remove the Oil Pan off the engine. The sealing surfaces on both the engine and the Oil Pan require complete cleaning. A correct transmission installation must come prior to Oil Pan installation for correct alignment to avoid transmission failure. Insert and tighten the transmission to Oil Pan bolts to 47 nm (35 ft. Lbs.) before installing the access plugs for the Oil Pan rear nuts and transmission cover bolts. Secure these bolts to 12 nm (106 inch lbs.). Start by mounting the Starter motor in place and bolting it to the bracket holding the Starter wiring harness and transmission cooler pipes before giving it 10 nm (89 inch lbs.) torque. The ckp sensor wiring harness retainer needs reinstallation before tightening the Oil Filter adapter and the oil cooler pipes bracket bolt to 10 nm (89 inch lbs.). Secure the Oil Filter and Oil Pan Drain Plug by following a torque of 25 nm (18 ft. Lbs.). Set the car at a lower height before adding engine oil to the crankcase and reattaching the battery's negative terminal.
    Posted by ChevyPartsGiant Specialist
    Q:
    How to replace the oil pan on a 4 Wheel Drive on Chevrolet Blazer? Posted by Customer
    A:
    To change the Oil Pan on a 4 wheel drive, one should first disconnect the negative cable from the battery, take the oil level indicator, the front Differential assembly, the Starter, and the transmission cover. Drip pan drain the engine oil and take it into a proper container by unbolt the Oil Pan Drain Plug. Next remove the remote oil filter pipe adapter, the bolt holding together the remote oil filter inlet and outlet hose clip to the Oil Pan, and the stud for the Starter wire harness bracket and transmission oil cooler pipes if equipped. Take off the Oil Pan rear nuts access plugs, transmission Oil Pan bolts and dispose of engine oil level sensor, as they cannot be reused. Take off the Oil Pan and gasket, clean all sealing surfaces, apply on the junction of the engine front cover and crankshaft rear oil seal housing a 5 mm (0.197 inch) wide and 25 mm (1.0 inch) long bead of adhesive gm p/n 12346141 or equivalent. Replace the new Oil Pan Gasket into the Oil Pan groove; the Oil Pan should align flush or front no more than 0.3mm (0.011 inch) behind the face of the engine block. Slide the Oil Pan back against an appropriate straight edge, bolt and nut the Oil Pan without tightening, measure pan to the transmission house clear gauge by using a feeler gauge. In the case where the clearance shows more than 0.3mm (0.011 inch) at any of the measurement points, then the process is repeated for alignment. Tighten the Oil Pan bolts to 25 nm (18 ft. Lbs.) in sequence, check the clearance again, and install a new Oil Pan Drain Plug seal onto the Oil Pan Drain Plug with a tightening to 25 nm (18 ft. Lbs.). Replace the new engine oil level sensor if it is available (torque to 13 Nm 115 inch lbs.), and then install transmission to Oil Pan bolts, tighten them to 47 nm (35 ft. Lbs.). Reinstallation of the access plugs for the Oil Pan rear nuts, the stud for the Starter wire harness bracket and the remote oil filter pipe adapter. Secure the oil filter inlet and outlet hose clip bolt to a 10nm (88 inch lbs.), also the transmission cover bolts to 12nm (106 inch lbs.). Finally, replace the Starter motor, front Differential assembly, and oil level indicator, and oil the engine plus reconnect the negative cable of the battery.
    Posted by ChevyPartsGiant Specialist
    Q:
    How to replace the oil pan on Chevrolet S10? Posted by Customer
    A:
    A replacement of the Oil Pan begins with disconnecting the negative cable battery followed by removal of the oil level indicator and front Differential assembly and the Starter unit before removing the transmission cover. Roll out the engine oil through the Oil Pan's Drain Plug before directing it into a proper receptacle. To begin the replacement process disconnect the remote oil filter pipe adapter along with the bolt securing the remote filter hose clip to the Oil Pan and finally remove the stud for wiring harness bracket and transmission oil cooler pipes if installed. Remove access plugs for Oil Pan rear nuts and transmission to Oil Pan bolts yet understand the low oil level sensor needs replacement with a new unit. Once the engine oil level sensor is discarded, technicians should remove all Oil Pan bolts and nuts before discarding the Oil Pan and gasket. Wash every sealing surface between the engine and Oil Pan. The installation process requires applying an adhesive 0.197 inch (5 mm) wide by 1 inch (25 mm) long bead of gm p/n 12346141 or equivalent along the front cover engine block junction and crankshaft rear oil seal housing to engine block junction at the Oil Pan sealing surfaces. When installing the Oil Pan Gasket always use a fresh one and position it when adhesive remains tacky. The Oil Pan should rest either flush or slightly forward facing at most 0.3 mm (0.011 inch) from the rear engine block surface. Set the Oil Pan Gasket into the groove of the Oil Pan before placing it onto the engine block while pressing the gasket into its grooves. First align the Oil Pan to a straight edge prior to applying the Oil Pan bolts with loose nut threads. Then use a feeler gauge to check the pan-to-transmission clearance. The alignment needs repeating if the clearance measurement reaches 0.3 mm (0.011 inch) at any point among the three measurement points. Measure the Oil Pan-to-transmission housing clearance again after tightening the Oil Pan bolts to 25 nm (18 ft. Lbs.) in sequence. Torque the new Oil Pan Drain Plug seal to 25 nm (18 ft. Lbs.) while also installing a new engine oil level sensor that requires 13 nm (115 inch lbs.) of torque. Begin by tightening transmission to Oil Pan bolts to 47 nm (35 ft. Lbs.) while completing the process with access plugs for Oil Pan rear nuts followed by Starter wire harness bracket stud and remote oil filter pipe adapter. Attach the oil filter hose inlet and outlet connection to the Oil Pan by threading a 10 nm (88 inch lbs.) bolt through the pan. Then fasten the transmission cover using 12 nm (106 inch lbs.) bolts. After installing the Starter motor connect the front Differential assembly and oil level indicator before filling the engine with oil and reattaching the negative Battery Cable.
    Posted by ChevyPartsGiant Specialist
    Q:
    How to Replace an Oil Pan for Off Vehicle on Chevrolet S10? Posted by Customer
    A:
    In order to remove the Oil Pan, one should first remove the Oil Pan Drain Plug and drain the engine oil into an appropriate recipient. Nexal the engine oil level sensor if necessary, then you pull off the Oil Pan bolts and nuts, remove the Oil Pan, and the gasket also needs to be discarded. Clean all sealing areas on the engine and Oil Pan. The adhesive used when reinstalling should be a 5 mm (0.197-in.) wide and 25 mm (1.0-in.) long bead of adhesive gm p/n (12346141) (Canadian P/N 10953433) or equivalent to both the right and left sides of the engine front cover to the engine block junction and the crankshaft rear oil seal housing to the engine block junction at the Oil Pan sealing surfaces. Always use a new Oil Pan Gasket and install in while the gasket is still wet. The Oil Pan alignment should be flush with a maximum of 0.3mm (0.011 inch) in the front from the rear face of the engine block. Attach the Oil Pan onto the engine block, pushing the gasket into the grooves, and slide the Oil Pan back against a suitable straight edge. Install the Oil Pan bolts and nuts loosely, and then check the pan-to-transmission housing gap with a feeler gauge. When any of the three points reads more than 0.3 mm (0.011 inch), align again until it falls within specification. Tighten the Oil Pan bolts and nuts in sequence to 25 nm (18 ft. Lbs.) and measure the clearance once more to check if the alignment is right. Replace a new Oil Pan Drain Plug seal (O-ring) on the Oil Pan Drain Plug and fasten it tight to 25 nm (18 ft. Lbs.). Lastly, make sure to replace a new engine oil level sensor if required, tighten it to 13 nm (115 inch lbs.).
    Posted by ChevyPartsGiant Specialist
    Q:
    How to replace the oil pan on GMC Jimmy? Posted by Customer
    A:
    To replace the Oil Pan, please first unhook the negative Battery Cable, oil level indicator, front Differential assembly, starter, and transmission cover. Drain the engine oil by unscrewing the Oil Pan Drain Plug and place it in a suitable container. Next, then you will dismount the remote oil filter pipe adapter, bolt on the remote oil filter inlet and outlet hose clip to the Oil Pan, the stud on the Starter wire harness bracket and transmission oil cooler pipes if applicable. Access plugs should be removed at the Oil Pan rear nuts, then transmission to Oil Pan bolts. If applicable, change a new low oil sensor (low oil level sensor is not reusable). Take off the bolts and nuts that hold the Oil Pan in place and remove the Oil Pan and old gasket while discarding the old gasket. Scrub all sealing surfaces on the engine and Oil Pan. In the course of installation apply on both sides of the engine front cover to the engine block junction, and crankshaft rear oil seal housing to the engine block junction at the Oil Pan sealing surfaces a 5mm (0L197in) wide x 25mm (10.0in) long bead of adhesive gm p/n 12346141 or equivalent. Always use a new Oil Pan gaskets and install it when adhesive is wet. The Oil Pan should be level, flush, or forward from no more than 0.3 mm (0.011 inch) from the rear face of the engine block. Mount the Oil Pan on to the engine block with the gasket pressed in the grooves sliding back again onto a suitable straight edge. Install the Oil Pan bolts and nuts, without tightening, and pan-to-transmission housing clearance with a feeler gauge. If the clearance measures more than 0.3 mm (0.011 inch) at any of the three measurement points, then adjust. Tighten the Oil Pan bolts to 25 nm (18 ft. Lbs.) followed by measuring the clearance once more. Insert a new Oil Pan Drain Plug seal (O-ring) onto the Oil Pan Drain Plug and screw this down finger-tight, then with 25 nm (18 ft. Lbs.). Install a new engine oil level sensor if applicable, tightening it to 13 nm (115 inch lbs.) install the transmission to Oil Pan bolts and tighten them to 47 nm (35 ft. Lbs.), access plugs for Oil Pan rear nuts, stud for the Starter wire harness bracket, as well as remote oil filter pipe adapter. Tighten the oil filter inlet and outlet hose clip bolt to 10nm (88 inchlbs), then install the transmission cover and bolts to 12nm (106 inchlbs), followed by the Starter motor and front Differential assembly. Replace the oil level indication, oil the engine, and attach the negative Battery Cable again.
    Posted by ChevyPartsGiant Specialist
    Q:
    How to replace the oil pan on GMC Safari? Posted by Customer
    A:
    Start by disconnecting the battery negative cable and removing the oil level indicator as the first step to replace the Oil Pan. Start by elevating the car and drain the engine oil through the pan's Drain Plug into a container before removing the Oil Filter. First, use a wrench to remove one bolt which attaches the oil cooler pipes bracket to the Oil Pan. Then remove the bolt securing the Oil Filter adapter. Unbolt the bracket which holds Starter wiring harness and transmission cooler pipes. Next detach the crankcase position sensor wiring harness from its retainer to remove the Starter. Start by removing the transmission cover and separate the inner axle shaft housing support bracket from its frame nuts and washers and remove the front differential carrier upper and lower mounting nuts and bolts. First lower the front differential carrier assembly before removing the Oil Pan but raise it back again afterward to access and remove the Oil Pan rear nuts and transmission to Oil Pan bolts. Afterward take out the Oil Pan from the engine. The team must thoroughly clean every surface which requires a seal between engine and Oil Pan. Proper alignment during Oil Pan installation requires transmission installation first to avoid transmission failures. After placing the Oil Pan on the engine you must install the transmission to Oil Pan bolts and nuts before tightening them to 47 nm (34 ft. Lbs.). First fit the access plugs back into Oil Pan rear nut locations then place the front differential carrier assembly followed by carrier upper and lower mounting bolt installation before tightening the nuts. The inner axle shaft housing support bracket requires frame washers and nuts before adding the transmission cover. Use a torque wrench to tighten the bolts at 12 nm (106 inch lbs.). Fasten both bolts at 10 nm (89 inch lbs.) to attach the wires of the Starter harness bracket with the cooler pipes bracket. Install the ckp sensor wiring harness into its retainer before you install the Oil Filter adapter and the oil cooler pipes bracket bolt and secure with 10 nm (89 inch lbs.) torque. Secure both the Oil Filter and Oil Pan Drain Plug using 25nm (18 ft.lbs.) torque. Put the vehicle in its lowered position before filling engine oil into the crankcase and reconnecting the device cable which supplies power to the battery.
    Posted by ChevyPartsGiant Specialist
    Q:
    How to Replace an Oil Pan for On Vehicle on GMC Sonoma? Posted by Customer
    A:
    The replacement of an Oil Pan begins by disconnecting the negative Battery Cable followed by removal of the oil level indicator and front Differential assembly and Starter and transmission cover. Extract engine oil through the removal of Oil Pan Drain Plug while using a suitable container for collection. Starting with adapter removal from the remote oil filter pipe you must also separate bolt securing inlet/outlet hose clip from the Oil Pan and disconnect the stud holding the Starter wire harness bracket along with transmission oil cooler pipes. Remove the access plugs which secure the Oil Pan rear nuts and transmission to Oil Pan bolts yet bear in mind the low oil level sensor cannot be put back into use unless you use a new sensor. Discard the engine oil level sensor if present, after which you should remove the Oil Pan bolts and nuts and discard the Oil Pan together with its gasket. All surfaces which need sealing on both the engine and Oil Pan need thorough cleaning. Use a 5 mm (0.197 inch) wide and 25 mm (1.0 inch) long bead from gm p/n 12346141 or equivalent adhesive on both sides of the engine front cover to engine block junction and crankshaft rear oil seal housing to engine block junction at the Oil Pan sealing surfaces. The Oil Pan Gasket installation must use a fresh one while placing it in the Oil Pan groove. The rear engine block surface requires the Oil Pan to fit either flat or forwards not more than 0.3 mm (0.011 inch) from its position. Press the gasket into the grooves while installing the Oil Pan onto the engine block then use a suitable straight edge for sliding it back into place. Position the Oil Pan bolts and nuts but do not tighten them first. After that measure the pan-to-transmission housing clearance using a feeler gauge. Perform the alignment procedure again until the three measurement points show a clearance within specified values not exceeding 0.3 mm (0.011 inch). After installing the Oil Pan with its bolts, check the clearance measurements again by using the feeler gauge. Follow by applying new installation hardware as follows: the Oil Pan Drain Plug seal should receive a torque of 25 nm (18 ft. Lbs.) and an engine oil level sensor should get 13 nm (115 inch lbs.) torque when new. Start with transmission to Oil Pan bolt installations at 47 nm (35 ft. Lbs.) then move to the access plugs for the Oil Pan rear nuts and the stud for the Starter wire harness bracket and the remote oil filter pipe adapter. Tighten the oil filter inlet and outlet hose clip bolt to 10 nm (88 inch lbs.) before you install the transmission cover along with its bolts. These bolts require 12 nm (106 inch lbs.) of torque force. As the last step install the Starter motor then add the front Differential assembly with the oil level indicator and refill the engine with oil before reconnecting the negative Battery Cable.
    Posted by ChevyPartsGiant Specialist
    Q:
    What is the torque specification for the transmission cover bolts for the 2005 Chevrolet Astro? Posted by Customer
    A:
    Tighten the bolts to 12 Nm (106 inch lbs.).
    Posted by ChevyPartsGiant Specialist
    See expert answers on similar Oil Pan
    Q:
    How do you drain the engine oil for the 2004 Chevrolet Astro? Posted by Customer
    A:
    Raise the vehicle and remove the oil pan drain plug into a suitable container, then remove the oil filter.
    Posted by ChevyPartsGiant Specialist
    See expert answers on similar Oil Pan
    Q:
    How do you drain the engine oil for the 2001 GMC Safari? Posted by Customer
    A:
    Raise the vehicle and drain the engine oil by removing the oil pan drain plug into a suitable container, then remove the oil filter.
    Posted by ChevyPartsGiant Specialist
    See expert answers on similar Oil Pan
    Q:
    What should be done after installing the starter motor for the 2000 GMC Safari? Posted by Customer
    A:
    Install the bolt holding the bracket for the starter wiring harness and the transmission cooler pipes, tightening these bolts to 10 Nm (89 inch lbs.).
    Posted by ChevyPartsGiant Specialist
    See expert answers on similar Oil Pan
    If you have any questions about this product, please don't hesitate to ask us. We will be happy to help you!

OEM GM 12597151, Excellent Performance and Perfect Fitment

To ensure reliability, purchase GM part # 12597151 Oil Pan. It is sometimes referred to as GM Oil Pan. Choosing OEM parts is the optimal decision for guaranteeing superior quality and perfect performance. These components undergo stringent quality checks and are carefully constructed to comply with GM's factory specifications, ensuring a smooth installation process.

ChevyPartsGiant.com is a leading supplier of genuine GM parts such as GM 12597151 Oil Pan. Our website boasts an extensive inventory of OEM GM parts, available at highly competitive prices in the market. Should you require any new genuine GM parts, rest assured we will deliver them swiftly and efficiently to your doorstep. Furthermore, all our parts come with the assurance of a manufacturer's warranty. For detailed Chevy parts information, click here.
Choose ChevyPartsGiant for discounted prices, exceptional service and fast delivery