ChevyParts
My Garage
My Account
Cart
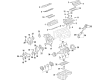
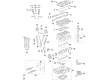
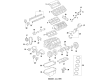
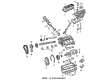
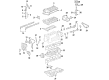
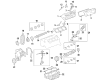
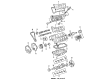
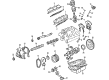
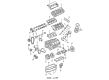
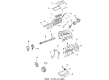
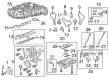
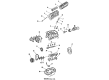
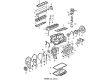
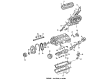
OEM Buick Timing Cover
Engine Timing Cover- Select Vehicle by Model
- Select Vehicle by VIN
Select Vehicle by Model
orMake
Model
Year
Select Vehicle by VIN
For the most accurate results, select vehicle by your VIN (Vehicle Identification Number).
57 Timing Covers found

Buick Timing Cover, Front Part Number: 12598350
$155.94 MSRP: $578.71You Save: $422.77 (74%)Ships in 1-2 Business DaysProduct Specifications- Other Name: Cover Assembly-Engine Front (W/Water Pump); Front Cover; Cover, Engine Front Cover
- Position: Front
- Replaces: 12589219

Buick Timing Cover, Front Part Number: 12690012
$129.63 MSRP: $203.97You Save: $74.34 (37%)Product Specifications- Other Name: Cover, Engine Front Cover; Front Cover
- Position: Front
- Replaces: 12633638, 12664882, 12658164, 12662952, 12659833, 12654043


Buick Timing Cover Part Number: 12633908
$23.60 MSRP: $36.96You Save: $13.36 (37%)Ships in 1-3 Business DaysProduct Specifications- Other Name: Cover Assembly-Engine Front; Front Cover
- Position: Front
- Replaces: 12593228, 12611881, 12580287

Buick Timing Cover Part Number: 10101799
$33.12 MSRP: $66.05You Save: $32.93 (50%)Ships in 1-2 Business DaysProduct Specifications- Other Name: Cover Assembly-Engine Front; Cover, Engine Front Cover
- Position: Front


Buick Timing Cover Part Number: 10044603
Product Specifications- Other Name: Cover Assembly-Engine Front; Front Cover; Cover; Cover, Engine Front Cover
- Position: Front


Buick Front Cover Part Number: 12628565
Product Specifications- Other Name: Cover, Engine Front Cover; Timing Cover; Cover, Engine Cover Front
- Position: Front
- Replaces: 12601932, 12586647


Buick Timing Cover, Front Part Number: 19209125
Product Specifications- Other Name: Cover, Engine Front; Front Cover; Cover, Engine Front Cover
- Position: Front
- Replaces: 89018196


Buick Timing Cover Part Number: 12576050
Product Specifications- Other Name: Cover Assembly-Engine Front; Front Cover; Cover, Engine Front Cover
- Position: Front
- Replaces: 12563938


Buick Timing Cover Part Number: 12576033
Product Specifications- Other Name: Cover Assembly-Engine Front; Front Cover
- Position: Front
- Replaces: 24502241


Buick Timing Cover, Front Part Number: 12568797
Product Specifications- Other Name: Cover, Engine Front Cover; Front Cover
- Position: Front
- Replaces: 24505667

Buick Timing Cover, Front Part Number: 12329552
Product Specifications- Other Name: Cover Kit, Engine Front Cover
- Position: Front

Buick Timing Cover, Front Part Number: 12655856
$532.78 MSRP: $841.74You Save: $308.96 (37%)Product Specifications- Other Name: Cover, Engine Front (W/Water Pump); Front Cover; Front Seal; Actuator; Cover, Engine Front Cover
- Position: Front
- Replaces: 12601276, 12612399, 12611884

Buick Timing Cover, Front Part Number: 10044605
Product Specifications- Other Name: Cover; Cover, Engine Front Cover
- Position: Front

Buick Timing Cover, Front Part Number: 22534080
Product Specifications- Other Name: Cover, Engine Front Cover
- Position: Front

Buick Timing Cover, Front Part Number: 24573027
Product Specifications- Other Name: Cover, Engine Front Cover; Front Cover
- Position: Front

Buick Timing Cover Part Number: 12523974
Product Specifications- Other Name: Cover; Front Cover; Engine Timing Indicator; Reinforcement; Cover
- Position: Front

Buick Timing Cover, Front Part Number: 24573991
Product Specifications- Other Name: Cover, Engine Front Cover; Front Cover
- Position: Front
Buick Timing Cover, Front Part Number: 24571584
Product Specifications- Other Name: Cover, Engine Front Cover; Front Cover; Cover
- Position: Front

Buick Timing Cover, Front Part Number: 22525282
Product Specifications- Other Name: Cover, Engine Front Cover
- Position: Front
Buick Timing Cover Part Number: 10101737
Product Specifications- Other Name: Cover Assembly-Engine Front; Cover, Engine Front Cover
- Position: Front
| Page 1 of 3 |Next >
1-20 of 57 Results
Buick Timing Cover
Want to cut long-term maintenance and repair costs? Choose OEM Timing Cover. Those parts deliver top durability you can trust. On our site, you'll find a huge catalog of genuine Buick parts. Prices are unbeatable, so you can keep more in your pocket. Every OEM Buick Timing Cover includes a manufacturer's warranty. You can also get an easy return policy that keeps buying risk free. Fast delivery, get your car on the road quickly. It's simple to search, compare, and order. Stop guessing about quality or fit. Order today and save with parts that last.
Buick Timing Cover Parts Questions & Experts Answers
- Q: How to service and repair the timing cover on Buick LeSabre?A:In order to service and repair the Timing Cover, start by unboltching the torque axis mount and the torque axis mount bracket off. Then, remove the Drive Belt and Drive Belt tensioner assembly, then remove the crankshaft balancer. Unplug the crank sensor shield and the crank sensor then remove the Oil Pan to engine front cover bolts and the engine front cover attach bolts to remove the engine front cover. Check the movement by the Timing Chain for its excessive movement, which should not be more than 25mm (1-inch), as well as inspect the timing sprockets for wear. Clean the mating surface of the gasket on the Timing Chain cover and cylinder block, and if the Oil Pan Gasket is too swollen remove the Oil Pan and replace gasket. For installation, perform the installation of the engine front cover gasket as well as the engine front cover using the torque angle meter (J 36660-A) with sealant gm p/n 12346004 or equivalent applied to relationship of bolt threads. Tighten the engine front cover attaching bolts to 20 nm (15 ft. Lbs.) and then further turn them by 40° with the help of the torque angle meter (J 36660-A). Install Oil Pan to engine front cover bolts and pull them to 14n m (125 in lbf). Proceed to install the Drive Belt tensioner assembly, do not co a sensor crankshaft adjustment and crankshaft sensor and the cranks in balance with the bolt. Lastly, install the Drive Belt, the torque axis mount bracket, and the torque axis mount.
- Q: How to replace the engine front timing cover on Buick LaCrosse?A:Starting the engine front cover replacement process requires the disconnection of the negative Battery Cable. Remove the Engine Control Module (ECM), generator assembly, coolant overflow reservoir, and Power Steering Reservoir as a next step. Start your replacement by removing the camshaft covers followed by the radiator inlet hose then coolant outlet and Water Pump and engine splash shield then crankshaft balancer and drive belt tensioner respectively. Separate all previously removed components before detaching the engine front cover from its seat on the engine block. When reinstalling components start by putting the engine front cover onto the engine block then install the Water Pump followed by the camshaft covers. The installation process includes reassembling the drive belt tensioner followed by the crankshaft balancer and coolant overflow reservoir then Power Steering Reservoir followed by the radiator inlet hose and coolant outlet and generator assembly and engine splash shield with the final step being the ecm module. The last step connects the negative Battery Cable to complete the installation.
- Q: How to Perform a Timing Cover Replacement on a Buick Regal?A:If you want to replace the engine front cover, start with removing the negative Battery Cable and lifting the vehicle to get access to it. Take out the engine oil and the cooling system, and lower the vehicle. Loosen off the Water Pump Pulley bolts and remove the drive belt tensioner, and remove the Water Pump Pulley. Gently take out the crankshaft balancer without breaking the crankshaft. Pry the crankshaft front oil seal out using a suitable tool without damaging the seal bore or contact surface. Unplug the electrical connectors for the camshaft position (CMP) and the crankshaft position (CKP) sensors as well as the oil pressure sensor then you take out the Crankshaft Position Sensor shield and radiator outlet hose from the Water Pump. Mount the fixture to hold the engine (J32127-B) & lift the vehicle. If needed, drop the Oil Pan slightly for clearance by unscrewing all pan bolts and taking out the oil level sensor. Drop the Oil Filter and engine mount bracket for cleaner access and remove the oil level sensor thereafter. Remove the Oil Pan to engine front cover bolts but loosen rest of the Oil Pan bolts but do not remove them. Let go of the Crankshaft Position Sensor and tight the engine front cover bolts then pull off the engine front cover with the Oil Filter adapter as one unit. Loosen the engine front cover gasket and if you are replacing it remove the Oil Filter adapter, pressure relief valve, water pump, and oil pump cover and gear set from the engine front cover. Check the oil pump cover, gear set, timing chain, sprockets, and Oil Pan Gasket and change if necessary. The Camshaft Position Sensor (if replacing engine front cover) then install the sensor and tighten its bolts to 10 nm (89 inch lbs.); entail the installation process in your website, along with the other operations as well mentioned at the beginning for the user. Install the oil pump cover and gear set, then the Water Pump with its bolts, being tight to 20 nm (15 ft. Lbs.) for the long and 15 nm (11 ft. Lbs.) for the short bolts. Install the pressure relief valve, oil filter adapter, and bolts while torquing adapter bolts to 15 nm (11 ft. Lbs.) and using the electronic torque angle meter (J 36660-A) to rotate bolt an additional 50 degrees. Install a new engine front cover gasket, sealer gm p/n12346004 or previous to the bolt threads, aligning the cogs on the crankshaft sprocket with oil pump gear set. Mount the engine front cover and tighten bolts 20 nm (15 ft. Lbs) and use the electronic torque angle meter (J 36660-A) for rotation of an additional 40 degrees. Replace the Crankshaft Position Sensor with its studs tightened to 30 nm (22 ft. Lbs.), and install a new engine front cover seal with the seal installer (J 35354), ensuring it is flush. Reconnect the Oil Pan to the engine front handle bolts with a torque of 14 nm (125 inch lbs.), and put in the oil level sensor and torque it at 20 nm (15 ft. Lbs.). Install the engine mount bracket, reconnect the oil level sensor electrical connector, and the Water Pump Pulley, tightening the bolts up to 13 nm (116 inch lbs.). Reconnect the radiator outlet hose, the Oil Filter, and the engine Oil Pan drain plug. Now reconnect the Crankshaft Position Sensor shield, and plug in the electrical connectors to the oil pressure sensor, ckp sensor, and cmp sensor. Lastly, install the crankshaft balancer, lower the vehicle, uninstall the engine support fixture, install the drive belt tensioner, fill the cooling apparatus and crankcase using engine oil, connect the negative Battery Cable back, inspect for leaks, and execute the ckp system variation learn procedure.


Related Buick Parts
 Buick Harmonic Balancer
 Buick Balance Shaft Bearing Set
 Buick Cam Gear
 Buick Camshaft Seal
 Buick Crankshaft Gear
 Buick Cylinder Head
 Buick Engine Mount Bracket
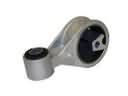 Buick Engine Torque Strut Mount
 Buick Exhaust Valve
 Buick Intake Valve
 Buick Oil Drain Plug Gasket
 Buick Valve Cover Grommet