ChevyParts
My Garage
My Account
Cart
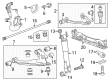
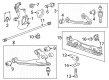
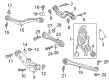
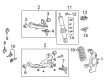
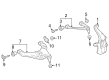
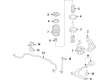
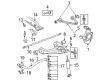
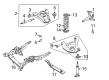
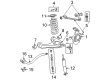
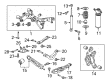
OEM GMC Steering Knuckle
Front Steering Knuckle- Select Vehicle by Model
- Select Vehicle by VIN
Select Vehicle by Model
orMake
Model
Year
Select Vehicle by VIN
For the most accurate results, select vehicle by your VIN (Vehicle Identification Number).
113 Steering Knuckles found


GMC Knuckle, Passenger Side Part Number: 84045104
$223.66 MSRP: $355.08You Save: $131.42 (38%)Product Specifications- Other Name: Knuckle, Steering
- Position: Passenger Side
- Replaces: 20872163, 22752927

GMC Knuckle, Passenger Side Part Number: 85124366
$151.38 MSRP: $271.54You Save: $120.16 (45%)Product Specifications- Other Name: Knuckle, Steering
- Position: Passenger Side
- Replaces: 84831199, 23422186

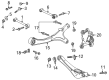
GMC Knuckle, Rear Passenger Side Part Number: 85116618
$103.10 MSRP: $177.09You Save: $73.99 (42%)Ships in 1-3 Business DaysProduct Specifications- Other Name: Knuckle, Rear Wheel
- Position: Rear Passenger Side
- Replaced by: 85562433

GMC Knuckle, Rear Driver Side Part Number: 84196224
$123.81 MSRP: $203.94You Save: $80.13 (40%)Ships in 1-2 Business DaysProduct Specifications- Other Name: Knuckle, Rear Wheel
- Position: Rear Driver Side
- Replaced by: 26503836

GMC Knuckle, Passenger Side Part Number: 19303845
$520.38 MSRP: $826.20You Save: $305.82 (38%)Ships in 1-2 Business DaysProduct Specifications- Other Name: Knuckle, Steering
- Position: Passenger Side
- Replaces: 19208800
GMC Knuckle, Rear Passenger Side Part Number: 84196225
$119.79 MSRP: $203.94You Save: $84.15 (42%)Ships in 1-2 Business DaysProduct Specifications- Other Name: Knuckle, Rear Wheel
- Position: Rear Passenger Side
- Replaced by: 26503837

GMC Knuckle, Driver Side Part Number: 84925031
$103.11 MSRP: $161.51You Save: $58.40 (37%)Product Specifications- Other Name: Knuckle, Steering
- Position: Driver Side
- Replaced by: 85777787
GMC Knuckle, Rear Driver Side Part Number: 85116617
$108.48 MSRP: $184.70You Save: $76.22 (42%)Ships in 1-3 Business DaysProduct Specifications- Other Name: Knuckle, Rear Wheel
- Position: Rear Driver Side
- Replaced by: 85562432
GMC Knuckle, Driver Side Part Number: 85124365
$139.91 MSRP: $238.20You Save: $98.29 (42%)Ships in 1-3 Business DaysProduct Specifications- Other Name: Knuckle, Steering
- Position: Driver Side
- Replaces: 23422185, 84831198

GMC Knuckle, Driver Side Part Number: 84210076
$72.98 MSRP: $125.34You Save: $52.36 (42%)Ships in 1-2 Business DaysProduct Specifications- Other Name: Knuckle, Steering
- Position: Driver Side

GMC Knuckle, Passenger Side Part Number: 18060909
$319.17 MSRP: $525.78You Save: $206.61 (40%)Ships in 1-2 Business DaysProduct Specifications- Other Name: Knuckle Assembly, Steering (Includes O-Ring)
- Position: Passenger Side
- Replaced by: 25850471

GMC Knuckle, Driver Side Part Number: 15124101
$243.71 MSRP: $383.45You Save: $139.74 (37%)Ships in 1-3 Business DaysProduct Specifications- Other Name: Knuckle, Steering
- Position: Driver Side
GMC Knuckle, Passenger Side Part Number: 84925032
$123.68 MSRP: $194.60You Save: $70.92 (37%)Product Specifications- Other Name: Knuckle, Steering
- Position: Passenger Side
- Replaced by: 85777788

GMC Knuckle, Passenger Side Part Number: 85544427
$190.20 MSRP: $323.83You Save: $133.63 (42%)Ships in 1-2 Business DaysProduct Specifications- Other Name: Knuckle, Steering
- Position: Passenger Side
- Replaced by: 85022681
GMC Knuckle, Passenger Side Part Number: 84210077
$51.88 MSRP: $126.56You Save: $74.68 (60%)Ships in 1-2 Business DaysProduct Specifications- Other Name: Knuckle, Steering
- Position: Passenger Side

GMC Knuckle, Rear Passenger Side Part Number: 87825520
$87.79 MSRP: $150.78You Save: $62.99 (42%)Ships in 1-3 Business DaysProduct Specifications- Other Name: Knuckle, Rear Wheel
- Position: Rear Passenger Side
- Replaces: 84034348, 84034344
GMC Knuckle, Passenger Side Part Number: 84588072
$119.91 MSRP: $188.67You Save: $68.76 (37%)Ships in 1-2 Business DaysProduct Specifications- Other Name: Knuckle, Steering
- Position: Passenger Side
- Replaced by: 86588655


GMC Knuckle, Passenger Side Part Number: 20872163
$223.66 MSRP: $355.08You Save: $131.42 (38%)Ships in 1-2 Business DaysProduct Specifications- Other Name: Knuckle Assembly-Steering
- Position: Passenger Side
- Replaced by: 84045104
GMC Knuckle, Driver Side Part Number: 19303846
$244.64 MSRP: $384.93You Save: $140.29 (37%)Product Specifications- Other Name: Knuckle, Steering
- Position: Driver Side
- Replaces: 19208801
GMC Knuckle, Driver Side Part Number: 84588071
$111.73 MSRP: $175.02You Save: $63.29 (37%)Product Specifications- Other Name: Knuckle, Steering
- Position: Driver Side
- Replaced by: 86588654
| Page 1 of 6 |Next >
1-20 of 113 Results
GMC Steering Knuckle
Want to cut long-term maintenance and repair costs? Choose OEM Steering Knuckle. Those parts deliver top durability you can trust. On our site, you'll find a huge catalog of genuine GMC parts. Prices are unbeatable, so you can keep more in your pocket. Every OEM GMC Steering Knuckle includes a manufacturer's warranty. You can also get an easy return policy that keeps buying risk free. Fast delivery, get your car on the road quickly. It's simple to search, compare, and order. Stop guessing about quality or fit. Order today and save with parts that last.
GMC Steering Knuckle Parts Questions & Experts Answers
- Q: How to replace the steering knuckle (1500) on GMC Sierra 1500?A:In order to replace the Steering Knuckle (1500), firstly you will have to raise and support the vehicle and take out the tire and wheel. If available, then remove the wheel drive shaft, followed by the Wheel Bearing and hub assembly. Next disconnect the outer Tie Rod End from the knuckle, take apart the upper Control Arm from knuckle and remove it from the automobile. For installation, start by the lower Ball Joint on the knuckle and proceeded by the upper Ball Joint and the outer tie rod ends. Replace the Wheel Bearing and hub assembly, the wheel drive shaft (if available) and the tire and wheel. After you have taken off the support, lower the vehicle and check for an allowed wheel alignment.
- Q: How to replace the steering knuckle on a 4WD on GMC Envoy?A:Curent replacement for a 4wd vehicle Steering Knuckle begins with tire center cap removal followed by drive axle nut removal. Start with a vehicle lift to support it at height before removing tire and wheel from beneath. You must first remove the Wheel Hub and bearing before you should take off the outer tie rod retaining nut. The j24319-b steering linkage and tie rod puller allows you to disconnect the outer tie rod from the Steering Knuckle assembly. The brake hose bracket retaining bolts require removal to separate the brake hose bracket from the Steering Knuckle. Unbolt the upper Control Arm from the Steering Knuckle and detach it from the pinch bolt and nut while disconnecting it from the Steering Knuckle. Crystalware Ball Joint remover tool (J43631) helps separate the Steering Knuckle from the lower Control Arm by removing the lower Ball Joint retaining nut. Take off the Steering Knuckle after the vehicle service is complete. Begin installation by mounting the Steering Knuckle onto the lower Control Arm then fasten it with the lower Ball Joint retaining nut and torque the connection to 110 nm (81 ft. Lbs.). Secure the upper Control Arm to the Steering Knuckle through its pinch bolt and nut before tightening them both to 40 nm (30 ft. Lbs.). Screw the brake hose bracket onto the Steering Knuckle while tightening its retaining bolts to 10 nm torques (89 inch lbs.). Use a new outer tie rod retaining nut when installing the rod to the Steering Knuckle before you tighten it to 60 nm (44 ft. Lbs.). The hub assembly and bearing receive new installation followed by tire assembly installation. Lower the vehicle while you install the drive axle nut and tighten it to 140 nm (103 ft. Lbs.) before finishing with a front toe adjustment.
- Q: How to replace the steering knuckle (2500) on GMC Yukon?A:To change the Steering Knuckle (2500), start with the removal of the tire and wheel and wheel drive shaft in case of equipment. The next step is to remove the Wheel Bearing and hub assembly, and remove the outer Tie Rod End from the knuckle. Unsupport the lower Control Arm and free the upper Ball Joint from knuckle then the lower Ball Joint. Lastly, take the knuckle off the vehicle. For the installation, slip in the knuckle onto the lower Ball Joint and at last install the upper Ball Joint into the knuckle. The outer Tie Rod End and the Wheel Bearing and hub assembly must be reattached. In case it's equipped, install the wheel drive shaft after which now remove the support from the lower Control Arm. Replace the tire and wheel and check the wheel alignment accordingly.


Related GMC Parts
 GMC Torsion Bar
 GMC Wheel Cover
 GMC Axle Beam Mount
 GMC Ball Joint
 GMC Coil Springs
 GMC Control Arm Bolt
 GMC Control Arm Bracket
 GMC Control Arm Bumper
 GMC Control Arm Bushing
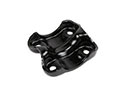 GMC Leaf Spring Plate
 GMC Shock and Strut Boot
 GMC Strut Bearing
Browse GMC Steering Knuckle by Models
Acadia Sierra 1500 Yukon Canyon Sierra 2500 HD Terrain Envoy Sonoma Typhoon Syclone Caballero C1500 Envoy XL Envoy XUV Jimmy K1500 S15 S15 Jimmy Safari Savana 2500 Savana 3500 Sierra 2500 Sierra 3500 Yukon XL Acadia Limited C2500 C3500 G2500 K2500 K3500 P3500 Savana 1500 Yukon XL 1500 C1500 Suburban C2500 Suburban G1500 G3500 K1500 Suburban K2500 Suburban P2500 R1500 R1500 Suburban R2500 R2500 Suburban R3500 Sierra 1500 Classic Sierra 1500 HD Sierra 1500 HD Classic Sierra 1500 Limited Sierra 2500 HD Classic Sierra 3500 Classic Sierra 3500 HD V1500 V1500 Suburban V2500 V2500 Suburban V3500 Yukon XL 2500