Make sure this part fits

GM 10403698
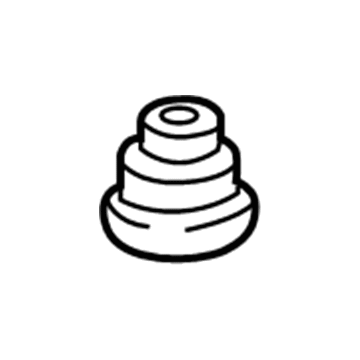
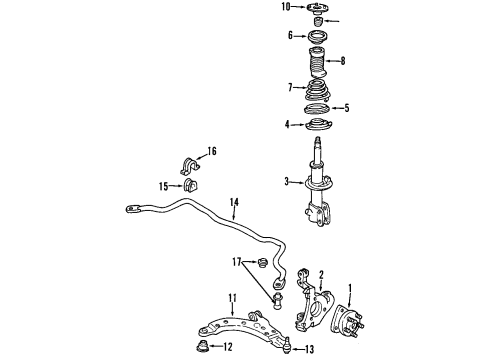
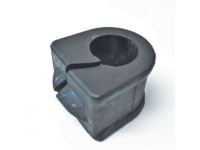
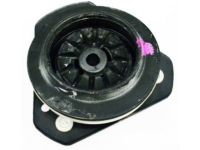
Lower Control Arm Bushing, Front

1997-2016 GM

Customer Questions & Expert Answers (26)
GM 10403698 Lower Control Arm Bushing, Front
  • Part Description
    Bushing Assembly-Front Lower Control Arm; Suspension Control Arm Bushing; Control Arm Bushing; Axle Pivot Bushing
  • Position
    Front Lower
  • Replaces
    10412685, 10441232, 10294083
  • Manufacturer
    General Motors
Make sure this part fits
$18.15 MSRP: $29.88
You Save: $11.73 (40%)
Ships in 1-2 Business Days
1
ADD TO CART
  • Related Parts
  • Product Specifications
  • Vehicle Fitment
  • Customer Questions & Expert Answers
  • Product Specifications

    BrandGenuine GM
    Manufacturer Part Number10403698
    Part DescriptionBushing Assembly-Front Lower Control Arm; Suspension Control Arm Bushing; Control Arm Bushing; Axle Pivot Bushing
    Other NamesLower Control Arm Front Bushing; Bushings; Bushing, Steering Knuckle Lower Control Arm
    Item Dimensions3.4 x 3.1 x 3.1 inches
    Item Weight0.70 Pounds
    PositionFront Lower
    ConditionNew
    Fitment TypeDirect Replacement
    Replaces10412685, 10441232, 10294083
    ManufacturerGeneral Motors
    SKU10403698
    WarrantyThis genuine GM part is guaranteed by GM's factory warranty.
    Shipping & ReturnShipping Policy Return Policy
    Warning: California's Proposition 65
  • Vehicle Fitment

    Year Make Model Trim Engine
    1997-2005 Buick CenturyCustom, Limited, Special Edition6 Cyl 3.1 L GAS
    2005-2009 Buick LaCrosseCX, CXL, CXS, Super6 Cyl 3.6 L GAS, 6 Cyl 3.8 L GAS, 8 Cyl 5.3 L GAS
    1997-2004 Buick Regal25th Anniversary Edition, GS, GSE, LS, LSE6 Cyl 3.8 L GAS
    2000-2013 Chevrolet Impala50th Anniversary Edition, Base, LS, LS Sport, LT, LTZ, Police, SS6 Cyl 3.4 L GAS, 6 Cyl 3.5 L FLEX, 6 Cyl 3.5 L GAS, 6 Cyl 3.6 L FLEX, 6 Cyl 3.6 L GAS, 6 Cyl 3.8 L GAS, 6 Cyl 3.9 L FLEX, 6 Cyl 3.9 L GAS, 8 Cyl 5.3 L GAS
    2014-2016 Chevrolet Impala LimitedLS, LT, LTZ6 Cyl 3.6 L FLEX
    2000-2007 Chevrolet Monte CarloLS, LS Competition, LS Sport, LT, LTZ, SS, SS 35th Anniversary Edition, SS Dale Earnhardt Signature Edition, SS High Sport, SS Pace Car6 Cyl 3.4 L GAS, 6 Cyl 3.5 L FLEX, 6 Cyl 3.5 L GAS, 6 Cyl 3.8 L GAS, 6 Cyl 3.9 L GAS, 8 Cyl 5.3 L GAS
    1998-1999 Oldsmobile IntrigueBase, GL, GLS, GX6 Cyl 3.8 L GAS
    2004-2008 Pontiac Grand PrixBase, GT, GT1, GT2, GTP, GXP6 Cyl 3.8 L GAS, 8 Cyl 5.3 L GAS
  • Customer Questions & Expert Answers

    Q:
    Is this 10403698 designed for my car? Posted by ChevyPartsGiant Specialist
    A:
    Please Select Your Vehicle model to see if part number 10403698 is suitable before ordering.
    Posted by ChevyPartsGiant Specialist
    Q:
    How to replace the front lower control arm bushing vertically on Buick LaCrosse? Posted by Customer
    A:
    A toolkit to replace the front lower Control Arm Bushing vertically includes items such as Control Arm Bushing set (J 21474-01) and 1/2 inch puller bolt thrust bearing (J 21474-27) and bushing installer remover (J 21474-2) alongside nut (J 21474-4) along with Control Arm Bushing installer (J 21474-13) and high pressure lubricant (J 23444-A) and driven sprocket support bearing installer (J 34126) and front knuckle support (J 35379). Multiple replacement components are required including Control Arm Bushing set (J 21474-01), 1/2 inch puller bolt thrust bearing (J 21474-27) and bushing installer remover (J 21474-2) along with nut (J 21474-4), Control Arm Bushing installer (J 21474-13), high pressure lubricant (J 23444-A), driven sprocket support bearing installer (J 34126) and front knuckle support (J 35379). Begin by placing the lower Control Arm into a vice for stability while performing the next steps. Begin by marked the lower Control Arm along its flat bushing flange surface. Lock out j 21474-27 threads with j 23444-a before threading j 21474-27 into j 21474-2 and j 21474-13 and j 34126 and j 35379. Then apply j 21474-4 until the tools are disassembled. Begin by tightening j 21474-4 then disassemble the tools using j 21474-27, j 21474-13, j 34126, j 35379, j 21474-2, and j 21474-4. To create a proper install position the lower Control Arm vertical bushing should align for original ride characteristics and handling behavior and road feel preservation. Align the bushing flange flat edge against the arm's marked area with a 30 degree angle from the centerline so the bushing's narrow slot points toward the exterior. Put the bushing inside the Control Arm then apply j 23444-a lubricant on j 21474-27 threads before tool assembly: before tool disassembly install j 21474-4 with a torque setting while using j 21474-27, j 21474-13, j 21474-4.
    Posted by ChevyPartsGiant Specialist
    Q:
    How to replace the lower control arm bushings on Buick Century? Posted by Customer
    A:
    To replace lower Control Arm bushings, one will need the following tools: Control Arm Bushing service set (J 21474-01), a nut (J", 21474-4 high-pressure lubricant (j 23444-A), puller bolt (J21474-27); bushing installer (l j 21474); bushing installer (j21 474-2, and Front Knuckle Support ). J 35379). Start by taking out the lower Control Arm and clamping it to a vice. Mark the lower Control Arm along the flat edge of bushing flange and assemble the bushing removal tools. Puller bolt (J 21474-27), driven. Sprocket support bearing installer (J 34126), front knuckle support (J 35379), bushing installer (J 21474-2), and nut (J 21474-4). Combustion chamber is the term that refers to the part of the engine where the air and fuel mixture comes together for nearly instant combustion. The combustion chamber is primarily the area that lies between the piston head and cylinder head. The head is the part of this engine facing upwards when the engine is in its horizontal position. Therefore, the combustion chamber should lie above the piston crown, and at the centre, it should be close to the valve. Disassemble the bushing removal tools. For installation, put the flat of the bushin flange to the mark on the Control Arm, 30 degrees to the centerline, thin slot of the bush in and outboard. Place the bushing in the Control Arm and now assemble the bushing installation tools. Puller bolt (J 21474-27), driven sprocket support bearing installer (J 34126), bushing installer (J 21474-5), nut (J 21474-4). Again, apply the high pressure lubricant (J 23444-A) to the threads of the puller bolt(J 21474-27) and then tighten the nut(J 21474-4). Finally, pose apart the bushing installation tools and insert the lower Control Arm.
    Posted by ChevyPartsGiant Specialist
    Q:
    How to replace the front lower control arm bushing on Buick LaCrosse? Posted by Customer
    A:
    The first step begins by removing the lower Control Arm then securing it into a vise for installation work. The bushing puller requires you to use a standard thread 1/2 x 20 in nut and puller bolt. The nut must be paired with the Control Arm Bushing service set (J 21474-01) washer , Control Arm Bushing service set (J 21474-01) bearing , Control Arm Bushing receiver (J 21474-5) and Control Arm Bushing service set (J 21474-01) puller bolt to form the bushing removal tools. Tighten the puller bolt until it removes the bushing and separate the j 21474-01 from the j 21474-5. The new bushing needs liquid hand soap or similar lubrication before being installed with the designated 1/2 x 20 in standard thread nut attached to the puller bolt. You should assemble a set of bushing installation tools which include the nut, Control Arm Bushing service set (J 21474-01) washer, Control Arm Bushing service set (J 21474-01) bearing, Control Arm Bushing receiver (J 21474-5), and Control Arm Bushing service set (J 21474-01) puller bolt. Continue bolting down the puller tool after the bushing inserts into the Control Arm before you disassemble j 21474-01 and j 21474-5 and remove the Control Arm from the vice for lower Control Arm installation.
    Posted by ChevyPartsGiant Specialist
    Q:
    How to replace the lower control arm bushings vertically on Buick Regal? Posted by Customer
    A:
    To perform vertical lower Control Arm Bushing replacement one requires these tools: Control Arm Bushing set (J 21474-01), 1/2 inch puller bolt thrust bearing (J 21474-271), bushing installer remover (J 21474-2), nut (J 21474-4), Control Arm Bushing installer (J 21474-13) and high pressure lubricant (J 23444-A) and driven sprocket support bearing installer (J 34126) and front knuckle support (J 35379). The tools required for vertical lower Control Arm Bushing replacement include Control Arm Bushing set (J 21474-01), 1/2 inch puller bolt thrust bearing (J 21474-271), bushing installer remover (J 21474-2), nut (J 21474-4), Control Arm Bushing installer (J 21474-13), high pressure lubricant (J 23444-A), driven sprocket support bearing installer (J 34126), and front knuckle support (J 35379). First secure the lower Control Arm into a vice before proceeding. Draw a mark on the lower Control Arm right along its bushing flange flat surface. Steadily apply j 23444-a or equivalent to the threads of j 21474-27. Assemble the bushing removal tools: the installer assembles tools in the sequence of j 21474-27, j 21474-13, j 34126, j 35379, j 21474-2, and j 21474-4 before tightening j 21474-4 to separate the tools. When installing the lower Control Arm vertical bushing verify its placement which preserves the vehicle's original ride performance alongside handling characteristics and natural road feedback. Position the flat bushing flange against the Control Arm mark at a 30-degree angle from the center and direct the bushing's narrow slot towards the outside. First place the bushing into the Control Arm before applying j 23444-a lubricant to j 21474-27 threads then connect the installation tools in this order: j 21474-27, j 21474-13, j 21474-5, j 21474-4. J 21474-27, j 21474-13, j 21474-5, and j 21474-4. With j 21474-4 as the final tool, disconnect all tools before adding the lower Control Arm to its place.
    Posted by ChevyPartsGiant Specialist
    Q:
    How to Replace a Control Arm Bushing on the Lower Control Arm on Chevrolet Monte Carlo? Posted by Customer
    A:
    In order to substitute the lower Control Arm bushings, first take off the lower Control Arm and clamp it in a vise. Mount in a 1/2 square nut standard thread with a puller bolt (J 21474-01 puller bolt ). Put together the bushing removal tools, the bushing removal tools comprise of the follows; the nut, j 21474-01 washer, j 21474-01 bearing and the Control Arm Bushing receiver (J 21474-5) (Siemens 2011). Tighten the puller bolt until the bushing is removed then deassemble the j 21474-01 and j 21474-5. For installation, lubricate it with liquid hand soap or an equivalent then use a 1/2 x 20 in standard thread nut with the puller bolt (J 21474-01 puller bolt ). Assemble the installation tools, comprised of the nut, j 21474-01 washer, j 21474-01 bearing, and the Control Arm Bushing receiver ( J 21474-5 ). Tighten the puller bolt until the bushing is install into the Control Arm, disassemble the j 21474-01 and or the j 21474-5, wipe out the vice and thus eventually install the lower Control Arm.
    Posted by ChevyPartsGiant Specialist
    Q:
    What should be done after tightening the Nut for the 2002 Buick Century? Posted by Customer
    A:
    Disassemble the bushing removal tools.
    Posted by ChevyPartsGiant Specialist
    See expert answers on similar Control Arm Bushing
    Q:
    How do you remove the bushing for the 2007 Buick LaCrosse? Posted by Customer
    A:
    Assemble the bushing removal tools and tighten the puller bolt until the bushing is removed.
    Posted by ChevyPartsGiant Specialist
    See expert answers on similar Control Arm Bushing
    Q:
    What type of nut is used with the puller bolt for the 2004 Buick Regal? Posted by Customer
    A:
    A 1/2 x 20 in standard thread nut is used with the puller bolt.
    Posted by ChevyPartsGiant Specialist
    See expert answers on similar Control Arm Bushing
    Q:
    How should the lower control arm vertical bushing be positioned for installation for the 2006 Buick LaCrosse? Posted by Customer
    A:
    Ensure it is positioned to maintain the original vehicle ride, handling, and road feel, aligning the flat edge of the bushing flange to the mark on the control arm and ensuring it is 30° from the centerline with the thin slot facing outboard.
    Posted by ChevyPartsGiant Specialist
    See expert answers on similar Control Arm Bushing
    Q:
    What is the final step after tightening the Nut during installation for the 2001 Buick Century? Posted by Customer
    A:
    Disassemble the tools and finally, install the lower control arm.
    Posted by ChevyPartsGiant Specialist
    See expert answers on similar Control Arm Bushing
    Q:
    How should the lower control arm be marked for the 2005 Buick LaCrosse? Posted by Customer
    A:
    Mark the lower control arm along the flat edge of the bushing flange.
    Posted by ChevyPartsGiant Specialist
    See expert answers on similar Control Arm Bushing
    Q:
    What should be noted about the strut lower bolts and nuts for the 2000 Buick Regal? Posted by Customer
    A:
    They are a prevailing torque type fastener that may be reused only if clean and free from rust, and if they develop 3 Nm (27 inch lbs.) of torque against their counterpart before seating; otherwise, replace the fastener.
    Posted by ChevyPartsGiant Specialist
    See expert answers on similar Control Arm Bushing
    Q:
    How do you assemble the bushing removal tools for the 2000 Buick Regal? Posted by Customer
    A:
    Use Puller Bolt (J 21474-27), J 41014-1, Driven Sprocket Support Bearing Installer (J 34126), Front Knuckle Support (J 35379), Bushing Installer (J 21474-02), and Nut (J 21474-4), then tighten the Nut (J 21474-4) and disassemble the tools.
    Posted by ChevyPartsGiant Specialist
    See expert answers on similar Control Arm Bushing
    Q:
    What should you do after tightening the puller bolt to install the bushing for the 2008 Chevrolet Impala? Posted by Customer
    A:
    Disassemble the J 21474-01 and J 21474-5.
    Posted by ChevyPartsGiant Specialist
    See expert answers on similar Control Arm Bushing
    Q:
    What should be done before installing the new bushing for the 2004 Chevrolet Impala? Posted by Customer
    A:
    Lubricate the new bushing with liquid hand soap or an equivalent.
    Posted by ChevyPartsGiant Specialist
    See expert answers on similar Control Arm Bushing
    Q:
    How should the lower control arm be marked for the 2008 Chevrolet Impala? Posted by Customer
    A:
    Mark the lower control arm along the flat edge of the bushing flange.
    Posted by ChevyPartsGiant Specialist
    See expert answers on similar Control Arm Bushing
    Q:
    What tools need to be assembled for bushing installation for the 2004 Chevrolet Monte Carlo? Posted by Customer
    A:
    J 21474-27, J 21474-13, J 21474-5, and J 21474-4.
    Posted by ChevyPartsGiant Specialist
    See expert answers on similar Control Arm Bushing
    Q:
    What alignment is necessary for the bushing flange during installation for the 2010 Chevrolet Impala? Posted by Customer
    A:
    Align the flat edge of the bushing flange to the mark on the control arm, ensuring it is 30 degrees from the centerline and that the thin slot in the bushing faces outboard.
    Posted by ChevyPartsGiant Specialist
    See expert answers on similar Control Arm Bushing
    Q:
    How should the vertical bushing be positioned during installation for the 2001 Chevrolet Impala? Posted by Customer
    A:
    Ensure the lower control arm vertical bushing is positioned as it was originally to maintain vehicle ride and handling.
    Posted by ChevyPartsGiant Specialist
    See expert answers on similar Control Arm Bushing
    Q:
    What is the first step to replace the lower control arm bushings for the 2005 Chevrolet Impala? Posted by Customer
    A:
    First, remove the lower control arm and secure it in a vise.
    Posted by ChevyPartsGiant Specialist
    See expert answers on similar Control Arm Bushing
    Q:
    What should be applied to the threads of the 1/2 Inch Puller Bolt Thrust Bearing for the 2009 Chevrolet Impala? Posted by Customer
    A:
    Apply High Pressure Lubricant (J 23444-A).
    Posted by ChevyPartsGiant Specialist
    See expert answers on similar Control Arm Bushing
    Q:
    What tools should be assembled for bushing removal for the 2005 Chevrolet Monte Carlo? Posted by Customer
    A:
    Assemble the bushing removal tools: J 21474-27, J 21474-13, J 34126, J 35379, and J 21474-2, followed by tightening J 21474-4.
    Posted by ChevyPartsGiant Specialist
    See expert answers on similar Control Arm Bushing
    Q:
    How should the lower control arm be marked for the 2000 Chevrolet Monte Carlo? Posted by Customer
    A:
    Mark the lower control arm along the flat edge of the bushing flange.
    Posted by ChevyPartsGiant Specialist
    See expert answers on similar Control Arm Bushing
    Q:
    What is the first step in the process for the 2006 Chevrolet Monte Carlo? Posted by Customer
    A:
    Begin by removing the lower control arm and securing it in a vice.
    Posted by ChevyPartsGiant Specialist
    See expert answers on similar Control Arm Bushing
    Q:
    What tools are assembled for bushing installation for the 2002 Chevrolet Monte Carlo? Posted by Customer
    A:
    Puller Bolt (J 21474-27), Bushing Installer (J 21474-13), Bushing Installer (J 21474-5), and Nut (J 21474-4).
    Posted by ChevyPartsGiant Specialist
    See expert answers on similar Control Arm Bushing
    If you have any questions about this product, please don't hesitate to ask us. We will be happy to help you!

OEM GM 10403698, Excellent Performance and Perfect Fitment

To ensure reliability, purchase GM part # 10403698 Lower Control Arm Bushing, Front. It is sometimes referred to as GM Control Arm Bushing. Choosing OEM parts is the optimal decision for guaranteeing superior quality and perfect performance. These components undergo stringent quality checks and are carefully constructed to comply with GM's factory specifications, ensuring a smooth installation process.

ChevyPartsGiant.com is a leading supplier of genuine GM parts such as GM 10403698 Lower Control Arm Bushing, Front. Our website boasts an extensive inventory of OEM GM parts, available at highly competitive prices in the market. Should you require any new genuine GM parts, rest assured we will deliver them swiftly and efficiently to your doorstep. Furthermore, all our parts come with the assurance of a manufacturer's warranty. For detailed Chevy parts information, click here.
Choose ChevyPartsGiant for discounted prices, exceptional service and fast delivery