Make sure this part fits

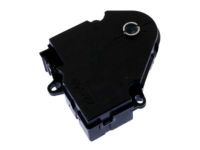
GM 19370209
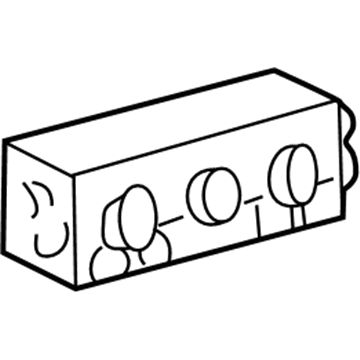
Heater Control

2003-2005 GM

Customer Questions & Expert Answers (23)
GM 19370209 Heater Control
  • Part Description
    Control, Air Conditioner Instrument Panel; Climate Control Module; Blower Control Switch
  • Replaces
    10367042, 15107730, 15185639, 15137655, 15105215
  • Manufacturer
    General Motors
Make sure this part fits
$169.27 MSRP: $266.33
You Save: $97.06 (37%)
Currently Unavailable

Due to manufacturer supply shortage, this item isn't currently available for ordering.

  • Related Parts
  • Product Specifications
  • Vehicle Fitment
  • Customer Questions & Expert Answers
  • Product Specifications

    BrandGenuine GM
    Manufacturer Part Number19370209
    Part DescriptionControl, Air Conditioner Instrument Panel; Climate Control Module; Blower Control Switch
    Other NamesDash Control Unit
    Item Dimensions11.8 x 4.9 x 4.9 inches
    Item Weight1.20 Pounds
    ConditionNew
    Replaces10367042, 15107730, 15185639, 15137655, 15105215
    ManufacturerGeneral Motors
    SKU19370209
    WarrantyThis genuine GM part is guaranteed by GM's factory warranty.
    Shipping & ReturnShipping Policy Return Policy
    Warning: California's Proposition 65
  • Vehicle Fitment

    Year Make Model Trim Engine
    2003-2005 Cadillac EscaladeBase8 Cyl 5.3 L GAS, 8 Cyl 6.0 L GAS
    2003-2004 Cadillac Escalade ESVBase8 Cyl 6.0 L GAS
    2003-2004 Cadillac Escalade EXTBase8 Cyl 6.0 L GAS
    2003-2004 Chevrolet Avalanche 1500Base, North Face, On Road Edition, WBH, Z66, Z718 Cyl 5.3 L GAS
    2003-2004 Chevrolet Avalanche 2500Base8 Cyl 8.1 L GAS
    2003-2004 Chevrolet Silverado 1500Base, LS, LT, SS, WT, Z71 Off-Road6 Cyl 4.3 L GAS, 8 Cyl 4.8 L GAS, 8 Cyl 5.3 L FLEX, 8 Cyl 5.3 L GAS, 8 Cyl 6.0 L GAS
    2003 Chevrolet Silverado 1500 HDLS, LT8 Cyl 6.0 L GAS
    2003-2004 Chevrolet Silverado 2500Base, LS, LT, WT8 Cyl 6.0 L GAS
    2003-2004 Chevrolet Silverado 2500 HDBase, LS, LT, WT8 Cyl 6.0 L CNG, 8 Cyl 6.0 L GAS, 8 Cyl 6.6 L DIESEL, 8 Cyl 8.1 L GAS
    2003-2004 Chevrolet Silverado 3500Base, LS, LT, WT8 Cyl 6.0 L CNG, 8 Cyl 6.0 L GAS, 8 Cyl 6.6 L DIESEL, 8 Cyl 8.1 L GAS
    View More
  • Customer Questions & Expert Answers

    Q:
    Is this 19370209 designed for my car? Posted by ChevyPartsGiant Specialist
    A:
    Please Select Your Vehicle model to see if part number 19370209 is suitable before ordering.
    Posted by ChevyPartsGiant Specialist
    Q:
    How to service and repair the front auxiliary A/C Switch assembly on Cadillac Escalade? Posted by Customer
    A:
    Start servicing the front auxiliary control assembly by unscrewing the console roof then extracting the console from its headliner position. First disconnect all electrical connectors of the console then remove the console from the vehicle. Begin detachment of the hvac control assembly from the console by pressing the 4 tabs positioned on the back of the assembly. Begin installation by mounting the hvac control assembly onto the console followed by plugging the electrical connectors back into the console. Install the console back on the headliner before securing it to the overhead console screw until it achieves 2 n.m (18 lb in) torque.
    Posted by ChevyPartsGiant Specialist
    Q:
    How to Service and Repair the HVAC Control Module on Cadillac Escalade? Posted by Customer
    A:
    The removal of the right rear quarter trim panel is the initial step in the servicing of Control Module HVAC. Remove the retaining screws securing the processor and also disconnect the electrical connector from the auxiliary blower motor processor. Remove the auxiliary blower motor processor from the auxiliary HVAC module. Installation: Reinstall the auxiliary blower motor processor on to the auxiliary HVAC module with retaining screws tightened to 1,6 N.m (14 lb in). Connect the electrical connector back to the auxiliary blower motor processor and install right rear quarter trim panel.
    Posted by ChevyPartsGiant Specialist
    Q:
    How to Remove and Install the HVAC Control Module on Chevrolet Avalanche 1500? Posted by Customer
    A:
    To service the HVAC Control Module, you will act by first removing an instrument cluster trim plate bezel, then an instrument panel storage tray and accessory switch assembly from the instrument panel. Next, disconnect the screws fixing the hvac control assembly and carefully retract the retaining tabs to remove the control head from the instrument panel carrier. Unplug the electric connectors from the hvac control assembly. In the installation phase, connect the electrical connectors to the assembly of hvac control. Do make sure that the key is in the off mode to allow for the correct calibration. Install the hvac control assembly, accessory switch assembly, and fasten using the screws and tighten to 1.9 n.m (17 lb in). Lastly, remove the instrument panel storage tray and the instrument cluster trim plate bezel. Operation of vehicle and running it for a minute without making adjustments to the HVAC Control Module for calibration purposes to avoid improper operations of hvac.
    Posted by ChevyPartsGiant Specialist
    Q:
    How to replace the HVAC control module on Chevrolet Silverado 1500? Posted by Customer
    A:
    To replace HVAC Control Module, you start with the removal of the instrument cluster trim plate bezel, the removal of the instrument panel storage tray, and the removal of the accessory switch assembly from the instrument panel. Then undo the screws securing the hvac control assembly and let out retaining tabs to pull out the control head of the instrument panel carrier. You are required to disconnect the hvac control assembly electrical connectors. During installation, let the key be in the off position so as to ensure proper calibration before connecting the electrical connectors to the hvac control assembly. Install the hvac control assembly and the accessory switch assembly to the paramount of the instrument panel and secure the hvac control assembly to the paramount with screws, twisting them to 1.9 n.m (17 lb in). Finally, install the instrument panel storage tray and the instrument cluster trim plate bezel. Do not change the control settings on the HVAC Control Module during calibration since interruptions will cause improper performance of hvac. Begin the running of the vehicle and allow it to run for one minute.
    Posted by ChevyPartsGiant Specialist
    Q:
    How to replace the HVAC control module on Chevrolet Silverado 2500? Posted by Customer
    A:
    To replace your HVAC control module, first remove the instrument panel accessory trim plate, and the screws which fix the HVAC control module. Press the control assembly retaining tabs to remove the HVAC control module from the instrument panel, then remove the electrical connectors. While installing the new HVAC control module, keep the key of the car in off position for proper calibration, plug the electrical connectors, and introduce the module into the instrument panel and ensure the retaining tabs are locked. Fasten the screws of the HVAC control module while tightening them to 1.9 N.m (17 lb in). Finally, install the instrument panel accessory trim plate without alteration to the HVAC control module controls, during calibration, to avoid incorrect performance of the HVAC system. Start the vehicle and warm it up for a minute.
    Posted by ChevyPartsGiant Specialist
    Q:
    How to replace the front overhead console A/C Switch in the auxiliary HVAC control assembly with heat and A/C on Chevrolet Tahoe? Posted by Customer
    A:
    To replace the auxiliary hcvac control assembly in front overhead console with heat and A/C, first you need to remove the overhead console screw & remove the overhead console out from headliner. Remove the electrical connectors from the auxiliary HVAC control module assembly and unfasten the overhead console from the car. Next, remove an auxiliary HVAC control assembly from the overhead console. For install, insert the auxiliary HVAC control assembly back into the overhead console and also reconnect the electrical connectors to auxiliary HVAC control module assembly. Install the overhead console to the headliner and fasten it to overhead console screw, tighten it to 2 N.m (18 lb in).
    Posted by ChevyPartsGiant Specialist
    Q:
    How to replace the Auxiliary Blower Control Switches on GMC Yukon XL 2500? Posted by Customer
    A:
    You must take out the console unit first from its seating spot in the headliner. Unsnap the tabs from the back of the overhead console for access to the auxiliary blower motor switch then detach its electrical connector . Reparing the blower motor switch requires connecting the electrical connector first and inserting the switch into the console. Learn how to place the overhead console back on the headliner afterward.
    Posted by ChevyPartsGiant Specialist
    Q:
    How to replace the HVAC control module on GMC Sierra 1500? Posted by Customer
    A:
    To replace HVAC Control Module, you start with the removal of the instrument cluster trim plate bezel, the removal of the instrument panel storage tray, and the removal of the accessory switch assembly from the instrument panel. Then undo the screws securing the hvac control assembly and let out retaining tabs to pull out the control head of the instrument panel carrier. You are required to disconnect the hvac control assembly electrical connectors. During installation, let the key be in the off position so as to ensure proper calibration before connecting the electrical connectors to the hvac control assembly. Install the hvac control assembly and the accessory switch assembly to the paramount of the instrument panel and secure the hvac control assembly to the paramount with screws, twisting them to 1.9 n.m (17 lb in). Finally, install the instrument panel storage tray and the instrument cluster trim plate bezel. Do not change the control settings on the HVAC Control Module during calibration since interruptions will cause improper performance of hvac. Begin the running of the vehicle and allow it to run for one minute.
    Posted by ChevyPartsGiant Specialist
    Q:
    How to replace the auxiliary HVAC Control Module on GMC Yukon? Posted by Customer
    A:
    The first step in replacing the auxiliary HVAC Control Module requires right rear quarter trim panel removal. First disconnect the electrical connectors (3,4) from the auxiliary HVAC Control Module then remove its mounting screws. First you need to remove the auxiliary HVAC Control Module from its housing in the auxiliary hvac module . Install the auxiliary HVAC Control Module onto the auxiliary hvac module then use screws to fix it while tightening them per the service precautions fastener notice at 1.6 n.m (14 lb in). Put electrical connectors (3,4) back into the auxiliary HVAC Control Module then reattach the right rear quarter trim panel.
    Posted by ChevyPartsGiant Specialist
    Q:
    How to Replace the A/C Switch in the Front Auxiliary HVAC Control Assembly on GMC Yukon? Posted by Customer
    A:
    To change the HVAC control assembly for cars with A/C, start by removing the overhead console screw and detach the overhead console from the headliner. Then, disconnects the electrical connectors located in the auxiliary HVAC control assembly, and remove the overhead console from the vehicle. Thereafter, lift out from the overhead console, the auxiliary HVAC control assembly. For installation first attach the auxiliary HVAC control assembly to the overhead console again reconnect the electrical connectors. Replace the overhead console to the headliner and tighten it using the overhead console screw in a 2 N.m (18 lb in) torque.
    Posted by ChevyPartsGiant Specialist
    Q:
    How to replace the auxiliary HVAC Control Module on GMC Yukon XL 2500? Posted by Customer
    A:
    The auxiliary hvac control processor can only be changed after the auxiliary rear hvac control assembly has been removed. After that, take the auxiliary hvac control processor off the bracket and take the cover off of the processor. Once this is done, take the processor out from the box . Installation starts by inserting the auxiliary hvac control processor into the box and putting the cover back. Next, fit the processor onto the bracket and then put the auxiliary rear hvac control assembly back in.
    Posted by ChevyPartsGiant Specialist
    Q:
    What is the first step to service the rear auxiliary control assembly for the 2003 Cadillac Escalade? Posted by Customer
    A:
    Begin by removing the right rear quarter trim panel.
    Posted by ChevyPartsGiant Specialist
    See expert answers on similar A/C Switch
    Q:
    What should be done after connecting the electrical connector for the 2004 Cadillac Escalade ESV? Posted by Customer
    A:
    Install the blower motor switch back into the overhead console.
    Posted by ChevyPartsGiant Specialist
    See expert answers on similar Blower Control Switches
    Q:
    What should be done after removing the console for the 2004 Cadillac Escalade EXT? Posted by Customer
    A:
    Release the tabs at the rear of the overhead console to remove the auxiliary blower motor switch.
    Posted by ChevyPartsGiant Specialist
    See expert answers on similar Blower Control Switches
    Q:
    What is the first step in the installation process for the 2004 Cadillac Escalade ESV? Posted by Customer
    A:
    Connect the electrical connector.
    Posted by ChevyPartsGiant Specialist
    See expert answers on similar A/C Switch
    Q:
    What is the first step to service the rear auxiliary control assembly for the 2003 Chevrolet Avalanche 1500? Posted by Customer
    A:
    Begin by separating the front of the overhead console from the headliner.
    Posted by ChevyPartsGiant Specialist
    See expert answers on similar A/C Switch
    Q:
    What should be done after removing the console for the 2003 Chevrolet Avalanche 1500? Posted by Customer
    A:
    Release the tabs at the rear of the overhead console to remove the auxiliary blower motor switch.
    Posted by ChevyPartsGiant Specialist
    See expert answers on similar Blower Control Switches
    Q:
    What is the first step in the installation process for the 2003 Chevrolet Suburban 1500? Posted by Customer
    A:
    Connect the electrical connector.
    Posted by ChevyPartsGiant Specialist
    See expert answers on similar Blower Control Switches
    Q:
    What is the first step in the installation process for the 2005 Chevrolet Tahoe? Posted by Customer
    A:
    Connect the electrical connector.
    Posted by ChevyPartsGiant Specialist
    See expert answers on similar Blower Control Switches
    Q:
    What is the first step to replace the auxiliary HVAC control module for the 2004 GMC Yukon XL 2500? Posted by Customer
    A:
    First, remove the right rear quarter trim panel.
    Posted by ChevyPartsGiant Specialist
    See expert answers on similar HVAC Control Module
    Q:
    What needs to be disconnected during the removal process for the 2004 GMC Yukon? Posted by Customer
    A:
    The electrical connector.
    Posted by ChevyPartsGiant Specialist
    See expert answers on similar Blower Control Switches
    Q:
    What is the first step to replace the HVAC control assembly for the 2004 GMC Yukon XL 2500? Posted by Customer
    A:
    Begin by removing the console roof screw and then take out the console from the headliner.
    Posted by ChevyPartsGiant Specialist
    See expert answers on similar A/C Switch
    If you have any questions about this product, please don't hesitate to ask us. We will be happy to help you!

OEM GM 19370209, Excellent Performance and Perfect Fitment

To ensure reliability, purchase GM part # 19370209 Heater Control. It is sometimes referred to as GM A/C Switch, GM Blower Control Switches, GM HVAC Control Module. Choosing OEM parts is the optimal decision for guaranteeing superior quality and perfect performance. These components undergo stringent quality checks and are carefully constructed to comply with GM's factory specifications, ensuring a smooth installation process.

ChevyPartsGiant.com is a leading supplier of genuine GM parts such as GM 19370209 Heater Control. Our website boasts an extensive inventory of OEM GM parts, available at highly competitive prices in the market. Should you require any new genuine GM parts, rest assured we will deliver them swiftly and efficiently to your doorstep. Furthermore, all our parts come with the assurance of a manufacturer's warranty. For detailed Chevy parts information, click here.
Choose ChevyPartsGiant for discounted prices, exceptional service and fast delivery