Make sure this part fits

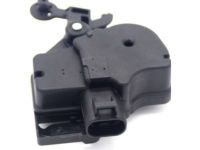
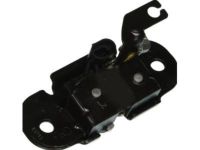
GM 15134524
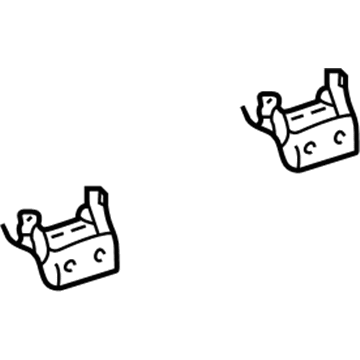
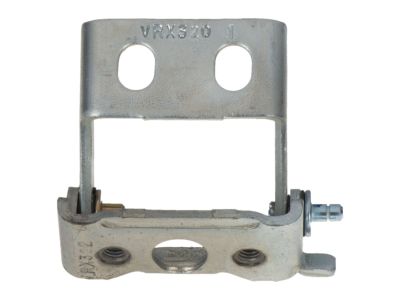
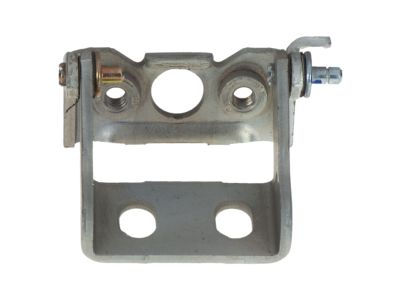
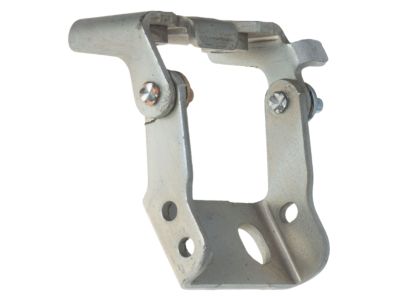
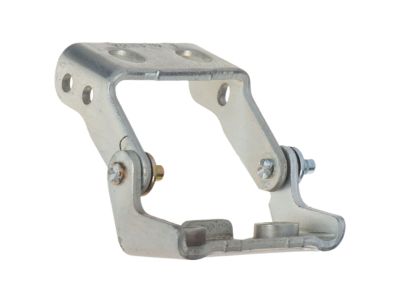
Hinge

2000-2006 GM

Customer Questions & Expert Answers (18)
GM 15134524 Hinge
GM 15134524 Hinge
  • Part Description
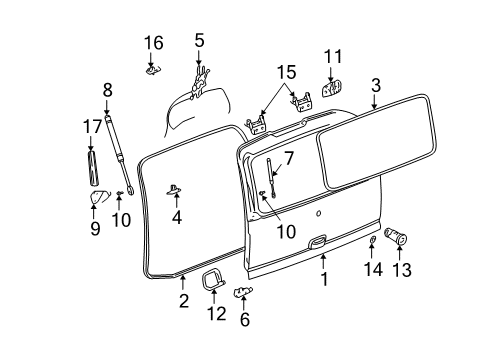
    Hinge, End Gate Closing; Liftgate Hinge; Door Hinge
  • Replaces
    15767489, 15762178
  • Manufacturer
    General Motors
  • Manufacturer's Notes
    This part is discontinued.
Make sure this part fits
  • Related Parts
  • Product Specifications
  • Vehicle Fitment
  • Customer Questions & Expert Answers
  • Product Specifications

    BrandGenuine GM
    Manufacturer Part Number15134524
    Part DescriptionHinge, End Gate Closing; Liftgate Hinge; Door Hinge
    Item Dimensions5.5 x 4.5 x 1.8 inches
    Item Weight0.90 Pounds
    ConditionNew
    Fitment TypeDirect Replacement
    Replaces15767489, 15762178
    ManufacturerGeneral Motors
    SKU15134524
    WarrantyThis genuine GM part is guaranteed by GM's factory warranty.
    Shipping & ReturnShipping Policy Return Policy
    Warning: California's Proposition 65
  • Vehicle Fitment

    Year Make Model Trim Engine
    2002-2006 Cadillac EscaladeBase8 Cyl 5.3 L GAS, 8 Cyl 6.0 L GAS
    2003-2006 Cadillac Escalade ESVBase8 Cyl 6.0 L GAS
    2000-2006 Chevrolet Suburban 1500Base, LS, LT, LTZ, Z718 Cyl 5.3 L FLEX, 8 Cyl 5.3 L GAS, 8 Cyl 6.0 L GAS
    2000-2006 Chevrolet Suburban 2500Base, LS, LT8 Cyl 6.0 L GAS, 8 Cyl 8.1 L GAS
    2000-2006 Chevrolet TahoeBase, LS, LT, Z718 Cyl 4.8 L GAS, 8 Cyl 5.3 L FLEX, 8 Cyl 5.3 L GAS
    2000-2006 GMC YukonDenali, SL, SLE, SLT8 Cyl 4.8 L GAS, 8 Cyl 5.3 L FLEX, 8 Cyl 5.3 L GAS, 8 Cyl 6.0 L GAS
    2000-2006 GMC Yukon XL 1500Denali, SL, SLE, SLT8 Cyl 5.3 L FLEX, 8 Cyl 5.3 L GAS, 8 Cyl 6.0 L GAS
    2000-2006 GMC Yukon XL 2500SLE, SLT8 Cyl 6.0 L GAS, 8 Cyl 8.1 L GAS
  • Customer Questions & Expert Answers

    Q:
    Is this 15134524 designed for my car? Posted by ChevyPartsGiant Specialist
    A:
    Please Select Your Vehicle model to see if part number 15134524 is suitable before ordering.
    Posted by ChevyPartsGiant Specialist
    Q:
    How to replace the trunk/liftgate hinge on the removable rear panel mid gate on Cadillac Escalade? Posted by Customer
    A:
    Before starting the task push the rear seat down and verify that the rear mid gate is stowed and closed tight. Take out the hinge trim cover from the mid-gate area before removing the hinge attachment nuts and separating the hinge from the vehicle. Fix the hinge to the vehicle while keeping the Fastener Notice from Service Precautions in mind. Install the four retaining nuts and tighten them using a torque value of 25 N.m (18 lb ft). Put the hinge trim cover in position over its opening and raise the rear seatback.
    Posted by ChevyPartsGiant Specialist
    Q:
    How to replace the upper and lower liftgate hinge on Chevrolet Suburban 1500? Posted by Customer
    A:
    First analyze factory specifications for damage then begin removing all related parts from the upper cargo hinge area. Mark the hinge angle on the pillar during removal then take out all unused sealant. Use a 13 mm drill bit to make holes in the necessary factory welds at the hinge access panel, pull out the access door to get better access, and drill through the hinge welds from the center. Remove the hinge from its pillar with a chisel when necessary. Prepare and clean the pillar surface while installing the service hinge according to specific requirements when applying anti-corrosion primer and full-bodied caulk to the mounting area. Place the service hinge directly on the scribe lines and attach its hardware. Tighten bolts to 25 N.m of torque (20 lb.Ft.) before refitting all parts. Examine and fix the lower cargo hinge while removing its associated parts and getting rid of any excess sealer as part of your inspection. Use 8 mm spot weld remover tools to drill out factory weld markings at the lower filler of the rear body opening while also center punching four weld locations on the hinge. Handle the filler panel with great care since you need to restore its exact position. Use a 13 mm (1/2 inch) rotabroach hole saw at each punch spot to make the drilling. When needed, a small chisel removes the hinge from the pillar. Clean the pillar so the service hinge sits evenly and fix any damage while positioning the hinge exactly on scribe marks. Use a center punch to mark bolt areas then begin by drilling 3 mm (1/8 in) pilots which you will follow with 13 mm (1/2 in) holes at the pilot marks. Apply approved paint to all raw metal areas and use complete sealant before placing the hinge into position where it lines up with the pillar holes. Tighten the bolts to 25 N.m (20 lb.Ft) when the fasteners are installed. Weld the lower filler material in its original factory spots after first making necessary metal repairs.
    Posted by ChevyPartsGiant Specialist
    Q:
    How to replace the trunk/liftgate hinge on the removable rear panel mid gate on Chevrolet Tahoe? Posted by Customer
    A:
    Before starting the task push the rear seat down and verify that the rear mid gate is stowed and closed tight. Take out the hinge trim cover from the mid-gate area before removing the hinge attachment nuts and separating the hinge from the vehicle. Fix the hinge to the vehicle while keeping the Fastener Notice from Service Precautions in mind. Install the four retaining nuts and tighten them using a torque value of 25 N.m (18 lb ft). Put the hinge trim cover in position over its opening and raise the rear seatback.
    Posted by ChevyPartsGiant Specialist
    Q:
    How to replace the upper and lower liftgate hinge on GMC Yukon? Posted by Customer
    A:
    First analyze factory specifications for damage then begin removing all related parts from the upper cargo hinge area. Mark the hinge angle on the pillar during removal then take out all unused sealant. Use a 13 mm drill bit to make holes in the necessary factory welds at the hinge access panel, pull out the access door to get better access, and drill through the hinge welds from the center. Remove the hinge from its pillar with a chisel when necessary. Prepare and clean the pillar surface while installing the service hinge according to specific requirements when applying anti-corrosion primer and full-bodied caulk to the mounting area. Place the service hinge directly on the scribe lines and attach its hardware. Tighten bolts to 25 N.m of torque (20 lb.Ft.) before refitting all parts. Examine and fix the lower cargo hinge while removing its associated parts and getting rid of any excess sealer as part of your inspection. Use 8 mm spot weld remover tools to drill out factory weld markings at the lower filler of the rear body opening while also center punching four weld locations on the hinge. Handle the filler panel with great care since you need to restore its exact position. Use a 13 mm (1/2 inch) rotabroach hole saw at each punch spot to make the drilling. When needed, a small chisel removes the hinge from the pillar. Clean the pillar so the service hinge sits evenly and fix any damage while positioning the hinge exactly on scribe marks. Use a center punch to mark bolt areas then begin by drilling 3 mm (1/8 in) pilots which you will follow with 13 mm (1/2 in) holes at the pilot marks. Apply approved paint to all raw metal areas and use complete sealant before placing the hinge into position where it lines up with the pillar holes. Tighten the bolts to 25 N.m (20 lb.Ft) when the fasteners are installed. Weld the lower filler material in its original factory spots after first making necessary metal repairs.
    Posted by ChevyPartsGiant Specialist
    Q:
    How to replace the upper and lower liftgate hinge on GMC Yukon XL 1500? Posted by Customer
    A:
    First analyze factory specifications for damage then begin removing all related parts from the upper cargo hinge area. Mark the hinge angle on the pillar during removal then take out all unused sealant. Use a 13 mm drill bit to make holes in the necessary factory welds at the hinge access panel, pull out the access door to get better access, and drill through the hinge welds from the center. Remove the hinge from its pillar with a chisel when necessary. Prepare and clean the pillar surface while installing the service hinge according to specific requirements when applying anti-corrosion primer and full-bodied caulk to the mounting area. Place the service hinge directly on the scribe lines and attach its hardware. Tighten bolts to 25 N.m of torque (20 lb.Ft.) before refitting all parts. Examine and fix the lower cargo hinge while removing its associated parts and getting rid of any excess sealer as part of your inspection. Use 8 mm spot weld remover tools to drill out factory weld markings at the lower filler of the rear body opening while also center punching four weld locations on the hinge. Handle the filler panel with great care since you need to restore its exact position. Use a 13 mm (1/2 inch) rotabroach hole saw at each punch spot to make the drilling. When needed, a small chisel removes the hinge from the pillar. Clean the pillar so the service hinge sits evenly and fix any damage while positioning the hinge exactly on scribe marks. Use a center punch to mark bolt areas then begin by drilling 3 mm (1/8 in) pilots which you will follow with 13 mm (1/2 in) holes at the pilot marks. Apply approved paint to all raw metal areas and use complete sealant before placing the hinge into position where it lines up with the pillar holes. Tighten the bolts to 25 N.m (20 lb.Ft) when the fasteners are installed. Weld the lower filler material in its original factory spots after first making necessary metal repairs.
    Posted by ChevyPartsGiant Specialist
    Q:
    How to replace the upper and lower liftgate hinge on GMC Yukon XL 2500? Posted by Customer
    A:
    First analyze factory specifications for damage then begin removing all related parts from the upper cargo hinge area. Mark the hinge angle on the pillar during removal then take out all unused sealant. Use a 13 mm drill bit to make holes in the necessary factory welds at the hinge access panel, pull out the access door to get better access, and drill through the hinge welds from the center. Remove the hinge from its pillar with a chisel when necessary. Prepare and clean the pillar surface while installing the service hinge according to specific requirements when applying anti-corrosion primer and full-bodied caulk to the mounting area. Place the service hinge directly on the scribe lines and attach its hardware. Tighten bolts to 25 N.m of torque (20 lb.Ft.) before refitting all parts. Examine and fix the lower cargo hinge while removing its associated parts and getting rid of any excess sealer as part of your inspection. Use 8 mm spot weld remover tools to drill out factory weld markings at the lower filler of the rear body opening while also center punching four weld locations on the hinge. Handle the filler panel with great care since you need to restore its exact position. Use a 13 mm (1/2 inch) rotabroach hole saw at each punch spot to make the drilling. When needed, a small chisel removes the hinge from the pillar. Clean the pillar so the service hinge sits evenly and fix any damage while positioning the hinge exactly on scribe marks. Use a center punch to mark bolt areas then begin by drilling 3 mm (1/8 in) pilots which you will follow with 13 mm (1/2 in) holes at the pilot marks. Apply approved paint to all raw metal areas and use complete sealant before placing the hinge into position where it lines up with the pillar holes. Tighten the bolts to 25 N.m (20 lb.Ft) when the fasteners are installed. Weld the lower filler material in its original factory spots after first making necessary metal repairs.
    Posted by ChevyPartsGiant Specialist
    Q:
    How should the existing hinge be prepared for removal for the 2002 Cadillac Escalade? Posted by Customer
    A:
    Lightly hand-sand the existing hinge with 100 grit or finer sandpaper to locate the four welds attaching the hinge to the door, and punch the center of each weld.
    Posted by ChevyPartsGiant Specialist
    See expert answers on similar Door Hinge
    Q:
    What is the next step after drilling the pilot holes for the 2004 Cadillac Escalade ESV? Posted by Customer
    A:
    Drill an 11.5 mm (29/64 in) hole at the pilot locations for the studs.
    Posted by ChevyPartsGiant Specialist
    See expert answers on similar Door Hinge
    Q:
    What should be done before refinishing the metal surfaces for the 2001 Chevrolet Suburban 1500? Posted by Customer
    A:
    Clean and prepare all bare metal surfaces, and consult GM 4901M-D-2000 GM Approved Refinish Materials for recommended products, avoiding the combination of paint systems and adhering to the paint manufacturer's recommendations.
    Posted by ChevyPartsGiant Specialist
    See expert answers on similar Door Hinge
    Q:
    What should be done after removing the panels for the 2000 Chevrolet Tahoe? Posted by Customer
    A:
    Eliminate any excess sealer around the existing hinge and mark its location on the hinge pillar.
    Posted by ChevyPartsGiant Specialist
    See expert answers on similar Door Hinge
    Q:
    What is the first step to service and repair the front door hinge for the 2000 Chevrolet Suburban 1500? Posted by Customer
    A:
    Remove the door from the body and eliminate any excess sealer around the existing hinge, marking its location on the hinge pillar.
    Posted by ChevyPartsGiant Specialist
    See expert answers on similar Door Hinge
    Q:
    How should the existing hinge be prepared for removal for the 2002 Chevrolet Suburban 2500? Posted by Customer
    A:
    Lightly hand-sand the existing hinge with 100 grit or finer sandpaper to locate the four welds attaching the hinge to the door, and punch the center of each weld.
    Posted by ChevyPartsGiant Specialist
    See expert answers on similar Door Hinge
    Q:
    How do you prepare for drilling the bodyside hinge for the 2000 Chevrolet Tahoe? Posted by Customer
    A:
    Hand-sand the existing hinge to locate the welds, punch the centers, and drill through the hinge base using a 13 mm (1/2 in) rotabroach hole saw.
    Posted by ChevyPartsGiant Specialist
    See expert answers on similar Door Hinge
    Q:
    How should the hinge and backing plate be installed for the 2006 GMC Yukon? Posted by Customer
    A:
    Align the hinge and backing plate with the holes in the door, install the bolts, and torque them to 25 N.m (20 ft lb).
    Posted by ChevyPartsGiant Specialist
    See expert answers on similar Door Hinge
    Q:
    How should the service hinge be positioned for the 2004 GMC Yukon XL 2500? Posted by Customer
    A:
    Position the service hinge within the scribe marks and center punch each stud location on the hinge pillar.
    Posted by ChevyPartsGiant Specialist
    See expert answers on similar Door Hinge
    Q:
    What is the first step in replacing the front side door hinge for the 2001 GMC Yukon XL 1500? Posted by Customer
    A:
    Begin by removing all related panels and components.
    Posted by ChevyPartsGiant Specialist
    See expert answers on similar Door Hinge
    Q:
    What should be done to the existing hinge before removal for the 2001 GMC Yukon XL 1500? Posted by Customer
    A:
    Eliminate any excess sealer around the existing hinge and mark its location on the hinge pillar.
    Posted by ChevyPartsGiant Specialist
    See expert answers on similar Door Hinge
    If you have any questions about this product, please don't hesitate to ask us. We will be happy to help you!

OEM GM 15134524, Excellent Performance and Perfect Fitment

To ensure reliability, purchase GM part # 15134524 Hinge. It is sometimes referred to as GM Door Hinge, GM Liftgate Hinge. Choosing OEM parts is the optimal decision for guaranteeing superior quality and perfect performance. These components undergo stringent quality checks and are carefully constructed to comply with GM's factory specifications, ensuring a smooth installation process.

ChevyPartsGiant.com is a leading supplier of genuine GM parts such as GM 15134524 Hinge. Our website boasts an extensive inventory of OEM GM parts, available at highly competitive prices in the market. Should you require any new genuine GM parts, rest assured we will deliver them swiftly and efficiently to your doorstep. Furthermore, all our parts come with the assurance of a manufacturer's warranty. For detailed Chevy parts information, click here.
Choose ChevyPartsGiant for discounted prices, exceptional service and fast delivery