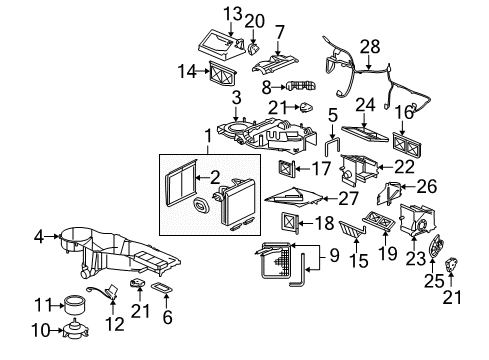
Make sure this part fits

GM 19130063
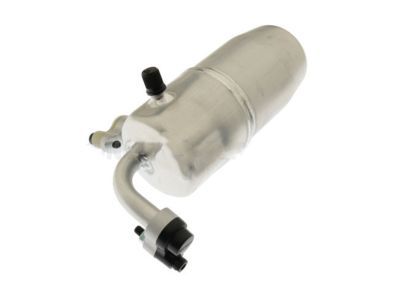
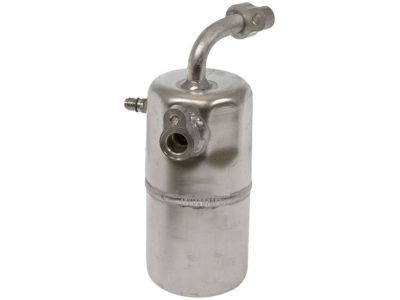
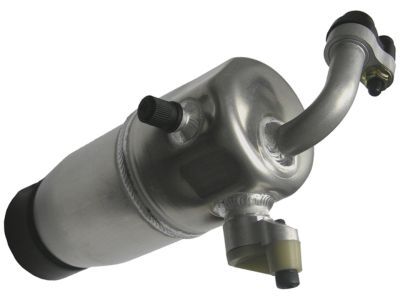
Drier

1999-2006 GM

Customer Questions & Expert Answers (17)
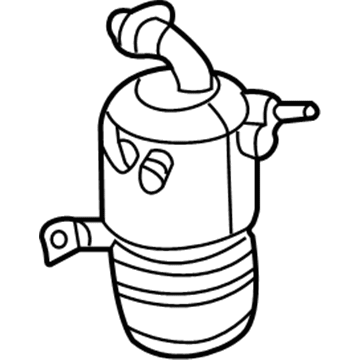
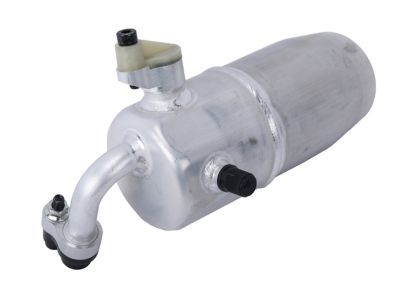
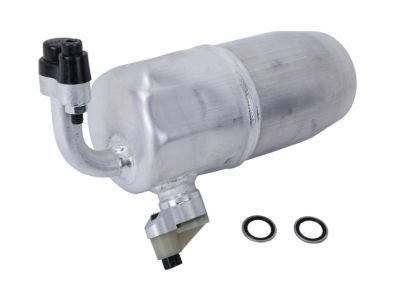
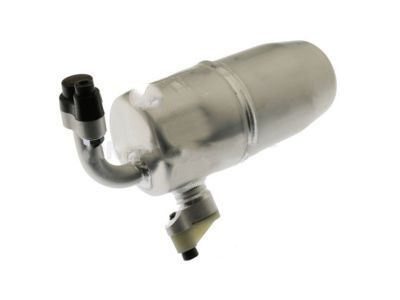
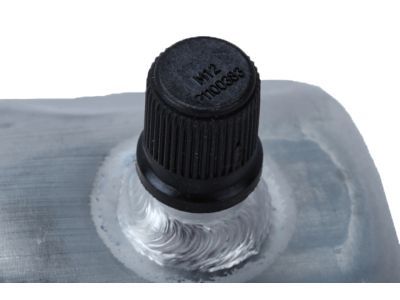
GM 19130063 Drier
GM 19130063 Drier
  • Part Description
    Accumulator, Air Conditioner Refrigerant; Drier Desiccant Element; A/C Receiver Drier; A/C Accumulator
  • Replaces
    01132822, 02724986, 1132822, 2724986, 89018423
  • Manufacturer
    General Motors
Make sure this part fits
$38.51 MSRP: $79.14
You Save: $40.63 (52%)
Ships in 1-2 Business Days
1
ADD TO CART
  • Vehicle Fitment

    Year Make Model Trim Engine
    2002-2006 Cadillac EscaladeBase8 Cyl 5.3 L GAS, 8 Cyl 6.0 L GAS
    2003-2006 Cadillac Escalade ESVBase8 Cyl 6.0 L GAS
    2002-2006 Cadillac Escalade EXTBase8 Cyl 6.0 L GAS
    2002-2006 Chevrolet Avalanche 1500Base, LS, LT, North Face, On Road Edition, WBH, Z66, Z718 Cyl 5.3 L FLEX, 8 Cyl 5.3 L GAS
    2002-2006 Chevrolet Avalanche 2500Base, LS, LT8 Cyl 8.1 L GAS
    1999-2006 Chevrolet Silverado 1500Base, Hybrid, LS, LT, SS, WT, Z71 Off-Road8 Cyl 4.8 L GAS, 8 Cyl 5.3 L FLEX, 8 Cyl 5.3 L FULL HYBRID EV-GAS (FHEV), 8 Cyl 5.3 L GAS, 8 Cyl 6.0 L GAS
    2005-2006, 2001-2003 Chevrolet Silverado 1500 HDBase, LS, LT8 Cyl 6.0 L GAS
    1999-2004 Chevrolet Silverado 2500Base, LS, LT, WT8 Cyl 5.3 L GAS, 8 Cyl 6.0 L BI-FUEL, 8 Cyl 6.0 L CNG, 8 Cyl 6.0 L GAS
    2001-2006 Chevrolet Silverado 2500 HDBase, LS, LT, WT8 Cyl 6.0 L BI-FUEL, 8 Cyl 6.0 L CNG, 8 Cyl 6.0 L GAS, 8 Cyl 8.1 L GAS
    2001-2006 Chevrolet Silverado 3500Base, LS, LT, WT8 Cyl 6.0 L CNG, 8 Cyl 6.0 L GAS, 8 Cyl 8.1 L GAS
    View More
    Warning: California's Proposition 65
  • Customer Questions & Expert Answers

    Q:
    Is this 19130063 designed for my car? Posted by ChevyPartsGiant Specialist
    A:
    Please Select Your Vehicle model to see if part number 19130063 is suitable before ordering.
    Posted by ChevyPartsGiant Specialist
    Q:
    How to replace the A/C Accumulator on Cadillac Escalade? Posted by Customer
    A:
    The first step to replace c60 A/C Accumulator involves recovering system refrigerant and removing the air cleaner unit. Start by unscrewing the four nuts along the A/C Accumulator while keeping the nuts and ferrules attached to the evaporator tube. Remove the A/C Accumulator from its placement on the evaporator tube. The A/C Accumulator installation requires placing o-rings onto the evaporator tube and orientating the flow arrow toward the evaporator before tightening the nuts on the A/C Accumulator to 15 n.m (11 lb ft). Complete the a/c system recharge procedure followed by the application of the halogen leak detector (J 39400-A) for fitting check-ups to components which underwent repair before reinstalling the air cleaner.
    Posted by ChevyPartsGiant Specialist
    Q:
    How to replace the A/C Accumulator on Cadillac Escalade EXT? Posted by Customer
    A:
    To replace the accumulator, you should recover the refrigerant first. You need to remove the evaporator tube nut and the steam evaporators. Then remove the nut from the evaporator tube and disconnect the electrical connector from the a/c low pressure switch. Unscrew the compressor hose nut off the accumulator and then compressor hose. Then remove the nut (from the evaporator fitting) and the accumulative bracket nut (from retaining stud) before getting rid of the accumulator. Remove o-ring seals, bolt and retaining bracket from the accumulator. For the installation, you should install new o-ring seals, and if you replace the accumulator, add refrigerant oil to the condenser. Mount the retaining bracket onto the accumulator, fasten it with the retaining bracket bolt and tighten it with the torque of 10 n.m (89 lb in). Wrench the accumulator and accelerator bracket nut with a torque of 9 n.m (80 lb in). Next, install the nut to the evaporator fitting, tighten it 16 nm (12 lb ft), the compressor hose to the accumulator and again the compressor hose nut, tighten that to 16 n.m (12 lb ft). Reconnect the electric connector to the a/c low pressure switch and fasten the nut of the evaporator tube to 25 n.m (18 lb ft). Lastly, install the evaporator tube to the evaporator and the evaporator tube nut and tighten to 16n.m (12 lb ft). Evacuate and recharge the system, and conduct a leak test on the fittings with the halogen leak detector (J 39400-A).
    Posted by ChevyPartsGiant Specialist
    Q:
    How to replace the A/C Accumulator on Chevrolet Avalanche 1500? Posted by Customer
    A:
    The first step to replace c60 A/C Accumulator involves recovering system refrigerant and removing the air cleaner unit. Start by unscrewing the four nuts along the A/C Accumulator while keeping the nuts and ferrules attached to the evaporator tube. Remove the A/C Accumulator from its placement on the evaporator tube. The A/C Accumulator installation requires placing o-rings onto the evaporator tube and orientating the flow arrow toward the evaporator before tightening the nuts on the A/C Accumulator to 15 n.m (11 lb ft). Complete the a/c system recharge procedure followed by the application of the halogen leak detector (J 39400-A) for fitting check-ups to components which underwent repair before reinstalling the air cleaner.
    Posted by ChevyPartsGiant Specialist
    Q:
    How to replace the A/C Accumulator on Chevrolet Avalanche 2500? Posted by Customer
    A:
    To replace the accumulator, you should recover the refrigerant first. You need to remove the evaporator tube nut and the steam evaporators. Then remove the nut from the evaporator tube and disconnect the electrical connector from the a/c low pressure switch. Unscrew the compressor hose nut off the accumulator and then compressor hose. Then remove the nut (from the evaporator fitting) and the accumulative bracket nut (from retaining stud) before getting rid of the accumulator. Remove o-ring seals, bolt and retaining bracket from the accumulator. For the installation, you should install new o-ring seals, and if you replace the accumulator, add refrigerant oil to the condenser. Mount the retaining bracket onto the accumulator, fasten it with the retaining bracket bolt and tighten it with the torque of 10 n.m (89 lb in). Wrench the accumulator and accelerator bracket nut with a torque of 9 n.m (80 lb in). Next, install the nut to the evaporator fitting, tighten it 16 nm (12 lb ft), the compressor hose to the accumulator and again the compressor hose nut, tighten that to 16 n.m (12 lb ft). Reconnect the electric connector to the a/c low pressure switch and fasten the nut of the evaporator tube to 25 n.m (18 lb ft). Lastly, install the evaporator tube to the evaporator and the evaporator tube nut and tighten to 16n.m (12 lb ft). Evacuate and recharge the system, and conduct a leak test on the fittings with the halogen leak detector (J 39400-A).
    Posted by ChevyPartsGiant Specialist
    Q:
    How to replace the A/C Accumulator in an A/C system on Chevrolet Silverado 3500? Posted by Customer
    A:
    In the replacement of the accumulator, first retrieve the loss of refrigerant. It is necessary to separate the evaporator tube nut first as well as the evaporator. Secondly, remove the nut on the evaporator tube and disconnect the a/c low pressure switch's electrical connector. Loosen the compressor hose nut from the accumulator and the compressor hose afterwards. Then, unscrew the nut from the evaporator fitting, and the accumulator bracket nut from the retaining stud prior to unhooking the accumulator. Unload the accumulator from the retaining bracket bolt and the retaining bracket and dispose of the o-ring seals. For the installation, the o-ring seals should be first installed and then the retaining bracket should be fixed to the accumulator. Install tightening bolt of retaining bracket to 10 n.m ( 89lb in) then, install the accumulator and the accumulator bracket nut and tighten the nut to 9 n.m (80 lb in). Install the nut to the evaporator fitting and tighten the nut to 16 n.m (12 lb ft). Connect the compressor hose to the accumulator and tighten it using the compressor hose nut turned to 16 n.m (12 lb ft). Reconnect the electrical connector to the a/c low pressure switch, and install the nut to the evaporator tube and tighten it with a 25 n.m (18 lb ft). Replace the evaporator tube by connecting it to the evaporator and fasten it using the evaporator tube nut, which is to be tightened to 16 n.m (12 lb ft). Last, but not least, evacuate and recharge system, do the leak test on the fittings of the component with the halogen leak detector (J 39400-A).
    Posted by ChevyPartsGiant Specialist
    Q:
    How to replace the A/C Accumulator in an A/C system on Chevrolet Silverado 1500? Posted by Customer
    A:
    In the replacement of the accumulator, first retrieve the loss of refrigerant. It is necessary to separate the evaporator tube nut first as well as the evaporator. Secondly, remove the nut on the evaporator tube and disconnect the a/c low pressure switch's electrical connector. Loosen the compressor hose nut from the accumulator and the compressor hose afterwards. Then, unscrew the nut from the evaporator fitting, and the accumulator bracket nut from the retaining stud prior to unhooking the accumulator. Unload the accumulator from the retaining bracket bolt and the retaining bracket and dispose of the o-ring seals. For the installation, the o-ring seals should be first installed and then the retaining bracket should be fixed to the accumulator. Install tightening bolt of retaining bracket to 10 n.m ( 89lb in) then, install the accumulator and the accumulator bracket nut and tighten the nut to 9 n.m (80 lb in). Install the nut to the evaporator fitting and tighten the nut to 16 n.m (12 lb ft). Connect the compressor hose to the accumulator and tighten it using the compressor hose nut turned to 16 n.m (12 lb ft). Reconnect the electrical connector to the a/c low pressure switch, and install the nut to the evaporator tube and tighten it with a 25 n.m (18 lb ft). Replace the evaporator tube by connecting it to the evaporator and fasten it using the evaporator tube nut, which is to be tightened to 16 n.m (12 lb ft). Last, but not least, evacuate and recharge system, do the leak test on the fittings of the component with the halogen leak detector (J 39400-A).
    Posted by ChevyPartsGiant Specialist
    Q:
    How to replace the A/C Accumulator in a system on Chevrolet Suburban 2500? Posted by Customer
    A:
    The first procedure when replacing an accumulator requires refrigerant recovery. The procedure begins by removing electrical power from the a/c low pressure switch followed by separate removal of the accumulator and compressor hose nut and the hose from the compressor hose. Before removing the accumulator you must first take out the nut from the evaporator fitting and then remove the accumulator bracket nut from the retaining stud. The accumulator needs the replacement of retaining bracket bolt and bracket followed by o-ring seals. Begin accumulator installation through new o-ring seal application before mounting the retaining bracket to the accumulator. Fasten the retaining bracket bolt before tightening the accumulator bracket bolt to 10 n.m (89 lb in). Follow installation protocol by attaching the accumulator while tightening its major fasteners to 9 n.m (80 lb in). Bolt the nut to the evaporator fitting before securing it at 16 n.m (12 lb ft). After applying the compressor hose to the accumulator you should tighten the compressor hose nut using 16 n.m of torque (12 lb ft). The last procedure includes connecting the electrical connector to the a/c low pressure switch followed by evacuating and recharging the system and finishing with a leak test of the fittings using the halogen leak detector (J 39400-A).
    Posted by ChevyPartsGiant Specialist
    Q:
    How to replace the A/C Accumulator on GMC Yukon? Posted by Customer
    A:
    To replace the accumulator, you should recover the refrigerant first. You need to remove the evaporator tube nut and the steam evaporators. Then remove the nut from the evaporator tube and disconnect the electrical connector from the a/c low pressure switch. Unscrew the compressor hose nut off the accumulator and then compressor hose. Then remove the nut (from the evaporator fitting) and the accumulative bracket nut (from retaining stud) before getting rid of the accumulator. Remove o-ring seals, bolt and retaining bracket from the accumulator. For the installation, you should install new o-ring seals, and if you replace the accumulator, add refrigerant oil to the condenser. Mount the retaining bracket onto the accumulator, fasten it with the retaining bracket bolt and tighten it with the torque of 10 n.m (89 lb in). Wrench the accumulator and accelerator bracket nut with a torque of 9 n.m (80 lb in). Next, install the nut to the evaporator fitting, tighten it 16 nm (12 lb ft), the compressor hose to the accumulator and again the compressor hose nut, tighten that to 16 n.m (12 lb ft). Reconnect the electric connector to the a/c low pressure switch and fasten the nut of the evaporator tube to 25 n.m (18 lb ft). Lastly, install the evaporator tube to the evaporator and the evaporator tube nut and tighten to 16n.m (12 lb ft). Evacuate and recharge the system, and conduct a leak test on the fittings with the halogen leak detector (J 39400-A).
    Posted by ChevyPartsGiant Specialist
    Q:
    How to replace the A/C Accumulator in a system on GMC Yukon XL 1500? Posted by Customer
    A:
    The first procedure when replacing an accumulator requires refrigerant recovery. The procedure begins by removing electrical power from the a/c low pressure switch followed by separate removal of the accumulator and compressor hose nut and the hose from the compressor hose. Before removing the accumulator you must first take out the nut from the evaporator fitting and then remove the accumulator bracket nut from the retaining stud. The accumulator needs the replacement of retaining bracket bolt and bracket followed by o-ring seals. Begin accumulator installation through new o-ring seal application before mounting the retaining bracket to the accumulator. Fasten the retaining bracket bolt before tightening the accumulator bracket bolt to 10 n.m (89 lb in). Follow installation protocol by attaching the accumulator while tightening its major fasteners to 9 n.m (80 lb in). Bolt the nut to the evaporator fitting before securing it at 16 n.m (12 lb ft). After applying the compressor hose to the accumulator you should tighten the compressor hose nut using 16 n.m of torque (12 lb ft). The last procedure includes connecting the electrical connector to the a/c low pressure switch followed by evacuating and recharging the system and finishing with a leak test of the fittings using the halogen leak detector (J 39400-A).
    Posted by ChevyPartsGiant Specialist
    Q:
    What should be removed after recovering the refrigerant for the 2004 Cadillac Escalade ESV? Posted by Customer
    A:
    Remove the evaporator tube nut from the evaporator, followed by the evaporator tube itself.
    Posted by ChevyPartsGiant Specialist
    See expert answers on similar A/C Accumulator
    Q:
    What should be done after installing the O-ring seals for the 2004 Chevrolet Silverado 2500? Posted by Customer
    A:
    Attach the retaining bracket to the accumulator.
    Posted by ChevyPartsGiant Specialist
    See expert answers on similar A/C Accumulator
    Q:
    What should be done after reconnecting the electrical connector for the 2004 Chevrolet Tahoe? Posted by Customer
    A:
    Install the nut to the evaporator tube, tightening it to 25 N.m (18 lb ft).
    Posted by ChevyPartsGiant Specialist
    See expert answers on similar A/C Accumulator
    Q:
    What is the torque specification for the evaporator tube nut for the 2003 Chevrolet Suburban 1500? Posted by Customer
    A:
    Tighten it to 25 N.m (18 lb ft).
    Posted by ChevyPartsGiant Specialist
    See expert answers on similar A/C Accumulator
    Q:
    What should be removed after recovering the refrigerant for the 2005 GMC Sierra 3500? Posted by Customer
    A:
    Remove the evaporator tube nut from the evaporator, followed by the evaporator tube itself.
    Posted by ChevyPartsGiant Specialist
    See expert answers on similar A/C Accumulator
    Q:
    What is the first step to replace the accumulator for the 2004 GMC Sierra 1500? Posted by Customer
    A:
    First, recover the refrigerant.
    Posted by ChevyPartsGiant Specialist
    See expert answers on similar A/C Accumulator
    Q:
    What is the next step after tightening the evaporator fitting nut for the 2004 GMC Yukon XL 2500? Posted by Customer
    A:
    Install the compressor hose to the accumulator and the compressor hose nut, also tightening it to 16 N.m (12 lb ft).
    Posted by ChevyPartsGiant Specialist
    See expert answers on similar A/C Accumulator
    If you have any questions about this product, please don't hesitate to ask us. We will be happy to help you!

OEM GM Drier 19130063 Designed for Proper Fit and Performance

Original OEM GM parts deliver superior quality and meet all performance standards needed for optimal automotive operation. The authentic part identified by 19130063 Drier is available in the market under the name GM A/C Accumulator. This genuine product has a full warranty coverage from the manufacturer available at all authorized GM dealers throughout the United States. This part 19130063 Drier fits certain Chevrolet Tahoe, Silverado 1500, Silverado 2500 HD models, as well as GMC Sierra 1500, Yukon, Sierra 2500 HD. Additionally, it is compatible with Cadillac Escalade, Escalade ESV, Escalade EXT models.
The original GM component designated by manufacturer part number 19130063 maintains top performance when functioning as the Accumulator, Air Conditioner Refrigerant; Drier Desiccant Element; A/C Receiver Drier; A/C Accumulator unit. The component 19130063 is constructed from durable material and its dimensions span 12.7 x 7.8 x 7.6 inches while weighing 3.70 Pounds. The Direct Replacement component is ready in New condition to ensure full compatibility with your vehicle system. This component receives the designation of Accumulator; Accumulator, A/C Refrigerant. The part 19130063 has available replacement options 01132822, 02724986, 1132822, 2724986, 89018423. GM manufacturer provides a warranty that ensures reliable operation of this product. The Shipping Policy and Return Policy pages outline complete details regarding shipping procedures and return processes.
If you want to save money in the long run on maintenance and repairs, you should choose OEM products because they're of the top level of durability. Are you on the quest of finding GM parts, our site is worth a visit. We stock an endless selection of high-quality GM components including things like ignition coils all the way through to fan shrouds and all at prices that can not be matched. You have nothing to worry about because all our OEM parts are covered with a manufacturer warranty, which guarantees superior quality and value.