Make sure this part fits

GM 15269918
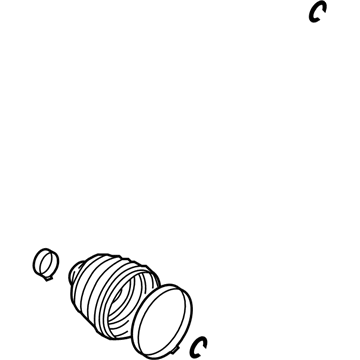
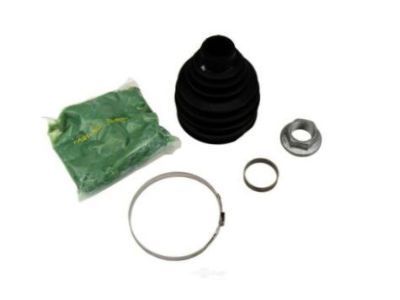
Boot Kit, Front

2004-2009 GM

Customer Questions & Expert Answers (9)
GM 15269918 Boot Kit, Front
  • Part Description
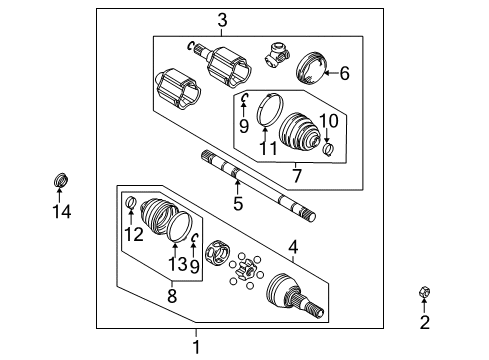
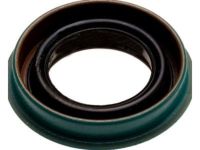
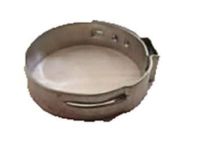
    Boot Kit, Front Wheel Drive Axle Shaft; CV Boot
  • Position
    Front
  • Replaces
    89047671
  • Manufacturer
    General Motors
  • Manufacturer's Notes
    This part is discontinued.
Make sure this part fits
  • Vehicle Fitment

    Year Make Model Trim Engine
    2006-2009 Buick LucerneCXL, CXS, Super8 Cyl 4.6 L GAS
    2004-2007 Buick RendezvousCX, CXL, CXL Plus, Ultra6 Cyl 3.5 L GAS, 6 Cyl 3.6 L GAS
    2005-2007 Buick TerrazaCX, CXL6 Cyl 3.5 L GAS, 6 Cyl 3.9 L FLEX, 6 Cyl 3.9 L GAS
    2006-2009 Cadillac DTSBase, Luxury, Platinum8 Cyl 4.6 L GAS
    2005 Cadillac DeVilleBase, DHS, DTS, Protection Series8 Cyl 4.6 L GAS
    2006-2009 Chevrolet Impala50th Anniversary Edition, LS, LT, LTZ, Police6 Cyl 3.5 L FLEX, 6 Cyl 3.5 L GAS, 6 Cyl 3.9 L FLEX, 6 Cyl 3.9 L GAS
    2006-2007 Chevrolet MalibuMaxx SS, SS6 Cyl 3.9 L GAS
    2006-2007 Chevrolet Monte CarloLS, LT, LTZ6 Cyl 3.5 L FLEX, 6 Cyl 3.5 L GAS, 6 Cyl 3.9 L GAS
    2005-2008 Chevrolet UplanderBase, LS, LT6 Cyl 3.5 L GAS, 6 Cyl 3.9 L FLEX, 6 Cyl 3.9 L GAS
    2004-2005 Pontiac BonnevilleGXP8 Cyl 4.6 L GAS
    View More
    Warning: California's Proposition 65
  • Customer Questions & Expert Answers

    Q:
    Is this 15269918 designed for my car? Posted by ChevyPartsGiant Specialist
    A:
    Please Select Your Vehicle model to see if part number 15269918 is suitable before ordering.
    Posted by ChevyPartsGiant Specialist
    Q:
    How to replace the inner CV Boot and CV Joint on Chevrolet Uplander? Posted by Customer
    A:
    Upon replacing wheel drive shaft inboard boot before cutting through it don't cut through it and risk to damage sealing surface and tripot bushing. First of all, detach the swage ring from the shaft with a hand grinder paying attention not to damage the shaft. Cut off the large seal retaining clamp from the tripot joint using side cutters, and get rid of it. Remove the inboard boot from the trilobal tripot bushing at the big diameter and remove the boot from the joint off the shaft. Descalze the housing from the tripot joint spider and the shaft. Spread the spacer ring with J 8059 (or equivalent) and remove the spacer ring, spider assembly, spacer ring if equipped, with J 8059 and discarding the tripot boot plus rings. Clean the shaft using a wire brush to get rid of the rust in the boot mounting region and check the state of the needle rollers, bearings and trunnion for wear or destruction and repair any destroyed pieces with the right kit. For the installation, the shaft can be mounted into a vise, with a towel wrapped in it. Attach the new small eared clamp to the small end of the joint boot and slide both over the shaft, having the small end of the joint boot in the joint seal groove on the shaft. Crimp the eared clamp by the use of J 35910, torque wrench and breaker bar. If available, set the spacer ring into the groove of the shaft using J 8059 and slide the tripot joint spider assembly onto the shaft. Fit the spacer ring into the groove of shaft with J 8059 and plug half the grease of service kit on the shaft inboard boot, applying the rest to repack the housing. Make sure that the trilobal tripot bushing is flush with the face of the housing prior to its installation. Position the larger new seal retaining clamp on the shaft inboard boot and slidethe housing over the tripot joint spider assembly on the shaft. Slide the large diameter of the shaft inboard boot with the larger clamp in place over the trilobal, tripot bushing with boot lip in the groove. Place the joint assembly in its correct vehicle dimension "a = 106mm (4.00in)", carefully insert a thin flat blunt tool between the large boot opening and the triloal tripot bushing and then equalize the pressure before removing the tool. Line up the shaft inboard boot, tripot housing, and the large boot retaining clamp by latching it, then crimp the boot retaining clamp with J 35910 to 176 N.m (130 lb ft), using breaker bar and torque wrench , to the J 35910 if necessary. Inspect the gap dimension (a) on the clamp ear, tighten till the 2.6 mm (0.102 in) if larger. Finally, stroke the joint completely multiple times to distribute the grease.
    Posted by ChevyPartsGiant Specialist
    Q:
    What is the procedure for removing the chrome alloy balls from the CV joint for the 2009 Buick Lucerne? Posted by Customer
    A:
    Remove the seal from the bar and gently tap on the CV joint cage with a brass drift and hammer to remove all chrome alloy balls.
    Posted by ChevyPartsGiant Specialist
    See expert answers on similar CV Boot
    Q:
    What steps are involved in cleaning the components for the 2004 Buick Rendezvous? Posted by Customer
    A:
    Remove the axle shaft retaining ring and the seal from the axle shaft, then clean all components thoroughly with solvent and air dry.
    Posted by ChevyPartsGiant Specialist
    See expert answers on similar CV Boot
    Q:
    What should be done after removing the large seal clamp for the 2005 Buick Rendezvous? Posted by Customer
    A:
    Separate the inboard seal from the tripot bushing and slide it away from the joint along the wheel drive shaft bar.
    Posted by ChevyPartsGiant Specialist
    See expert answers on similar CV Boot
    Q:
    What is the first step in the process for the 2006 Buick Rendezvous? Posted by Customer
    A:
    Remove the small seal clamp from the wheel drive shaft bar using side cutters and discard it.
    Posted by ChevyPartsGiant Specialist
    See expert answers on similar CV Boot
    Q:
    How do you secure the outboard end of the halfshaft assembly for the 2009 Cadillac DTS? Posted by Customer
    A:
    Secure the outboard end of the halfshaft assembly in tool J 41048, aligning the boot neck with the bottom die, and ensure no pinch points exist before inserting and tightening the bolts by hand until snug.
    Posted by ChevyPartsGiant Specialist
    See expert answers on similar CV Boot
    Q:
    How do you separate the outboard boot from the CV joint for the 2008 Cadillac DTS? Posted by Customer
    A:
    Slide the outboard boot away from the CV joint outer race.
    Posted by ChevyPartsGiant Specialist
    See expert answers on similar CV Boot
    Q:
    What is the next step after installing the boot clamp on the boot for the 2009 Chevrolet Impala? Posted by Customer
    A:
    Install the boot and the clamp on the wheel drive shaft.
    Posted by ChevyPartsGiant Specialist
    See expert answers on similar CV Boot
    If you have any questions about this product, please don't hesitate to ask us. We will be happy to help you!

OEM GM Boot Kit, Front 15269918 Designed for Proper Fit and Performance

Original OEM GM parts deliver superior quality and meet all performance standards needed for optimal automotive operation. The authentic part identified by 15269918 Boot Kit, Front is available in the market under the name GM CV Boot. This genuine product has a full warranty coverage from the manufacturer available at all authorized GM dealers throughout the United States. This part 15269918 Boot Kit, Front fits certain Chevrolet Malibu, Impala, Monte Carlo models, as well as Cadillac DTS, DeVille. Additionally, it is compatible with Buick Lucerne, Rendezvous, Terraza and Pontiac G6, Bonneville, Montana models.
The original GM component designated by manufacturer part number 15269918 maintains top performance when functioning as the Boot Kit, Front Wheel Drive Axle Shaft; CV Boot unit at its Front. The component 15269918 is constructed from durable material and its dimensions span 6.4 x 6.1 x 5.9 inches while weighing 1.60 Pounds. The Direct Replacement component is ready in New condition to ensure full compatibility with your vehicle system. This component receives the designation of Outer CV Joint Boot; Outer Boot; Inner Boot Kit; Boots; Boot Kit, Front Axle. The part 15269918 has available replacement options 89047671. GM manufacturer provides a warranty that ensures reliable operation of this product. The Shipping Policy and Return Policy pages outline complete details regarding shipping procedures and return processes.
If you want to save money in the long run on maintenance and repairs, you should choose OEM products because they're of the top level of durability. Are you on the quest of finding GM parts, our site is worth a visit. We stock an endless selection of high-quality GM components including things like ignition coils all the way through to fan shrouds and all at prices that can not be matched. You have nothing to worry about because all our OEM parts are covered with a manufacturer warranty, which guarantees superior quality and value.