Make sure this part fits

GM 15062379
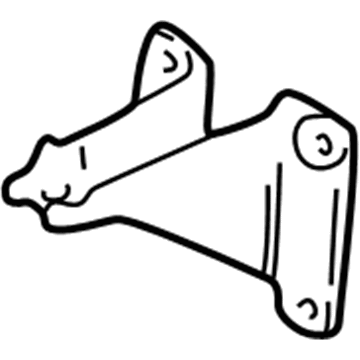
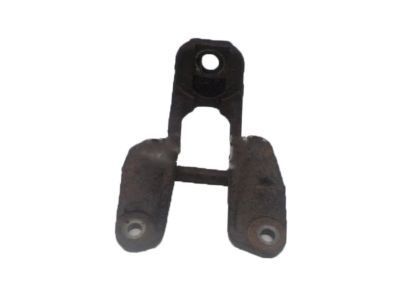
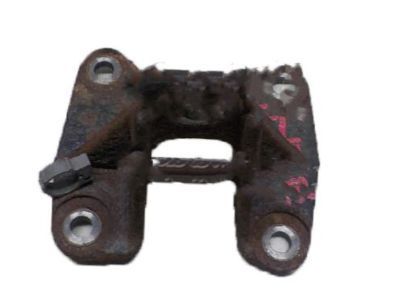
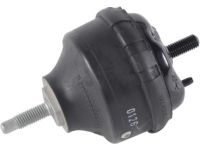
Motor Mount Bracket, Driver Side

2002-2009 GM

Customer Questions & Expert Answers (19)
GM 15062379 Motor Mount Bracket, Driver Side
  • Part Description
    Bracket, Engine Mounting
  • Position
    Driver Side
  • Manufacturer
    General Motors
Make sure this part fits
$100.58 MSRP: $157.55
You Save: $56.97 (37%)
Currently Unavailable

Due to manufacturer supply shortage, this item isn't currently available for ordering.

  • Vehicle Fitment

    Year Make Model Trim Engine
    2004-2007 Buick RainierCXL, CXL Plus6 Cyl 4.2 L GAS
    2002-2009 Chevrolet TrailblazerBase, LS, LT, LTZ, North Face6 Cyl 4.2 L GAS
    2002-2006 Chevrolet Trailblazer EXTLS, LT, North Face6 Cyl 4.2 L GAS
    2002-2009 GMC EnvoySLE, SLT6 Cyl 4.2 L GAS
    2002-2006 GMC Envoy XLSLE, SLT6 Cyl 4.2 L GAS
    2004-2005 GMC Envoy XUVSLE, SLT6 Cyl 4.2 L GAS
    2002-2004 Oldsmobile BravadaBase6 Cyl 4.2 L GAS
    Warning: California's Proposition 65
  • Customer Questions & Expert Answers

    Q:
    Is this 15062379 designed for my car? Posted by ChevyPartsGiant Specialist
    A:
    Please Select Your Vehicle model to see if part number 15062379 is suitable before ordering.
    Posted by ChevyPartsGiant Specialist
    Q:
    How to replace the LH engine mount and engine mount bracket on Buick Rainier? Posted by Customer
    A:
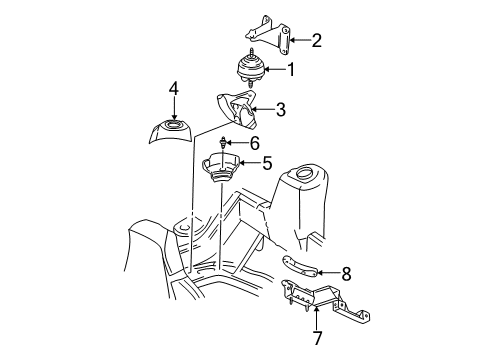
    The process for left engine mount and bracket replacement needs a starting point of disconnecting the negative Battery Cable followed by cooling fan removal. The procedure starts by removing the manifold absolute pressure (MAP) sensor electrical connector together with its retainer before proceeding to disconnect the MAP Sensor. The left shock module needs removal whenever you detach the frame mount. First remove engine mount nuts at both upper right and left positions before lifting the vehicle to eliminate the lower engine mount nuts at right and left. Caretfully remove the engine protection shield while avoiding contact with the oil level sender so that a jack can be placed on the Oil Pan. Gold lower the vehicle while placing a jack under the Oil Pan alongside a wooden block to raise the engine sufficient to free the engine mount stud. Begin by removing the left engine mount from its bracket and brackets bolts before proceeding to remove both the left bracket and left frame bracket bolts. The technician should remove the left frame engine mount bracket only in cases where it is required. The first step of installation involves installing the left frame engine mount bracket along with its bolts until they reach 110 nm (81 ft. Lbs.) tightness. Install the left engine mount bracket then fasten it with bolts while tightening them to 50 nm (37 ft. Lbs.). Lower the engine onto the mounts after placing the left mount on the bracket then secure the right and left upper engine mount nuts with 70 nm (52 ft. Lbs. Torque setting. When extending the vehicle use a jack to access the engine protection shield which will be fastened into place through bolts. Position the right and left lower engine mount nuts before torquing them to 70 Nm (52 ft. Lbs.) then lower the vehicle. Install the left shock module along with the MAP Sensor , map sensor retainer as well as its electrical connector. After that connect the cooling fan hub nut to the water pump shaft before reinstalling the cooling fan. Reconnect the negative Battery Cable.
    Posted by ChevyPartsGiant Specialist
    Q:
    How to replace the right engine mount and engine mount bracket on GMC Envoy? Posted by Customer
    A:
    The first step for replacing the right engine mount and bracket involves disconnecting the negative Battery Cable. The cooling fan should be removed first followed by disconnecting the electrical connector and retainer of the MAP Sensor before sensor removal. The removal process starts with taking out the right shock module when frame engine mounts must be extracted. The installation process begins by removing right and left upper engine mount nuts followed by vehicle elevation before right and left lower engine mount nuts extraction. The engine protection shield needs removal but avoid damaging the oil level sender when adding the jack to the Oil Pan. Users should use a floor jack with wood blocking to guide the Oil Pan level before engine rise clears engine mount studs. The engine technician should observe the position of the heat shield during right engine mount bracket removal and then remove the bracket bolts to separate the right engine mount from its bracket. You should take out the right frame engine mount bracket bolts and the bracket when it becomes necessary during the process. To install the right frame engine mount bracket please replace it followed by using bolts and tighten them to 110 n.m (81 lb ft). The right engine mount bracket should be installed with bolts that reach 50 n.m (37 lb ft) tightness. Place the right engine mount while the heat shield must cover the anti-rotation feature of the right side before the engine can drop onto its mounting points. Raise the vehicle and remove the floor jack before you tighten the right and left upper engine mount nuts to 70 n.m (52 lb ft). Mount the engine protection shield with hardware before fastening right and left lower engine mount nuts to 70 n.m (52 lb ft) torque prior to dropping the vehicle. Reinstall the right shock module with the MAP Sensor and its retainer and the electrical connector. After connecting and installing the cooling fan fan hub nut on the water pump shaft, add the cooling fan assembly while reconnecting the battery negative cable.
    Posted by ChevyPartsGiant Specialist
    Q:
    How to replace the LH engine mount and engine mount bracket on GMC Envoy? Posted by Customer
    A:
    The replacement process of left engine mount and bracket begins with disconnecting the negative Battery Cable followed by cooling fan removal. Start by disconnecting the manifold absolute pressure (MAP) sensor electrical connector together with its retainer and subsequently remove the MAP Sensor. The left shock module should be taken out before removing the frame mount. Raising the vehicle while removing the right and left upper engine mount nuts will then require the removal of both right and left lower engine mount nuts. Place a jack on the Oil Pan while cautioning against striking the oil level sender to avoid damage. The first step involves using a floor jack together with wood block to elevate the engine until it reaches a position where the engine mount stud can be cleared. Proceed with the removal of the left engine mount from its bracket and then uninstall the left engine mount bracket bolts and left engine mount bracket sequentially. The technician should remove the left frame engine mount bracket bolts and its bracket only if it becomes necessary. Before reattaching the left frame engine mount bracket users must install it with proper bolts which require a torque of 110 nm (81 ft. Lbs.). The left engine mount bracket needs installation by securing it using bolts which should be tightened to 50 nm (37 ft. Lbs.). After placing the left engine mount onto the bracket position the engine on its mounts then install the right and left upper engine mount nuts with a torque of 70 nm (52 ft. Lbs.). Draw up the vehicle after taking out the jack to put on the engine protection shield which needs bolt installation. Lower the vehicle after installing right and left lower engine mount nuts which should be torqued to 70 nm (52 ft. Lbs.). The service technician should install the left shock module together with the MAP Sensor and MAP Sensor retainer and its electrical connector. Before completion install the cooling fan hub nut to the water pump shaft while placing the cooling fan and reconnecting the negative Battery Cable.
    Posted by ChevyPartsGiant Specialist
    Q:
    What is the last step in the process for the 2007 Buick Rainier? Posted by Customer
    A:
    Connect the cooling fan hub nut to the water pump shaft, install the cooling fan, and reconnect the negative battery cable.
    Posted by ChevyPartsGiant Specialist
    See expert answers on similar Engine Mount
    Q:
    How should the right engine mount be installed for the 2008 Chevrolet Trailblazer? Posted by Customer
    A:
    Ensure the heat shield is properly located over the anti-rotation feature.
    Posted by ChevyPartsGiant Specialist
    See expert answers on similar Engine Mount Bracket
    Q:
    What is the next step after raising the engine for the 2008 Chevrolet Trailblazer? Posted by Customer
    A:
    Remove the left engine mount to bracket nut and the mount from the bracket, followed by the left engine mount bracket bolts and the left engine mount bracket itself.
    Posted by ChevyPartsGiant Specialist
    See expert answers on similar Engine Mount
    Q:
    What is the next step after removing the upper engine mount nuts for the 2009 Chevrolet Trailblazer? Posted by Customer
    A:
    Raise the vehicle and remove the right and left lower engine mount nuts.
    Posted by ChevyPartsGiant Specialist
    See expert answers on similar Engine Mount
    Q:
    What needs to be done if the frame engine mount is being removed for the 2003 GMC Envoy? Posted by Customer
    A:
    Take out the right shock module.
    Posted by ChevyPartsGiant Specialist
    See expert answers on similar Engine Mount
    Q:
    What should be done after tightening the engine mount bolts for the 2004 GMC Envoy? Posted by Customer
    A:
    Lower the engine and install the engine mount-to-frame bracket through bolt, tightening both bracket bolts to 85 Nm (63 ft. lbs.).
    Posted by ChevyPartsGiant Specialist
    See expert answers on similar Engine Mount
    Q:
    What needs to be done if the frame engine mount is being removed for the 2002 Chevrolet Trailblazer? Posted by Customer
    A:
    Take out the right shock module.
    Posted by ChevyPartsGiant Specialist
    See expert answers on similar Engine Mount Bracket
    Q:
    What should be done after removing the upper engine mount nuts for the 2005 Chevrolet Trailblazer? Posted by Customer
    A:
    Raise the vehicle and remove the right and left lower engine mount nuts.
    Posted by ChevyPartsGiant Specialist
    See expert answers on similar Engine Mount Bracket
    Q:
    What should be done after lowering the engine onto the mounts for the 2006 GMC Envoy? Posted by Customer
    A:
    Install the right and left upper engine mount nuts and tighten them to 70 Nm (52 ft. lbs.).
    Posted by ChevyPartsGiant Specialist
    See expert answers on similar Engine Mount Bracket
    Q:
    What is the final step in the process for the 2002 Chevrolet Trailblazer? Posted by Customer
    A:
    Connect the cooling fan hub nut to the water pump shaft, install the J 41240 to the water pump pulley, tighten the cooling fan hub nut to 56 Nm (41 ft. lbs.), then reconnect the negative battery cable.
    Posted by ChevyPartsGiant Specialist
    See expert answers on similar Engine Mount
    Q:
    When should the mounts be replaced for the 2002 GMC Envoy? Posted by Customer
    A:
    Replace the mounts if the hard rubber surface is covered with heat check cracks, if the rubber cushion is separated from the metal plate of the mount, or if the rubber cushion is split through the center.
    Posted by ChevyPartsGiant Specialist
    See expert answers on similar Engine Mount
    Q:
    How should the new engine mount be installed for the 2004 GMC Envoy? Posted by Customer
    A:
    Articulate the new engine mount into place and install the engine mount bolts, starting with the bolt in position to aid in the installation.
    Posted by ChevyPartsGiant Specialist
    See expert answers on similar Engine Mount
    Q:
    How do you detach the engine protection shield for the 2003 Chevrolet Trailblazer? Posted by Customer
    A:
    Detach the engine protection shield mount bolts and the engine protection shield, ensuring not to damage the oil level sender when placing a jack onto the oil pan.
    Posted by ChevyPartsGiant Specialist
    See expert answers on similar Engine Mount
    Q:
    How should the engine be supported during the process for the 2009 GMC Envoy? Posted by Customer
    A:
    Install a pole jack underneath the oil pan with a block of wood between the oil pan and the pole jack.
    Posted by ChevyPartsGiant Specialist
    See expert answers on similar Engine Mount
    Q:
    How should the right engine mount be installed for the 2009 GMC Envoy? Posted by Customer
    A:
    Install the right engine mount, ensuring the heat shield is properly positioned.
    Posted by ChevyPartsGiant Specialist
    See expert answers on similar Engine Mount Bracket
    If you have any questions about this product, please don't hesitate to ask us. We will be happy to help you!

OEM GM Motor Mount Bracket, Driver Side 15062379 Designed for Proper Fit and Performance

Original OEM GM parts deliver superior quality and meet all performance standards needed for optimal automotive operation. The authentic part identified by 15062379 Motor Mount Bracket, Driver Side is available in the market under the name GM Engine Mount, Engine Mount Bracket. This genuine product has a full warranty coverage from the manufacturer available at all authorized GM dealers throughout the United States. This part 15062379 Motor Mount Bracket, Driver Side fits certain Chevrolet Trailblazer, Trailblazer EXT models, as well as GMC Envoy, Envoy XL, Envoy XUV. Additionally, it is compatible with Buick Rainier and Oldsmobile Bravada models.
The original GM component designated by manufacturer part number 15062379 maintains top performance when functioning as the Bracket, Engine Mounting unit at its Driver Side. The component 15062379 is constructed from durable material and its dimensions span 6.2 x 5.8 x 5.2 inches while weighing 3.30 Pounds. The Direct Replacement component is ready in New condition to ensure full compatibility with your vehicle system. The part 15062379 has available replacement options. GM manufacturer provides a warranty that ensures reliable operation of this product. The Shipping Policy and Return Policy pages outline complete details regarding shipping procedures and return processes.
If you want to save money in the long run on maintenance and repairs, you should choose OEM products because they're of the top level of durability. Are you on the quest of finding GM parts, our site is worth a visit. We stock an endless selection of high-quality GM components including things like ignition coils all the way through to fan shrouds and all at prices that can not be matched. You have nothing to worry about because all our OEM parts are covered with a manufacturer warranty, which guarantees superior quality and value.