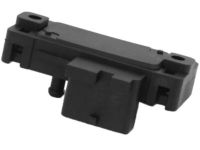
Make sure this part fits

GM 17113622
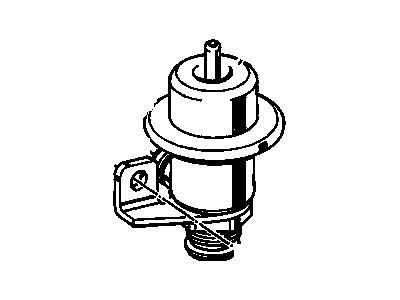
Fuel Pressure Regulator

2000-2005 GM

Customer Questions & Expert Answers (28)
GM 17113622 Fuel Pressure Regulator
  • Part Description
    Regulator, Fuel Pressure
  • Manufacturer
    General Motors
Make sure this part fits
$124.56 MSRP: $221.43
You Save: $96.87 (44%)
Ships in 1-2 Business Days
1
ADD TO CART
  • Related Parts
  • Product Specifications
  • Vehicle Fitment
  • Customer Questions & Expert Answers
  • Product Specifications

    BrandGenuine GM
    Manufacturer Part Number17113622
    Part DescriptionRegulator, Fuel Pressure
    Other NamesRegulator, Fuel Injection
    Item Dimensions3.8 x 3.3 x 2.0 inches
    Item Weight0.70 Pounds
    ConditionNew
    Fitment TypeDirect Replacement
    ManufacturerGeneral Motors
    SKU17113622
    Shipping & ReturnShipping Policy Return Policy
    Warning: California's Proposition 65
  • Vehicle Fitment

    Year Make Model Trim Engine
    2000-2005 Buick CenturyCustom, Limited, Special Edition6 Cyl 3.1 L GAS
    2002-2005 Buick RendezvousCX, CX Plus, CXL, CXL Plus6 Cyl 3.4 L GAS
    2000-2002 Chevrolet CavalierBase, LS, LS Sport4 Cyl 2.2 L BI-FUEL, 4 Cyl 2.2 L GAS
    2000-2005 Chevrolet ImpalaBase6 Cyl 3.4 L GAS
    2000-2001 Chevrolet LuminaBase6 Cyl 3.1 L GAS
    2000-2003 Chevrolet MalibuBase, LS6 Cyl 3.1 L GAS
    2000-2005 Chevrolet Monte CarloLS, LS Competition, LS Sport6 Cyl 3.4 L GAS
    2000-2003 Chevrolet VentureBase, LS, LT, Plus, Value, Warner Bros.6 Cyl 3.4 L GAS
    2000-2004 Oldsmobile AleroGL, GLS, GX6 Cyl 3.4 L GAS
    2000-2003 Oldsmobile SilhouetteGL, GLS, Premiere6 Cyl 3.4 L GAS
    View More
  • Customer Questions & Expert Answers

    Q:
    Is this 17113622 designed for my car? Posted by ChevyPartsGiant Specialist
    A:
    Please Select Your Vehicle model to see if part number 17113622 is suitable before ordering.
    Posted by ChevyPartsGiant Specialist
    Q:
    How to service and repair the fuel pressure regulator on Buick Rendezvous? Posted by Customer
    A:
    Service and repair of the Fuel Pressure Regulator require the user to first relieve fuel system pressure. First disconnect the vacuum line from the Fuel Pressure Regulator then remove its retaining screw. Use a towel placed underneath before lifting and twisting the regulator at the Fuel Rail to separate it from the Fuel Pressure Regulator system. Separate the bracket-retainer assembly from the rail before you disconnect the Fuel Pressure Regulator from engine fuel return pipe to discard two parts including the inlet o-ring. The filter screen must be checked for contamination before changing the Fuel Pressure Regulator. Check the fuel return line before tightening the regulator attaching screw because rotating movements might damage the retainer and spacer bracket thus causing a fuel leak at the inlet. The Fuel Pressure Regulator should not undergo testing or cleaning with compressed air because this practice will probably result in damage. Use gasoline to clean the filter screen but avoid placing the regulator inside any solvent bath. Clean engine oil serves to lubricate the new o-ring at the regulator inlet before installing it to this section. Fix the fuel return pipe onto the regulator before mounting the new retainer along with spacer bracket within the slot located on the Fuel Rail. Mount the pressure regulator onto the Fuel Rail while torquing the engine fuel return pipe nut at 17 n.m (13 lb ft). The Fuel Pressure Regulator vacuum line needs attachment followed by tightening its screw to 8.5 n.m (76 lb in). Check that the retainer connects securely with the slots inside the Fuel Rail as seen when pulling on the regulator. To check for fuel leaks turn the ignition on for 2 seconds then off for 10 seconds followed by turning the ignition on for another inspection of leaks.
    Posted by ChevyPartsGiant Specialist
    Q:
    How to service and repair the fuel pressure regulator on Buick Century? Posted by Customer
    A:
    Before servicing the Fuel Pressure Regulator a fuel system pressure relief method should be performed first. The Fuel Pressure Regulator requires service by disconnecting the vacuum line before removing its retaining screw. A shop towel should be used to contain fuel droplets when you twist the Fuel Pressure Regulator away from the Fuel Rail to detach it. Please remove the retainer as well as the spacer bracket from the rail before extracting the Fuel Pressure Regulator from the engine fuel return pipe. Thoroughly dispose of the Fuel Pressure Regulator inlet o-ring together with the fuel return pipe o-ring. Check the filter screen for contamination because contaminated parts require replacement of the Fuel Pressure Regulator. The Fuel Pressure Regulator filter screen requires cleaning with gasoline when necessary however complete immersions in solvent baths or usage of compressed air for testing or cleaning will damage the regulator. Apply clean engine oil to the new pressure regulator inlet o-ring before installing it onto the regulator inlet and following this up by lubricating and installing the new fuel return pipe o-ring. Secure the regulator attaching screw before connecting the fuel return line because unscrewed movement could vandalize the retainer and spacer bracket leading to fuel leakage at the regulator inlet. Insert the new retainer and spacer bracket into the Fuel Rail slot before connecting the pressure regulator unit to the rail and torquing engine fuel return pipe to 17 n.m (13 lb ft). Use the Fuel Pressure Regulator vacuum line before threading and securing the regulator attaching screw at 8.5 n.m of torque (75 lb in). Use a hand to check that the retainer together with spacer bracket securely rests within the Fuel Rail slots before pulling on the regulator for proper installation verification. Finish the procedure by first connecting the negative Battery Cable then verify the fuel system for leaks by activating the ignition switch for two seconds before switching it off for ten seconds and finally activating it again for leak inspection.
    Posted by ChevyPartsGiant Specialist
    Q:
    How to replace the fuel pressure regulator on Buick Century? Posted by Customer
    A:
    The first step to replace a Fuel Pressure Regulator requires removing fuel system pressure. First disconnect the vacuum line from the Fuel Pressure Regulator before you remove the fuel return pipe and its securing screw. Twisting the regulator as you lift it away from the Fuel Rail is possible by using a shop towel to capture any fuel that might spill. The maintenance process requires discarding of retainer components and spacer bracket along with removing inlet and return pipe o-rings. Check the filter screen for contamination and replace the Fuel Pressure Regulator in case of its contamination. Put clean engine oil on the Fuel Pressure Regulator o-rings before placing them onto the regulator assembly. Use compressed air for tests or cleaning operations on the regulator since submersion of this component in solvent baths is also prohibited. Tighten the screw only after connecting the fuel return pipe to the regulator since this prevents retainer and spacer bracket damage. Use the new retainer and spacer bracket to replace the ones on the Fuel Rail before securing the Fuel Pressure Regulator and its screw. Secure the Fuel Pressure Regulator screw to 8.5 n.m (75 lb in) along with tightening the engine fuel return pipe nut to 17 n.m (13 lb ft). Vin initiates the processes of vacuum line assembly followed by retainer and spacer bracket engagement check and then negative Battery Cable connection. Complete the inspection process by turning the ignition two times and surveying for fuel leakages.
    Posted by ChevyPartsGiant Specialist
    Q:
    How to replace the fuel pressure regulator on Chevrolet Malibu? Posted by Customer
    A:
    The first step to replace the Fuel Pressure Regulator requires the removal of fuel system pressure. You should first disconnect the Fuel Pressure Regulator vacuum line and then remove its retaining screw. A shop towel should be used to contain any spilled fuel after you lift and twist the Fuel Pressure Regulator in order to detach it from the Fuel Rail. Take away the retainer and spacer bracket followed by removal of the Fuel Pressure Regulator from the engine fuel return pipe where you need to discard the inlet o-ring. Connect the fuel return line before installation to stop regulator rotation that may hurt the retainer and spacer bracket and create a fuel leak. Compressed air should not be used for cleaning or testing the Fuel Pressure Regulator since it poses the risk of causing damage. The filter screen requires cleaning with gasoline only but keep the regulator out of all solvent baths. The filter screen requires examination for pollutants; if contamination is present, you need to install a new Fuel Pressure Regulator. The new inlet o-ring needs engine oil lubrication before its installation onto the regulator inlet position. The fuel return pipe needs to be connected to the regulator before you put the new retainer alongside spacer bracket into the Fuel Rail slot. You should mount the pressure regulator to the Fuel Rail while making sure the engine fuel return pipe nut reaches a torque of 17 n.m (13 lb ft). Fasten the vacuum line while using an attaching screw which needs tightening up to 8.5 n.m (76 lb in). A proper seat of the regulator can be confirmed by applying tension to both the retainer and spacer bracket until it fixes into the Fuel Rail slots. To check for fuel leaks turn the ignition on for 2 seconds, wait 10 seconds with off position and then turn the ignition on to inspect for any leaking fuel.
    Posted by ChevyPartsGiant Specialist
    Q:
    How to service the fuel pressure regulator on Chevrolet Lumina? Posted by Customer
    A:
    Prior to servicing the Fuel Pressure Regulator you must drain fuel system pressure from the system. Detach the Fuel Pressure Regulator vacuum line then undo its retaining screw. A shop towel should catch flowing fuel during the Fuel Pressure Regulator's removal from the Fuel Rail through lifting and twisting procedures. Detach the retainer with spacer bracket while discarding both elements before removing the Fuel Pressure Regulator from its position on the engine fuel return pipe. Afterward discard the inlet o-ring. A fuel return line connection should take place first to stop regulator rotation that could harm the retainer and spacer bracket while also preventing fuel leakage. Testing or cleaning the Fuel Pressure Regulator requires avoidance of compressed air since damage can occur whereas cleaning the filter screen with gasoline should replace immersion in solvent baths. A check of the filter screen will determine if contamination exists so replace the Fuel Pressure Regulator when contamination is detected. The new inlet o-ring requires engine oil lubrication before its installation onto the regulator inlet. Place the fuel return pipe on the regulator before you fit the new spacer bracket and retainer to their designated slot on the Fuel Rail. Mount the pressure regulator onto the Fuel Rail before tightening its engine fuel return pipe nut to 17 nm (13 lb ft). The Fuel Pressure Regulator vacuum line must now be reconnected followed by installing and tightening an attaching screw to 8.5 nm (76 lb in). To verify proper seating of the retainer and spacer bracket check the regulator when pulling it towards the slots inside the Fuel Rail. Finish the procedure by reinstalling the fuel filler cap then connect the negative Battery Cable. The inspection of fuel system occurs by following an ignition switch sequence of 2-second on position then 10-second off position followed by another 2-second on position while checking for any fuel leaks.
    Posted by ChevyPartsGiant Specialist
    Q:
    How to service and repair the fuel pressure regulator on Chevrolet Malibu? Posted by Customer
    A:
    The first step before servicing or repairing the Fuel Pressure Regulator includes draining the fuel system pressure. The vacuum line of the Fuel Pressure Regulator must be disconnected followed by removal of the retaining screw. A shop towel should be used to catch leaking fuel before lifting and twisting the Fuel Pressure Regulator to unhook it from the Fuel Rail. Beginning with the removal of both the retainer and spacer bracket, the technician proceeds to separate the Fuel Pressure Regulator from the engine fuel return pipe before discarding the inlet o-ring. Before installing the fuel return line you must first connect it to avoid having the regulator rotate because this could harm the retainer and spacer bracket while creating a fuel leakage. Test and cleaning operations should never use compressed air when working with the Fuel Pressure Regulator because damage could occur during these procedures. The filter screen requires cleaning with gasoline but the regulator should never be submerged in solvent baths. Before mounting the pressure regulator always check the filter screen for contamination because a contaminated screen requires replacement of the Fuel Pressure Regulator. Put clean engine oil on the new inlet o-ring before mounting it onto the regulator inlet port. First connect the fuel return pipe to the regulator before putting the new retainer and spacer bracket inside the Fuel Rail slot. Secure the pressure regulator onto the Fuel Rail by tightening its nut to 17 n.m (13 lb ft). The vacuum line should be reconnected by installing an attaching screw which needs to be secured at 8.5 n.m (76 lb in). You should verify the retainer together with spacer bracket securely connects to the Fuel Rail slots by applying force to the regulator. Before concluding the procedure install the fuel filler cap while inspecting for any fuel leaks during the following sequence: turn the ignition on for two seconds followed by ten seconds off and another two seconds on for inspection.
    Posted by ChevyPartsGiant Specialist
    Q:
    How to service and repair the fuel pressure regulator on Chevrolet Venture? Posted by Customer
    A:
    One must first release fuel system pressure before performing any work on the Fuel Pressure Regulator. The first step includes cutting the vacuum connector from the Fuel Pressure Regulator while unscrewing its mounting screw. A shop towel should be used to contain fuel drips before you detach the Fuel Pressure Regulator from the Fuel Rail by lifting and twisting it. Separate the rail retainer with spacer bracket before removing the Fuel Pressure Regulator from the engine fuel return pipe and discarding its inlet o-ring. A fuel return line connection at the beginning of installation stops the regulator from spinning because this motion might destroy the retainer and spacer bracket and trigger a fuel leak. You must not utilize compressed air either for examination or cleansing duties of the Fuel Pressure Regulator since it will lead to damage. You can apply gasoline to clean the filter screen but you should never subject the regulator to solvent immersion for cleaning. The filter screen must be inspected for contamination; if contamination is present then change the Fuel Pressure Regulator. The new inlet o-ring requires lubrication using engine oil then needs installation onto the regulator inlet port. Begin by affixing the fuel return pipe to the regulator before installing the new retainer together with spacer bracket into the Fuel Rail slot. Position the Fuel Pressure Regulator on the Fuel Rail after installing the new retainer and spacer bracket into the slots of the rail. Tighten the engine fuel return pipe nut to 17 n.m (13 lb ft). Use the Fuel Pressure Regulator vacuum line before tightening its attaching screw to 8.5 n.m (76 lb in). To verify correct seating of the regulator check that you can pull the regulator easily before tightening the fuel return pipe nut to 17 n.m (13 lb ft) while also making sure the retainer and spacer bracket sits in the slots of the Fuel Rail. Verify fuel leakages by operating the ignition for two seconds then turning it off for ten seconds before repeating the process while inspecting for any fuel leaks. Reinstall the fuel filler cap afterward.
    Posted by ChevyPartsGiant Specialist
    Q:
    What should be verified after reconnecting the fuel pressure regulator vacuum line for the 2005 Buick Century? Posted by Customer
    A:
    Verify that the retainer and spacer bracket are engaged in the slots in the fuel rail by pulling on the regulator to ensure it is properly seated.
    Posted by ChevyPartsGiant Specialist
    See expert answers on similar Fuel Pressure Regulator
    Q:
    What should be disconnected before removing the fuel pressure regulator for the 2000 Buick Century? Posted by Customer
    A:
    The fuel pressure regulator vacuum line.
    Posted by ChevyPartsGiant Specialist
    See expert answers on similar Fuel Pressure Regulator
    Q:
    What should be disconnected before removing the fuel pressure regulator for the 2001 Buick Century? Posted by Customer
    A:
    The fuel pressure regulator vacuum line.
    Posted by ChevyPartsGiant Specialist
    See expert answers on similar Fuel Pressure Regulator
    Q:
    What should be done with the inlet O-ring during the removal process for the 2005 Buick Rendezvous? Posted by Customer
    A:
    Discard the inlet O-ring.
    Posted by ChevyPartsGiant Specialist
    See expert answers on similar Fuel Pressure Regulator
    Q:
    What should be done before installation to prevent the regulator from rotating for the 2002 Buick Rendezvous? Posted by Customer
    A:
    Connect the fuel return line.
    Posted by ChevyPartsGiant Specialist
    See expert answers on similar Fuel Pressure Regulator
    Q:
    What is the first step to service and repair the fuel pressure regulator for the 2002 Chevrolet Cavalier? Posted by Customer
    A:
    Relieve the fuel system pressure.
    Posted by ChevyPartsGiant Specialist
    See expert answers on similar Fuel Pressure Regulator
    Q:
    What should be done after reinstalling the fuel pressure regulator for the 2000 Chevrolet Impala? Posted by Customer
    A:
    Reinstall the fuel filler cap and reconnect the negative battery cable.
    Posted by ChevyPartsGiant Specialist
    See expert answers on similar Fuel Pressure Regulator
    Q:
    What is the torque specification for the attaching screw of the vacuum line for the 2001 Chevrolet Impala? Posted by Customer
    A:
    8.5 N.m (76 lb in).
    Posted by ChevyPartsGiant Specialist
    See expert answers on similar Fuel Pressure Regulator
    Q:
    What is the first step in replacing the fuel pressure regulator for the 2005 Chevrolet Impala? Posted by Customer
    A:
    Relieve the fuel pressure.
    Posted by ChevyPartsGiant Specialist
    See expert answers on similar Fuel Pressure Regulator
    Q:
    What should be done with the retainer and spacer bracket after removal for the 2002 Chevrolet Malibu? Posted by Customer
    A:
    Remove them from the rail and discard them.
    Posted by ChevyPartsGiant Specialist
    See expert answers on similar Fuel Pressure Regulator
    Q:
    What is the first step to service the fuel pressure regulator for the 2000 Chevrolet Monte Carlo? Posted by Customer
    A:
    Relieve the fuel pressure and ensure cleanliness when handling fuel system components.
    Posted by ChevyPartsGiant Specialist
    See expert answers on similar Fuel Pressure Regulator
    Q:
    How should the filter screen be cleaned if necessary for the 2003 Chevrolet Malibu? Posted by Customer
    A:
    Clean it with gasoline without immersing the regulator in a solvent bath.
    Posted by ChevyPartsGiant Specialist
    See expert answers on similar Fuel Pressure Regulator
    Q:
    Why is it important to connect the fuel return line before tightening the screw for the 2003 Chevrolet Impala? Posted by Customer
    A:
    To prevent the regulator from rotating, which could damage the retainer and spacer bracket and lead to a fuel leak.
    Posted by ChevyPartsGiant Specialist
    See expert answers on similar Fuel Pressure Regulator
    Q:
    How should spilled fuel be managed during the removal process for the 2004 Chevrolet Monte Carlo? Posted by Customer
    A:
    Use a shop towel to catch any spilled fuel.
    Posted by ChevyPartsGiant Specialist
    See expert answers on similar Fuel Pressure Regulator
    Q:
    How should the fuel pressure regulator be detached from the housing for the 2004 Chevrolet Impala? Posted by Customer
    A:
    Lift and twist it.
    Posted by ChevyPartsGiant Specialist
    See expert answers on similar Fuel Pressure Regulator
    Q:
    What should be done with the retainer and spacer bracket for the 2005 Chevrolet Monte Carlo? Posted by Customer
    A:
    Remove and discard them, along with the fuel pressure regulator inlet and fuel return pipe O-rings.
    Posted by ChevyPartsGiant Specialist
    See expert answers on similar Fuel Pressure Regulator
    Q:
    What is the torque specification for tightening the attaching screw of the fuel pressure regulator for the 2002 Chevrolet Monte Carlo? Posted by Customer
    A:
    8.5 N.m (76 lb in).
    Posted by ChevyPartsGiant Specialist
    See expert answers on similar Fuel Pressure Regulator
    Q:
    Why should compressed air be avoided when testing or cleaning the fuel pressure regulator for the 2001 Chevrolet Venture? Posted by Customer
    A:
    Using compressed air may cause damage to the regulator.
    Posted by ChevyPartsGiant Specialist
    See expert answers on similar Fuel Pressure Regulator
    Q:
    How should the new pressure regulator inlet O-ring be prepared before installation for the 2002 Chevrolet Venture? Posted by Customer
    A:
    Lubricate it with clean engine oil.
    Posted by ChevyPartsGiant Specialist
    See expert answers on similar Fuel Pressure Regulator
    Q:
    What should be disconnected before removing the fuel pressure regulator for the 2003 Chevrolet Venture? Posted by Customer
    A:
    The fuel pressure regulator vacuum line.
    Posted by ChevyPartsGiant Specialist
    See expert answers on similar Fuel Pressure Regulator
    If you have any questions about this product, please don't hesitate to ask us. We will be happy to help you!

OEM GM 17113622, Excellent Performance and Perfect Fitment

To ensure reliability, purchase GM part # 17113622 Fuel Pressure Regulator. It is sometimes referred to as GM Fuel Pressure Regulator. Choosing OEM parts is the optimal decision for guaranteeing superior quality and perfect performance. These components undergo stringent quality checks and are carefully constructed to comply with GM's factory specifications, ensuring a smooth installation process.

ChevyPartsGiant.com is a leading supplier of genuine GM parts such as GM 17113622 Fuel Pressure Regulator. Our website boasts an extensive inventory of OEM GM parts, available at highly competitive prices in the market. Should you require any new genuine GM parts, rest assured we will deliver them swiftly and efficiently to your doorstep. Furthermore, all our parts come with the assurance of a manufacturer's warranty. For detailed Chevy parts information, click here.
Choose ChevyPartsGiant for discounted prices, exceptional service and fast delivery