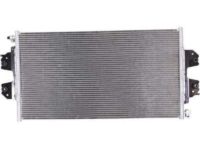
Make sure this part fits

GM 84451983
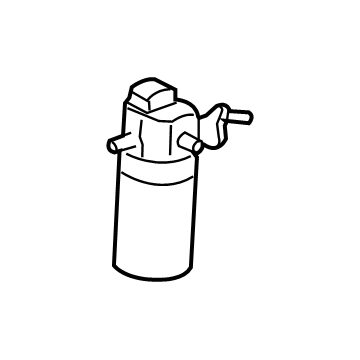
Drier

2003-2024 GM

Customer Questions & Expert Answers (19)
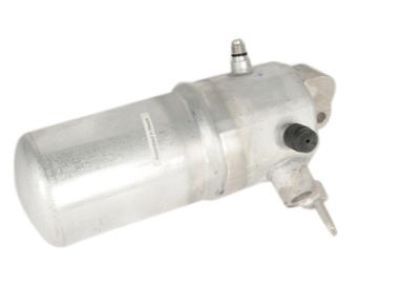
GM 84451983 Drier
GM 84451983 Drier
  • Part Description
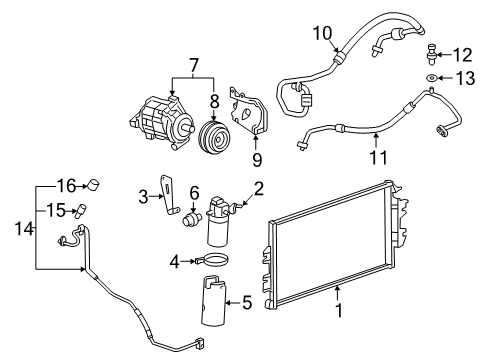
    Accumulator Assembly-A/C; Drier Desiccant Element; A/C Receiver Drier; A/C Accumulator
  • Replaces
    15750663, 25760829, 25890358
  • Manufacturer
    General Motors
Make sure this part fits
$68.81 MSRP: $137.69
You Save: $68.88 (51%)
Ships in 1-2 Business Days
1
ADD TO CART
  • Vehicle Fitment

    Year Make Model Trim Engine
    2003-2014 Chevrolet Express 1500Base, LS, LT6 Cyl 4.3 L GAS, 8 Cyl 5.3 L FLEX, 8 Cyl 5.3 L GAS
    2003-2024 Chevrolet Express 2500Base, LS, LT4 Cyl 2.8 L DIESEL, 6 Cyl 4.3 L FLEX, 6 Cyl 4.3 L GAS, 8 Cyl 4.8 L FLEX, 8 Cyl 4.8 L GAS, 8 Cyl 5.3 L GAS, 8 Cyl 6.0 L CNG, 8 Cyl 6.0 L FLEX, 8 Cyl 6.0 L GAS, 8 Cyl 6.6 L DIESEL, 8 Cyl 6.6 L GAS
    2003-2024 Chevrolet Express 3500Base, LS, LT4 Cyl 2.8 L DIESEL, 6 Cyl 4.3 L FLEX, 6 Cyl 4.3 L GAS, 8 Cyl 4.8 L FLEX, 8 Cyl 4.8 L GAS, 8 Cyl 6.0 L CNG, 8 Cyl 6.0 L FLEX, 8 Cyl 6.0 L GAS, 8 Cyl 6.6 L DIESEL, 8 Cyl 6.6 L GAS
    2003-2014 GMC Savana 1500Base, LS, LT, SLE6 Cyl 4.3 L GAS, 8 Cyl 5.3 L FLEX, 8 Cyl 5.3 L GAS
    2003-2024 GMC Savana 2500Base, LS, LT, SLE4 Cyl 2.8 L DIESEL, 6 Cyl 4.3 L FLEX, 6 Cyl 4.3 L GAS, 8 Cyl 4.8 L FLEX, 8 Cyl 4.8 L GAS, 8 Cyl 5.3 L GAS, 8 Cyl 6.0 L CNG, 8 Cyl 6.0 L FLEX, 8 Cyl 6.0 L GAS, 8 Cyl 6.6 L DIESEL, 8 Cyl 6.6 L GAS
    2003-2024 GMC Savana 3500Base, LS, LT, SLE4 Cyl 2.8 L DIESEL, 6 Cyl 4.3 L FLEX, 6 Cyl 4.3 L GAS, 8 Cyl 4.8 L FLEX, 8 Cyl 4.8 L GAS, 8 Cyl 6.0 L CNG, 8 Cyl 6.0 L FLEX, 8 Cyl 6.0 L GAS, 8 Cyl 6.6 L DIESEL, 8 Cyl 6.6 L GAS
    Warning: California's Proposition 65
  • Customer Questions & Expert Answers

    Q:
    Is 84451983 compatible with my car? Posted by ChevyPartsGiant Specialist
    A:
    Please Select Your Vehicle model to see if part number 84451983 is suitable before ordering.
    Posted by ChevyPartsGiant Specialist
    Q:
    How to install the A/C Accumulator in systems with an auxiliary system on Chevrolet Express 1500? Posted by Customer
    A:
    The initial step to install the A/C accumulator consists of refrigerant recovery from the A/C system specifically intended for vehicles with an auxiliary system. Begin by removing the condenser tube from the condenser but stop 20 millimeters (0.75 inches) after the bend of the tube for marking. Then proceed 42 millimeters (1.65 inches) beyond the first mark to place another point. Cut the marked area of the condenser tube with a tubing cutter while paying attention to prevent metal burrs from entering the tube during the procedure. Isolate any burrs that appear on the condenser tube before removing its nuts and ferrules and O-rings from the A/C accumulator. Place suitable nuts along with ferrules onto each section of condenser tube; however, keep the O-rings aside for now. Position the small part of each ferrule toward the nut before attaching the A/C accumulator to the condenser tube. Keep the accumulator flow arrow aimed at the evaporator. Tighten the condenser tube on the A/C accumulator when holding it while keeping the torque at 34 N.m (25 lb.ft). Following the removal of nuts from the A/C accumulator, mount O-rings onto the condenser tube followed by nuts reinstalling on the A/C accumulator while tightening them to 34 N.m (25 lb ft). The last procedure involves connecting the condenser tube to the condenser unit while also performing A/C system evacuation and recharge operations through a Halogen Leak Detector check (J 39400-A).
    Posted by ChevyPartsGiant Specialist
    Q:
    How to install the A/C Accumulator in systems with an auxiliary system on Chevrolet Express 2500? Posted by Customer
    A:
    Only vehicles with auxiliary systems need a/c accumulators so start the installation process by recovering a/c refrigerant from the system. The technician should mark a condenser tube section 20 mm (0.75 in) from the bend and then remove it from the condenser. Create another mark 42 mm (1.65 in) beyond the preceding point. Avoid the entry of metal burrs into the condenser tube while performing cutting or removal tasks. Cautiously cut through the marked portion of the condenser tube with the tubing cutter before removing all burrs. The next step involves removing the nuts and ferrules together with the o-rings from the A/C Accumulator but avoid installing the o-rings at this point. Install nuts together with ferrules over each segment of condenser tubing by placing ferrule ends at the narrow portion of the nut. Fit the A/C Accumulator with its flow arrow pointing to the evaporator onto the condenser tube. Maintain a hold on the condenser tube within the A/C Accumulator while torquing the nuts to a specification of 34 n.m (25 lb ft). The next step involves taking out the nuts from the A/C Accumulator but placing o-rings onto the condenser tube. Fasten the two nuts which secure the A/C Accumulator and tighten them with 34 n.m (25 lb ft) of torque. Close the condenser tube before evacuating and recharging the a/c system with the halogen leak detector (J 39400-A) for fitting leak detection.
    Posted by ChevyPartsGiant Specialist
    Q:
    How to install the A/C Accumulator (ACDelco P/N 15-1697) to the A/C evaporator tube on GMC Savana 2500? Posted by Customer
    A:
    Before setting the A/C Accumulator (ACDelco P/N 15-1697) between the condenser and expansion (orifice) tube you must recover refrigerant from the a/c system. Cut the marked section of condenser tube using a tubing cutter after marking it 20 mm (0.75 in) from the bend and another 50.8 mm (2 in) beyond. You should use a tubing cutter to cut the marked condenser tube section. Keep all metal burrs outside the tube space when you execute this process. Place all burrs from the condenser tube away before removing the A/C Accumulator's nuts, ferrules and o-rings. Install ferrules and nuts onto both sides of the condenser tube without adding the o-rings at present. Place ferrules on condenser tube with small inner end facing nuts while mounting the A/C Accumulator onto the tube with the flow arrow pointing toward the evaporator. Tighten the nuts on the accumulator by applying torque of 15 n.m (11 lb ft) while holding the condenser tube inside the accumulator. After securing the nuts on the A/C Accumulator reverse their removal to put on the o-rings to the condenser tube and reinstall the nuts back to the accumulator while tightening them to 15 n.m (11 lb ft). The last step involves reattaching the condenser tube to the condenser unit before conducting a/c system evacuation and recharging along with using the halogen leak detector(J39400-A) for fitting tests.
    Posted by ChevyPartsGiant Specialist
    Q:
    How to install the A/C Accumulator (ACDelco P/N 15-1697) to the A/C evaporator tube on GMC Savana 1500? Posted by Customer
    A:
    Recovery of a/c system refrigerant should occur before the A/C Accumulator installation at the a/c evaporator tube between the condenser and the expansion (orifice) tube. Measure the condenser tube starting 20 mm (0.75 in) after the bend then mark the tube. Subsequently measure 50.8 mm (2 in) following the first mark before marking it again. A tubing cutter cuts through the marked condenser tube section after which the user removes all burrs that could enter the tube. Remove the nuts and ferrules along with the o-rings from the A/C Accumulator after which o-rings stay uninstalled. Position the ferrules and nuts on both sides of the condenser tube segments before inserting ferrules with tiny ends facing the nuts. The A/C Accumulator should be fitted next with its flow arrow aimed at the evaporator. You need to fasten the condenser tube within the A/C Accumulator while applying 15 n.m (11 lb ft) torque to the nuts. To complete this operation, first take off the nuts from the A/C Accumulator then add the o-rings to the condenser tube before reinstalling the accumulator nuts for a second time and torquing them to 15 n.m (11 lb ft). Reinstall the condenser tube to the condenser unit before evacuating plus recharging your a/c system and using a halogen leak detector (J 39400-A) for fitting leak checks.
    Posted by ChevyPartsGiant Specialist
    Q:
    How should the A/C refrigerant filter be attached to the condenser tube for the 2003 Chevrolet Express 3500? Posted by Customer
    A:
    Attach the A/C refrigerant filter to the condenser tube with the flow arrow pointing towards the evaporator.
    Posted by ChevyPartsGiant Specialist
    See expert answers on similar A/C Accumulator
    Q:
    How should the new accumulator be installed for the 2006 Chevrolet Express 1500? Posted by Customer
    A:
    Install the new accumulator and secure it by installing the screw to the accumulator retaining bracket, tightening it to 9 N.m (80 lb in).
    Posted by ChevyPartsGiant Specialist
    See expert answers on similar A/C Accumulator
    Q:
    What is the first step to replace the accumulator in the HVAC system for the 2005 Chevrolet Express 2500? Posted by Customer
    A:
    Recover the refrigerant from the A/C system.
    Posted by ChevyPartsGiant Specialist
    See expert answers on similar A/C Accumulator
    Q:
    What should be done after recovering the refrigerant for the 2008 Chevrolet Express 3500? Posted by Customer
    A:
    Remove the front evaporator tube, ensuring that the nuts and ferrules remain on the condenser tube.
    Posted by ChevyPartsGiant Specialist
    See expert answers on similar A/C Accumulator
    Q:
    What should be done after reinstalling the front evaporator tube for the 2007 Chevrolet Express 2500? Posted by Customer
    A:
    Evacuate and recharge the A/C system.
    Posted by ChevyPartsGiant Specialist
    See expert answers on similar A/C Accumulator
    Q:
    How should the accumulator retaining bracket screw be installed for the 2008 Chevrolet Express 2500? Posted by Customer
    A:
    Install the screw to the accumulator retaining bracket and tighten it to 9 N.m (80 lb in).
    Posted by ChevyPartsGiant Specialist
    See expert answers on similar A/C Accumulator
    Q:
    What should be removed after recovering the refrigerant for the 2006 GMC Savana 3500? Posted by Customer
    A:
    Remove the front evaporator tube.
    Posted by ChevyPartsGiant Specialist
    See expert answers on similar A/C Accumulator
    Q:
    How do you remove the A/C refrigerant filter for the 2005 GMC Savana 3500? Posted by Customer
    A:
    Remove the nuts from the A/C refrigerant filter and take the filter off the condenser tube.
    Posted by ChevyPartsGiant Specialist
    See expert answers on similar A/C Accumulator
    Q:
    What is the torque specification for tightening the nuts to the A/C refrigerant filter for the 2005 GMC Savana 2500? Posted by Customer
    A:
    Tighten the nuts to 34 N.m (25 lb ft).
    Posted by ChevyPartsGiant Specialist
    See expert answers on similar A/C Accumulator
    Q:
    What should be installed after connecting the low pressure sensor for the 2010 GMC Savana 1500? Posted by Customer
    A:
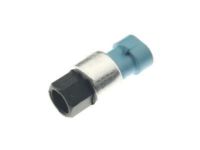
    Install new sealing washers and then install the evaporator outlet pipe, tightening its retaining nut to 16 Nm (12 lb ft).
    Posted by ChevyPartsGiant Specialist
    See expert answers on similar A/C Accumulator
    Q:
    What is the first step to replace the accumulator for the 2003 GMC Savana 2500? Posted by Customer
    A:
    Recover the refrigerant from the A/C system.
    Posted by ChevyPartsGiant Specialist
    See expert answers on similar A/C Accumulator
    Q:
    What should be done after recovering the refrigerant for the 2004 GMC Savana 3500? Posted by Customer
    A:
    Remove the front evaporator tube, ensuring that the nuts and ferrules remain on the condenser tube.
    Posted by ChevyPartsGiant Specialist
    See expert answers on similar A/C Accumulator
    Q:
    What components need to be pushed over each half of the condenser tube for the 2007 GMC Savana 2500? Posted by Customer
    A:
    The proper size nuts and ferrules.
    Posted by ChevyPartsGiant Specialist
    See expert answers on similar A/C Accumulator
    Q:
    What is the next step after removing the evaporator outlet pipe retaining nut for the 2009 GMC Savana 1500? Posted by Customer
    A:
    Remove the compressor suction hose retaining nut and the compressor suction hose from the accumulator.
    Posted by ChevyPartsGiant Specialist
    See expert answers on similar A/C Accumulator
    If you have any questions about this product, please don't hesitate to ask us. We will be happy to help you!

OEM GM Drier 84451983 Designed for Proper Fit and Performance

Original OEM GM parts deliver superior quality and meet all performance standards needed for optimal automotive operation. The authentic part identified by 84451983 Drier is available in the market under the name GM A/C Accumulator. This genuine product has a full warranty coverage from the manufacturer available at all authorized GM dealers throughout the United States. This part 84451983 Drier fits certain Chevrolet Express 1500, Express 2500, Express 3500 models, as well as GMC Savana 2500, Savana 3500, Savana 1500 models.
The original GM component designated by manufacturer part number 84451983 maintains top performance when functioning as the Accumulator Assembly-A/C; Drier Desiccant Element; A/C Receiver Drier; A/C Accumulator unit. The component 84451983 is constructed from durable material and its dimensions span 15.1 x 8.4 x 7.0 inches while weighing 2.20 Pounds. The Direct Replacement component is ready in New condition to ensure full compatibility with your vehicle system. This component receives the designation of Accumulator; Accumulator, A/C Refrigerant. The part 84451983 has available replacement options 15750663, 25760829, 25890358. GM manufacturer provides a warranty that ensures reliable operation of this product. The Shipping Policy and Return Policy pages outline complete details regarding shipping procedures and return processes.
If you want to save money in the long run on maintenance and repairs, you should choose OEM products because they're of the top level of durability. Are you on the quest of finding GM parts, our site is worth a visit. We stock an endless selection of high-quality GM components including things like ignition coils all the way through to fan shrouds and all at prices that can not be matched. You have nothing to worry about because all our OEM parts are covered with a manufacturer warranty, which guarantees superior quality and value.