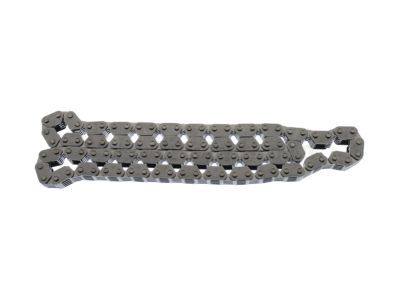
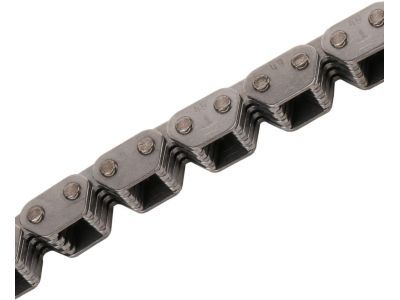
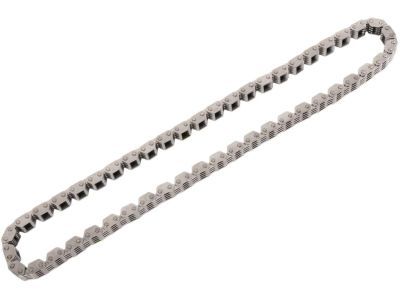
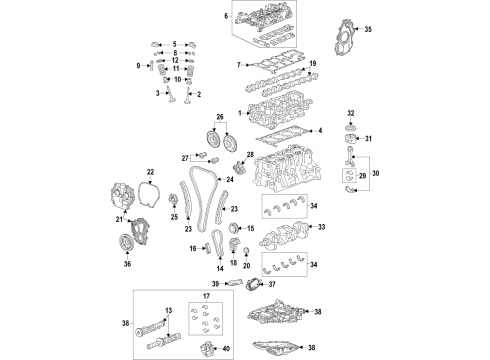
First to replace the Camshaft Timing Chain, sprocket, tensioner remove number 1 cylinder Spark Plug. Slowly turn the Crankshaft to the clockwise until the number 1 piston at top dead center (TDC) in the exhaust stroke. Next, take off the Camshaft cover and engine front cover. Remove the upper Timing Chain Guide bolts and guide, as well as the Timing Chain Tensioner, unload the chain tension first in order to avoid cocking. Use a 24 mm wrench to hold the exhaust Camshaft and discard the exhaust Camshaft actuator bolt and remove the actuator from Camshaft and Timing Chain. Proceed to dismantle the Timing Chain Tensioner guide bolt and guide, the fixed Timing Chain Guide access plug and fixed Timing Chain Guide bolts and guide. With a 24 mm wrench, hold the intake Camshaft on removing the intake Camshaft actuator bolt, and remove the intake Camshaft actuator as well as the Timing Chain. Remove the crank shaft sprocket and friction washers if available. In the case of replacing the balance shaft Timing Chain and sprocket, chip off the balance shaft drive chain tensioner bolts and tensioner, the adjustable balance shaft chain guide bolt and guide, the small and upper balance shaft drive chain guide bolts and guides. Remove the balance shaft drive chain and sprocket. For installation, if we are replacing the balance shaft Timing Chain, we can replace the balance shaft drive sprocket and chain aligning the colored links so that they are in line with the timing marks on the sprockets. Install the upper and small balance shaft drive chain guides, and tighten, 15 nm (11 lb Speed)) and 10 nm (89 lb In.) respectively. Reset the Timing Chain Tensioner by rotating the plunger and using a paper clip (install), then balance shaft drive chain tensioner and bolts (tighten up to 10Nm=89 lbf.in). Make sure that the intake Camshaft notch points to the correct position according to the type of engine, if required, install the friction washer, and install the Timing Chain drive sprocket with the timing mark pointing at the 5 o'clock position. Mount the intake Camshaft actuator with its timing mark lined up with the uniquely colored link, and lower the Timing Chain into the cylinder head, then install the actuator onto the intake Camshaft. Circle the Timing Chain around the Crankshaft sprocket making sure that the first matching coloured link line up with the timing mark. Rotate the Crankshaft to remove slack and place the adjustable Timing Chain Guide and tighten the guide bolt to 10 nm (89 lb in). Unbolt the exhaust Camshaft actuator, install it in line with the timing make to the second matching colored link, and then bolt it to the exhaust Camshaft. It is necessary to draw the tight new actuator bolts and check all colored links and timing marks at the same time. Install the fixed Timing Chain Guide and bolts with a tightening value of 12 nm (106 lb in) after which installing the upper Timing Chain Guide and bolts with a tightening value of 10 nm (89 lb in). Reset the Timing Chain Tensioner, examine the seal for players and increase the cleanliness of the threaded hole prior to installing the Timing Chain Tensioner assembly and tighten it to 75 nm (55 lb ft). Follow up by releasing the Timing Chain Tensioner with the appropriate tool and then retightening the intake and exhaust Camshaft actuator bolts, 30 nm (22 lb ft) plus 100 degrees, using the timeweigh en-45059-meter. Install nozzle of the Timing Chain oiling and tighten its bolt with 10 nm (89 lb in) of torque. Screw the access hole plug for the Timing Chain Guide to the bolt head, tighten it to 90 nm (66 lb ft) and apply the sealant. Lastly, install the engine front cover, camshaft cover, and the number 1 cylinder Spark Plug.
Posted by ChevyPartsGiant Specialist