Make sure this part fits

GM 12601240
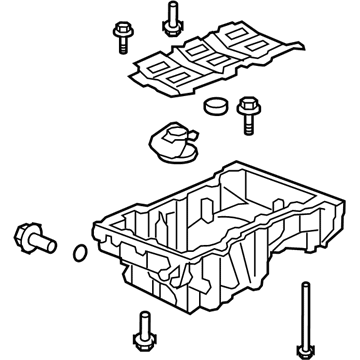
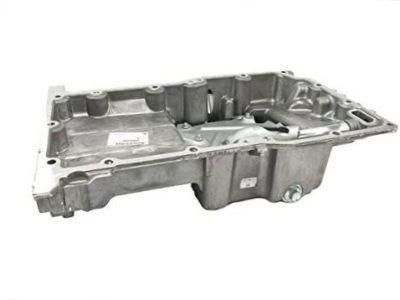
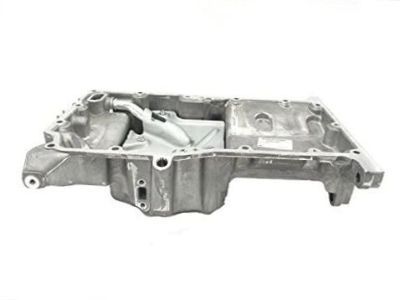
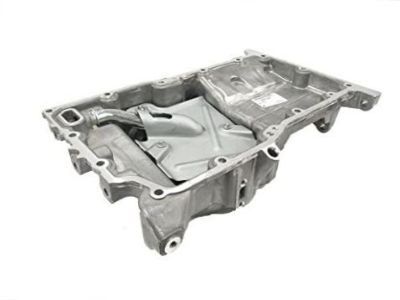
Oil Pan, Green Line

2002-2017 GM

Customer Questions & Expert Answers (13)
GM 12601240 Oil Pan, Green Line
  • Part Description
    Pan, Engine Oil; Engine Oil Pan
  • Replaces
    12578193
  • Manufacturer
    General Motors
Make sure this part fits
$152.53 MSRP: $261.96
You Save: $109.43 (42%)
Ships in 1-2 Business Days
1
ADD TO CART
  • Related Parts
  • Product Specifications
  • Vehicle Fitment
  • Customer Questions & Expert Answers
  • Product Specifications

    BrandGenuine GM
    Manufacturer Part Number12601240
    Part DescriptionPan, Engine Oil; Engine Oil Pan
    Item Dimensions21.8 x 16.3 x 14.7 inches
    Item Weight10.70 Pounds
    ConditionNew
    Fitment TypeDirect Replacement
    Replaces12578193
    ManufacturerGeneral Motors
    SKU12601240
    WarrantyThis genuine GM part is guaranteed by GM's factory warranty.
    Shipping & ReturnShipping Policy Return Policy
    Warning: California's Proposition 65
  • Vehicle Fitment

    Year Make Model Trim Engine
    2010-2016 Buick LaCrosseBase, Convenience, CX, CXL, Leather, Premium, Touring4 Cyl 2.4 L GAS, 4 Cyl 2.4 L MILD HYBRID EV-GAS (MHEV), 6 Cyl 3.6 L FLEX
    2011-2017 Buick RegalBase, CXL, Premium4 Cyl 2.4 L FLEX, 4 Cyl 2.4 L GAS, 4 Cyl 2.4 L MILD HYBRID EV-GAS (MHEV)
    2012-2017 Buick VeranoBase, Convenience, Leather, Sport Touring4 Cyl 2.4 L FLEX, 4 Cyl 2.4 L GAS
    2012-2015 Chevrolet Captiva SportLS, LT, LTZ4 Cyl 2.4 L FLEX
    2005-2010 Chevrolet CobaltBase, LS, LT, LTZ, Sport, SS4 Cyl 2.0 L GAS, 4 Cyl 2.2 L GAS, 4 Cyl 2.4 L GAS
    2010-2017 Chevrolet EquinoxL, LS, LT, LTZ, Premier4 Cyl 2.4 L FLEX, 4 Cyl 2.4 L GAS
    2006-2011 Chevrolet HHRLS, LS Panel, LT, LT Panel, SS, SS Panel4 Cyl 2.0 L GAS, 4 Cyl 2.2 L FLEX, 4 Cyl 2.2 L GAS, 4 Cyl 2.4 L FLEX, 4 Cyl 2.4 L GAS
    2014 Chevrolet ImpalaEco4 Cyl 2.4 L MILD HYBRID EV-GAS (MHEV)
    2005-2014 Chevrolet MalibuBase, Classic LS, Eco, Hybrid, LS, LT, LTZ4 Cyl 2.2 L GAS, 4 Cyl 2.4 L FLEX, 4 Cyl 2.4 L FULL HYBRID EV-GAS (FHEV), 4 Cyl 2.4 L GAS, 4 Cyl 2.4 L MILD HYBRID EV-GAS (MHEV)
    2010-2017 GMC TerrainDenali, SL, SLE, SLT4 Cyl 2.4 L FLEX, 4 Cyl 2.4 L GAS
    View More
  • Customer Questions & Expert Answers

    Q:
    Is this 12601240 designed for my car? Posted by ChevyPartsGiant Specialist
    A:
    Please Select Your Vehicle model to see if part number 12601240 is suitable before ordering.
    Posted by ChevyPartsGiant Specialist
    Q:
    How to replace the oil pan on Chevrolet Cobalt? Posted by Customer
    A:
    Start by elevating and stabilizing your vehicle before you insert a drain pan under the Drain Plug of the Oil Pan to extract engine oil. Begin by uninstalling the Drive Belt from the engine and the lower ac compressor bolt and then unfasten all Oil Pan bolts. Clean out the old Oil Pan sealant from the surface before you remove the pan. Begin the installation process by clearing both the Oil Pan and lower crankcase sealing surface from oil debris before applying gm pn 12346286 (Canadian PN 10953472) sealant into a 2 mm bead around the Oil Pan edges and oil suction port. Do not exceed recommended application amount. Screw the Oil Pan in place and tighten its bolts starting from the specified sequence to 25 nm (18 ft. Lbs.). To complete the installation you must replace the lower ac compressor bolt then reattach the engine Drive Belt and bring down the vehicle before adding correct oil volume.
    Posted by ChevyPartsGiant Specialist
    Q:
    How to replace the oil pan on Chevrolet HHR? Posted by Customer
    A:
    To replace the Oil Pan, firstly take off the oil amount indicator and tube, and then lift and support the vehicle. Position a drain pan under the Drain Plug of the engine oil and pull the plug to drain off the engine oil while making sure to reattach and secure the Drain Plug to 25 n.m (18 lb ft) afterward. Then after take off remove, the engine Drive Belt, and remove the lower air conditioning (A/C) compressor bolt. Where a manual transaxle is fitted, one is to remove the 2 lower transaxle bolts; for those with automatic transaxle, take off the 4 lower transaxle bolts. Continue removing Oil Pan bolts and the Oil Pan while at the same time disposing the old Oil Pan sealant. For installation, ensure the Oil Pan and the sealing surface provided on the lower crankcase have gone off oil and dirt. Clean all surfaces that gasket sealing o-rings make contact with. Use a 2 mm line of sealant around the Oil Pan's perimeter and the oil suction port opening but do not apply too much. Mount the Oil Pan and Oil Pan bolts, tightening them to 25 n.m (18 lb ft). Tighten them in the specified sequence. Reinstall 4 lower transaxle bolts (automatrics) or the 2 lower transaxle bolts (manuals), tightening to 75 n.m (55 lb ft) if applicable. Replace the lower a/c compressor bolt and tighten it to 20 n.m (15 lb ft); install the engine Drive Belt; lower the vehicle; and replace the oil level indicator and tube and fill engine oil to the correct level.
    Posted by ChevyPartsGiant Specialist
    Q:
    How to replace the oil pan on GMC Terrain? Posted by Customer
    A:
    Starting with Drive Belt removal you should also remove the oil level indicator tube. Begin by supporting the vehicle from above along with bolting compressor a/c (Air Conditioning) at its top before removing the bottom compressor a/c bolt. The power brake booster pump must have its lower two bolts removed so you can relocate the pump out from the Oil Pan. Drain the engine oil into a suitable pan by first removing the Drain Plug from the Oil Pan then reinstalling the Drain Plug tightly. Use a socket wrench to remove the 4 bolts that connect the Oil Pan to transaxle and then proceed with removing the Oil Pan bolts until the Oil Pan can be removed while simultaneously scraping off any old sealant present in the area. Establish a clean condition for both the Oil Pan and the lower crankcase sealing surface before mounting the parts. Apply a 2 mm bead of sealant to run along the outer edge of the Oil Pan and the oil suction port opening while being careful not to go overboard. Fasten the Oil Pan and its bolts while following the recommended fastener installation steps. Use a torque wrench to tighten the transaxle bolts that hold the Oil Pan at 75 nm (55 lb ft) before moving on to a specified bolt sequence with a torque setting of 25 nm (18 lb ft). Fasten the m8 power brake booster pump bolt with 22 nm (16 lb ft) torque and the m10 bolt with 50 nm (37 lb ft). Lower the vehicle while you firmly tighten the A/C Compressor bolts to 20 nm (15 lb ft). Next, add the oil level indicator tube. You need to put on the Drive Belt then establish the proper engine oil level.
    Posted by ChevyPartsGiant Specialist
    Q:
    How should the installation of the oil pan begin for the 2010 Buick LaCrosse? Posted by Customer
    A:
    Use the 8 mm guides from the (EN-46109) set in the center oil pan rail bolt hole on each side of the engine block.
    Posted by ChevyPartsGiant Specialist
    See expert answers on similar Oil Pan
    Q:
    How should the oil pan to transaxle bolts be tightened for the 2010 Chevrolet Cobalt? Posted by Customer
    A:
    Install the 4 oil pan to transaxle bolts and tighten to 75 Nm (55 lb ft).
    Posted by ChevyPartsGiant Specialist
    See expert answers on similar Oil Pan
    Q:
    What should be ensured before installation of the new oil pan for the 2006 Chevrolet HHR? Posted by Customer
    A:
    The oil pan and the sealing surface on the lower crankcase should be free of oil and debris.
    Posted by ChevyPartsGiant Specialist
    See expert answers on similar Oil Pan
    Q:
    What should be done after raising it for the 2008 Chevrolet HHR? Posted by Customer
    A:
    Place a drain pan under the oil pan drain plug and remove the drain plug to drain the engine oil.
    Posted by ChevyPartsGiant Specialist
    See expert answers on similar Oil Pan
    Q:
    What should be done after removing the oil pan for the 2008 Chevrolet Malibu? Posted by Customer
    A:
    Clean any old oil pan sealant from the surface.
    Posted by ChevyPartsGiant Specialist
    See expert answers on similar Oil Pan
    Q:
    What should be done if the oil pan cannot be removed for the 2005 Chevrolet Malibu? Posted by Customer
    A:
    Lower the vehicle and repeat the previous steps until it can be removed.
    Posted by ChevyPartsGiant Specialist
    See expert answers on similar Oil Pan
    Q:
    What is the next step after installing the engine support fixture for the 2009 Chevrolet Malibu? Posted by Customer
    A:
    Remove the engine mount and raise the engine approximately 76 mm (3 in) using the engine support fixture.
    Posted by ChevyPartsGiant Specialist
    See expert answers on similar Oil Pan
    Q:
    What is the first step to replace the oil pan for the 2005 Chevrolet Cobalt? Posted by Customer
    A:
    Raise and support the vehicle, then drain the engine oil.
    Posted by ChevyPartsGiant Specialist
    See expert answers on similar Oil Pan
    Q:
    What components need to be removed before taking out the oil pan for the 2007 Chevrolet Cobalt? Posted by Customer
    A:
    Remove the engine drive belt and the lower AC compressor bolt.
    Posted by ChevyPartsGiant Specialist
    See expert answers on similar Oil Pan
    If you have any questions about this product, please don't hesitate to ask us. We will be happy to help you!

OEM GM 12601240, Excellent Performance and Perfect Fitment

To ensure reliability, purchase GM part # 12601240 Oil Pan, Green Line. It is sometimes referred to as GM Oil Pan. Choosing OEM parts is the optimal decision for guaranteeing superior quality and perfect performance. These components undergo stringent quality checks and are carefully constructed to comply with GM's factory specifications, ensuring a smooth installation process.

ChevyPartsGiant.com is a leading supplier of genuine GM parts such as GM 12601240 Oil Pan, Green Line. Our website boasts an extensive inventory of OEM GM parts, available at highly competitive prices in the market. Should you require any new genuine GM parts, rest assured we will deliver them swiftly and efficiently to your doorstep. Furthermore, all our parts come with the assurance of a manufacturer's warranty. For detailed Chevy parts information, click here.
Choose ChevyPartsGiant for discounted prices, exceptional service and fast delivery