Make sure this part fits

GM 12591689
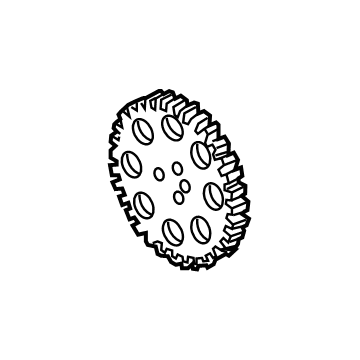
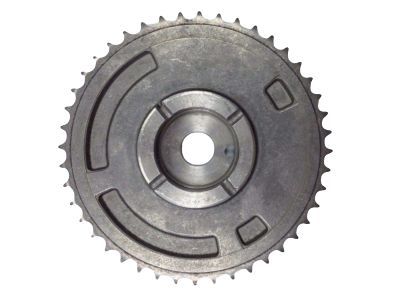
Camshaft Gear

2007-2017 GM

Customer Questions & Expert Answers (24)
GM 12591689 Camshaft Gear
  • Part Description
    Sprocket, Engine Camshaft
  • Manufacturer
    General Motors
Make sure this part fits
$23.14 MSRP: $38.11
You Save: $14.97 (40%)
Ships in 1-2 Business Days
1
ADD TO CART
  • Related Parts
  • Product Specifications
  • Vehicle Fitment
  • Customer Questions & Expert Answers
  • Product Specifications

    BrandGenuine GM
    Manufacturer Part Number12591689
    Part DescriptionSprocket, Engine Camshaft
    Other NamesTiming Gear
    Item Dimensions5.8 x 5.5 x 3.1 inches
    Item Weight1.40 Pounds
    ConditionNew
    Fitment TypeDirect Replacement
    ManufacturerGeneral Motors
    SKU12591689
    WarrantyThis genuine GM part is guaranteed by GM's factory warranty.
    Shipping & ReturnShipping Policy Return Policy
    Warning: California's Proposition 65
  • Vehicle Fitment

    Year Make Model Trim Engine
    2008-2009 Buick LaCrosseSuper8 Cyl 5.3 L GAS
    2007 Buick RainierCXL8 Cyl 5.3 L GAS
    2009-2011 Cadillac CTSV8 Cyl 6.2 L GAS
    2007-2009 Chevrolet AvalancheLS, LT, LTZ8 Cyl 5.3 L FLEX, 8 Cyl 5.3 L GAS
    2010-2015 Chevrolet CamaroSS, ZL18 Cyl 6.2 L GAS
    2011-2016 Chevrolet CapricePPV8 Cyl 6.0 L FLEX
    2009 Chevrolet ColoradoLT8 Cyl 5.3 L GAS
    2007-2013 Chevrolet CorvetteBase, Grand Sport8 Cyl 6.0 L GAS, 8 Cyl 6.2 L GAS
    2008-2010 Chevrolet Express 1500Base, LS, LT8 Cyl 5.3 L FLEX, 8 Cyl 5.3 L GAS
    2008-2010 Chevrolet Express 2500Base, LS, LT8 Cyl 4.8 L FLEX, 8 Cyl 4.8 L GAS, 8 Cyl 6.0 L FLEX, 8 Cyl 6.0 L GAS
    View More
  • Customer Questions & Expert Answers

    Q:
    Is this 12591689 designed for my car? Posted by ChevyPartsGiant Specialist
    A:
    Please Select Your Vehicle model to see if part number 12591689 is suitable before ordering.
    Posted by ChevyPartsGiant Specialist
    Q:
    How to replace the Cam Gear on Bank 1 (Right Side) Exhaust on Buick LaCrosse? Posted by Customer
    A:
    You need to have en 46108 Timing Chain retention tool (EN 46108) ready when replacing the camshaft position actuator on bank 1 (Right Side) exhaust. First strip out all parts including upper and lower intakes along with the camshaft cover. Eliminate both camshaft position sensors and the intake camshaft position actuator solenoid. Move the crankshaft balancer forward and press the crankshaft once to place both exhaust camshafts equally between their intake and exhaust positions. You should use an open-end wrench at the camshaft hex point to prevent turning the camshaft while you unscrew the camshaft position actuator bolt. Fasten the en 46108 Timing Chain retainer as you push it into the correct position and mark the chain position for future assembly reference. Take out the bolt and actuator of the right exhaust camshaft position actuator. Timing chain and camshaft position actuator should line up their marks before loosely installing the camshaft actuator bolt and removing en 46108. First tighten the camshaft position actuator while also fitting the intake camshaft position actuator solenoid and camshaft sensors. After you put back the camshaft cover you should connect both the intake manifolds together.
    Posted by ChevyPartsGiant Specialist
    Q:
    How to replace the Cam Gear on Bank 2 (Left Side) Exhaust on Buick LaCrosse? Posted by Customer
    A:
    Begin the bank 2 exhaust camshaft position actuator replacement by removing both upper and lower intake manifolds. You need to remove the camshaft cover from the left side as well as the camshaft sensors. You should separate the camshaft position actuator solenoid next. Turn the crankshaft balancer clockwise with the bolt at hand to place the camshafts in neutral as camshaft flats match up to the camshaft cover rail. Set up 1 open-end wrench at the camshaft hex end to stop it from rotating while you loosen the camshaft position actuator bolt. We need the en 46108 Timing Chain retention tool to keep the Timing Chain in place as we mark the position of the chain and camshaft position actuators for specific assembly. Tilt the exhaust camshaft position actuator and turn off the camshaft position actuator bolt before pulling out the left exhaust camshaft position actuator. At installation position the bolt between Timing Chain and camshaft marks before partially installing the bolt then removing en 46108. Tighten the camshaft position actuator bolt with the open-end wrench to prevent its movement. Reinstall the camshaft position actuator solenoid along with camshaft sensors under the camshaft cover and upper Intake Manifold.
    Posted by ChevyPartsGiant Specialist
    Q:
    How to replace the Cam Gear on the Camshaft Position Exhaust Actuator on Buick Rainier? Posted by Customer
    A:
    Before starting the camshaft position exhaust actuator replacement process get the following necessary tools: working with torque angle meter (J 36660-A) and Timing Chain retention tool (J 44217) will be needed to start this repair process. Torque angle meter (J 36660-A) and Timing Chain retention tool (J 44217). Start by taking off the camshaft cover and rotate the engine to position the exhaust camshaft position actuator where its delphi label is parallel with the intake surface. Begin by taking out the top chain guide bolts followed by the top chain guide removal. Use the timing mark on the exhaust camshaft position actuator sprocket to indicate a reference point which marks a link across from it. Attach the Timing Chain retention tool (J 44217) by hooking it into one of the Timing Chain links surrounding the Timing Chain shoe on both sides of the engine then tighten the wingnuts while maintaining secure placement of the gage blocks on the head's edge. First remove the exhaust camshaft position actuator bolt then remove the actuator from the installation. During installation position the exhaust camshaft actuator inside the Timing Chain with caution towards aligning the marked link to the sprocket timing mark while maintaining activation of the alignment pin. The engine will face damage if the actuator is not advanced to its full position during installation. Screw in the exhaust camshaft actuator bolt to 25 n.m (18 lb ft) initial torque followed by torque angle meter (J 36660-A) final torque to 135 degrees. Follow these steps to replace the Timing Chain retention tool (J 44217) by installing the top chain guide and treating top chain guide bolt threads with threadlocker before you bolt down the top chain guide bolts to 10 n.m (89 lb in). Finally, reinstall the camshaft cover.
    Posted by ChevyPartsGiant Specialist
    Q:
    How to replace the Cam Gear for Bank 2 on Chevrolet Camaro? Posted by Customer
    A:
    The replacement of bank 2 camshaft position actuator starts with removing both the Intake Manifold and the left camshaft cover. The maintenance process starts with sensor removal of the left intake and exhaust camshaft position sensors and additional removal of left intake and exhaust camshaft position actuator solenoids. You should turn the crankshaft balancer bolt to a clockwise direction so the camshafts reach their neutral position before marking the camshaft Timing Chain and position actuators for reassembly. Mark appropriate positions on the Timing Chain links and the neighboring teeth on both the intake and exhaust camshaft position actuators. With an open-end wrench during this procedure grip the camshafts to move them in unison and produce chain slack before removing the en-48313 (Timing Chain Retention Tool) so its legs can retract. Place the en-48313 tool between the front-facing camshaft actuators and adjust its legs to reach the Timing Chain until they just stop but avoid tightening down. After hand-tightening the tool you need to rotate the camshafts to generate additional slack. The brevity of the tool allows it to maintain position of the Timing Chain. An open-end wrench serves as a tool to stop engine rotation before removing the camshaft position actuator bolts so the actuators can be taken off when needed. Begin actuator installation by aligning marks from the actuator to marks on the Timing Chain which were established during removal then place the parts while keeping the bolts loose. Take the en-48313 tool off before installing the correct camshaft thrust washer according to the number of actuator attaching screws. Reapply the new actuator bolts with a torque of 58 nm (43 lb ft) when the actuator needs replacement. The last stage includes reinstallation of the left intake and exhaust camshaft position actuator solenoids along with sensors and left camshaft cover and Intake Manifold.
    Posted by ChevyPartsGiant Specialist
    Q:
    How to replace the Cam Gear intake sprocket on Chevrolet Colorado? Posted by Customer
    A:
    The first step involves eliminating the Camshaft cover before commencing with the inlet sprocket replacement task. The clockwise rotation of the Crankshaft should stop when the #1 Piston hits top dead center (TDC) in its compression cycle. The timing chain link next to the intake Camshaft sprocket timing mark should be marked before proceeding with the replacement. Fit the Camshaft holding tool (J 44221) at the rear end of both camshafts. Both tools should enter a timing chain link near the timing chain shoe on each side of the engine after setting them onto the timing chain retention tool (J 44217) and chain holding tool (J-44217-45). Then tighten the wingnuts and check that the hooks stay secure. The technician removes and discards the intake Camshaft sprocket bolt before extracting the intake Camshaft sprocket. Install the sprocket by using a 25 mm (1 in) wrench to maintain Camshaft hex alignment while setting the marked link to the intake Camshaft sprocket timing mark until the pin secures correctly. In this step the intake Camshaft sprocket receives its installation onto the intake Camshaft followed by the addition of a new intake Camshaft sprocket bolt which must be tightened to 20 nm (15 lb ft) together with an additional 100 degrees using the angle meter (J 45059). Reinstall the Camshaft cover after removing both the timing chain retention tool (J 44217) and chain holding tool (J-44217-45) and the Camshaft holding tool (J 44221).
    Posted by ChevyPartsGiant Specialist
    Q:
    How to replace the Cam Gear position actuator on Chevrolet Express 2500? Posted by Customer
    A:
    The beginning step to replace the Camshaft position actuator involves stripping out the Oil Pump from its installation position. The removal and installation process of the cmp actuator solenoid valve (234) requires attention to the reluctor wheel since it contains three roll pins which could harm users if detached during operation. Start by breaking free the cmp actuator together with the Timing Chain from the Camshaft before removing both components (235 and 208). Screw a tie strap through the actuator center extending it over the reluctor wheel. The installation process requires the compression of Timing Chain tensioner guide before applying en 46330 timing belt tensioner retaining pin (EN 46330). The cmp actuator should connect to its proper location on the Camshaft locating pin while the sprocket teeth simultaneously mesh and the sprocket alignment marks display alignment between the Camshaft and crankshaft components. Position the cmp actuator at the Camshaft while its rear opening faces the locating pin of the Camshaft. The installation requires a straight edge tool to check the front engine block face for Timing Chain excess. Place the new cmp actuator solenoid valve model 234 and torque it by hand until it reaches regular tightness. The sprocket alignment requires inspection where the cmp actuator sprocket should position at 6 o'clock while the crankshaft sprocket rests at 12 o'clock. Begin by removing the en 46330 and apply torque to the cmp actuator solenoid valve using the first sequence to 65 n.m (48 lb ft) followed by a second sequence of 90-degree rotation using the j 45059 angle meter (J 45059). Finally, reinstall the Oil Pump.
    Posted by ChevyPartsGiant Specialist
    Q:
    How to replace the Cam Gear on Chevrolet Express 3500? Posted by Customer
    A:
    The first step for Camshaft position actuator replacement involves removal of the Oil Pump unit. The next step requires the removal of the Camshaft position (CMP) actuator solenoid valve (234). When dealing with the reluctor wheel do not apply force because 3 roll pins keep it in place and sudden movement may result in serious injuries. Unfasten the cmp actuator from the Camshaft by moving it away from the Camshaft not touching the reluctor wheel. Secure a tie strap through the center of the actuator while it spans the reluctor wheel. The en 46330 installation requires the compression of the Timing Chain tensioner guide. Position the cmp actuator correctly onto the Camshaft locating pin while the sprocket teeth fit together and the two sprocket alignment marks on the Camshaft and crankshaft match up. Attach the new cmp actuator solenoid valve (234) to the Camshaft by threading it there with light hand pressure until it fits snugly. The sprocket alignment should be checked where the cmp actuator sprocket mark faces 6 o'clock while the crankshaft sprocket mark points at 12 o'clock. First tighten the cmp actuator solenoid valve to 65 nm (48 lb ft), followed by another 90-degree rotation when using tool j 45059. After this point remove the en 46330. Finally, reinstall the Oil Pump.
    Posted by ChevyPartsGiant Specialist
    Q:
    How to replace the Cam Gear on Chevrolet Tahoe? Posted by Customer
    A:
    The first step to change the Camshaft position actuator requires removal of the Oil Pump. The cmp actuator solenoid valve (234) should be thrown out next. Keep away from applying force to the reluctor wheel throughout removal and installation procedures since its retention comes from three roll pins and any sudden motion can lead to personal injuries. The cmp actuator and Timing Chain must be detached from the Camshaft both loosened and separated while maintaining the reluctor wheel free of pulling forces. Connect a tie strap through the cmp actuator (235) midsection before placing it over the reluctor wheel. The en 46330 needs to be installed after compressing the Timing Chain tensioner guide. Install the cmp actuator on the Camshaft locating pin while ensuring the mesh of sprocket teeth alongside the Camshaft and crankshaft sprocket alignment marks. Mount the cmp actuator on the Camshaft while making it align with the locating pin. When installing the actuator maintain straight insertion until it reaches its full length and apply no pressure to the reluctor wheel. Examine the installation by applying a similar tool across the engine block and make sure that the Timing Chain parts do not extend beyond the block. Secure the new cmp actuator solenoid valve (234) by hand-twisting the unit until it becomes snug. Verify that the sprocket alignment is correct where the cmp actuator sprocket has its mark at the 6 o'clock position versus the crankshaft sprocket mark at the 12 o'clock position. Begin by removing en 46330 and apply torque to the cmp actuator solenoid valve at 65 nm (48 lb ft) and proceed another 90 degrees with j 45059. Finally, reinstall the Oil Pump.
    Posted by ChevyPartsGiant Specialist
    Q:
    How to replace the Cam Gear Actuator on Chevrolet Silverado 1500? Posted by Customer
    A:
    The replacement of the camshaft position actuator requires en 46330 timing belt tensioner retaining pin (EN 46330) and j 45059 angle meter (J 45059). Start the replacement by extracting the Oil Pump while getting rid of the camshaft position (CMP) actuator solenoid valve (234). It is essential to handle the reluctor wheel with care because its three roll pins serve as its securing mechanism and a sudden removal or installation could result in injury. Remove the cmp actuator together with the Timing Chain from the camshaft by carefully loosening their connections and avoid pulling on the reluctor wheel. Place a tie strap through the cmp actuator central hole to secure it over the reluctor wheel. The en 46330 can be installed by compressing the Timing Chain tensioner guide. The cmp actuator needs to be placed accurately onto the camshaft locating pin as the sprocket teeth must engage properly while both sprocket alignment marks should match exactly. Correctly orient the cmp actuator by placing its rear hole onto the camshaft locating pin before installing it with the Timing Chain. A straight edge across the engine block front face should be used to check that the Timing Chain stays inside the specified area. Fasten the new cmp actuator solenoid valve (234) by hand only until it achieves a firm fit. The sprocket alignment requires checking because the cmp actuator sprocket mark should face 6 o'clock while the crankshaft sprocket mark must point to 12 o'clock. Secure the en 46330 and operate the cmp actuator solenoid valve using j 45059 to reach 65 n.m (48 lb ft) torque while rotating it an additional 90 degrees. Finally, reinstall the Oil Pump.
    Posted by ChevyPartsGiant Specialist
    Q:
    How to replace the Cam Gear on the Camshaft Position Exhaust Actuator on Chevrolet Trailblazer? Posted by Customer
    A:
    The first step to replace the camshaft position exhaust actuator requires removal of the camshaft cover. Secure the engine rotation to position the delphi designation on exhaust camshaft position actuator straight along the Cylinder Head to cam cover mating surface. You need to use the timing mark on the exhaust camshaft position actuator sprocket to mark the adjacent timing chain link. Use the timing chain retention tool j-44217 by inserting its hook section into a timing chain link next to the shoe on both engine sides. Tighten the wingnuts while maintaining hook placement and gage block securement over the head's edge. Begin by taking out both the exhaust camshaft position actuator bolt along with the complete actuator. To install the exhaust camshaft actuator place it inside the timing chain while fitting the marked link to the timing mark of the exhaust camshaft position actuator sprocket before engaging the alignment pin between actuator and camshaft. Place the actuator on the exhaust camshaft before tightening the actuator bolt to 25 n.m (18 lb ft) and proceed with the torque angle meter (J 36660-A) to complete an additional 135-degree torque. After removal of the timing chain retention tool (J-44217) install the camshaft cover.
    Posted by ChevyPartsGiant Specialist
    Q:
    How to replace the Cam Gear on the Camshaft Position Exhaust Actuator on GMC Envoy? Posted by Customer
    A:
    Start the camshaft position exhaust actuator replacement by taking out the camshaft cover. Turn the engine until delphi becomes visible on the exhaust camshaft position actuator which should be parallel with the Cylinder Head to cam cover mating surface. Use the timing indicator on the exhaust camshaft position actuator sprocket to mark a Timing Chain link which directly faces it. Use installation tool j-44217 to position its hooks through Timing Chain links by the times chain shoes at both engine sides so the gage blocks securely rest on the engine head's edges before tightening wingnuts. The installation requires removing the exhaust camshaft position actuator bolt before extracting the actuator from its mounting place. The exhaust camshaft actuator installation requires slotting it into the Timing Chain with the marked link facing the sprocket timing mark while ensuring the alignment pin engages between camshaft and actuator components. Position the actuator on the exhaust camshaft before applying an initial torque of 25 nm (18 lb ft) then finish securing it with the torque angle meter (J 36660-A) until reaching 135 degrees torque. To finish the installation replace the camshaft cover when the Timing Chain retention tool (J-44217) has been removed.
    Posted by ChevyPartsGiant Specialist
    Q:
    How to replace the Cam Gear on GMC Savana 1500? Posted by Customer
    A:
    The first step for Camshaft position actuator replacement involves removal of the Oil Pump unit. The next step requires the removal of the Camshaft position (CMP) actuator solenoid valve (234). When dealing with the reluctor wheel do not apply force because 3 roll pins keep it in place and sudden movement may result in serious injuries. Unfasten the cmp actuator from the Camshaft by moving it away from the Camshaft not touching the reluctor wheel. Secure a tie strap through the center of the actuator while it spans the reluctor wheel. The en 46330 installation requires the compression of the Timing Chain tensioner guide. Position the cmp actuator correctly onto the Camshaft locating pin while the sprocket teeth fit together and the two sprocket alignment marks on the Camshaft and crankshaft match up. Attach the new cmp actuator solenoid valve (234) to the Camshaft by threading it there with light hand pressure until it fits snugly. The sprocket alignment should be checked where the cmp actuator sprocket mark faces 6 o'clock while the crankshaft sprocket mark points at 12 o'clock. First tighten the cmp actuator solenoid valve to 65 nm (48 lb ft), followed by another 90-degree rotation when using tool j 45059. After this point remove the en 46330. Finally, reinstall the Oil Pump.
    Posted by ChevyPartsGiant Specialist
    Q:
    How to replace the Cam Gear on GMC Savana 2500? Posted by Customer
    A:
    Begin by removing the Oil Pump before you start with the Camshaft position actuator replacement. Your next step should be discarding the Camshaft position (CMP) actuator solenoid valve (234). Duringunciation of the reluctor wheel avoid manipulation by force because roll pins maintain its position and extraction might result in safety risks. You should disconnect the cmp actuator and Timing Chain from its position on the Camshaft by pulling the actuator away but not touching the reluctor wheel. Secure a tie strap through the actuator center which must cover the reluctor wheel. During installation compress the Timing Chain tensioner guide while fitting the en 46330 to place the cmp actuator onto the locating pin of the Camshaft with the sprocket teeth properly meshing and alignment marks between the Camshaft and crankshaft sprockets in correct position. Install a fresh cmp solenoid valve when assembling the vehicle. Insert the hole of the cmp actuator through the locating pin on the Camshaft while rotating the sprockets if needed until the actuator touches the Camshaft without touching the reluctor wheel. Use a straight edge to check that the Timing Chain remains inside the engine block's front surface. Use a small amount of hand pressure to install the new cmp actuator solenoid valve (234) into the Camshaft while checking for correct alignment by verifying the cmp actuator sprocket mark faces the 6 o'clock position and the crankshaft sprocket mark aligns with the 12 o'clock position. First install the en 46330 to a torque of 65 nm (48 lb ft) using j 45059 then continue torquing an additional 90 degrees. Finally, reinstall the Oil Pump.
    Posted by ChevyPartsGiant Specialist
    Q:
    How to replace the Cam Gear on GMC Sierra 1500? Posted by Customer
    A:
    When removing the Camshaft position actuator the first step should be to detach the Oil Pump. Second in the process you need to discard the Camshaft position (CMP) actuator solenoid valve (234). The reluctor wheel should be installed and removed without applying pressure or torque because its three roll pins secure the component and result in potential injury. The cmp actuator and Timing Chain attachment needs to be loosened before separating from the Camshaft to pull the actuator away from the reluctor wheel. Place a tie strap through the cmp actuator (235) so it crosses over the reluctor wheel before securing it with a clamping device. The first step of installation includes compressing the Timing Chain tensioner guide before putting on en 46330. Proper placement of the cmp actuator needs to occur on the Camshaft locating pin while the sprocket teeth should mesh together with both sprockets' alignment marks facing each other. Next install the cmp actuator and Timing Chain by matching the actuator hole with the locating pin of the Camshaft before rotating both components to meet up with the timing marks. A straight edge should be used to verify that the Timing Chain remains within the engine block during the installation inspection. Fitting a new cmp actuator solenoid valve (234) should be tightened by hand until only slightly loose. The sprocket alignment needs examination to confirm that both the cmp actuator sprocket mark sits at the 6 o'clock spot and the crankshaft sprocket mark points to the 12 o'clock position. For the en 46330 removal procedure you must first tighten the cmp actuator solenoid valve to 65 nm (48 lb ft) and continue torqueing by 90 degrees using j 45059. Finally, reinstall the Oil Pump.
    Posted by ChevyPartsGiant Specialist
    Q:
    How to replace the Cam Gear on GMC Savana 3500? Posted by Customer
    A:
    The first step for Camshaft position actuator replacement involves removal of the Oil Pump unit. The next step requires the removal of the Camshaft position (CMP) actuator solenoid valve (234). When dealing with the reluctor wheel do not apply force because 3 roll pins keep it in place and sudden movement may result in serious injuries. Unfasten the cmp actuator from the Camshaft by moving it away from the Camshaft not touching the reluctor wheel. Secure a tie strap through the center of the actuator while it spans the reluctor wheel. The en 46330 installation requires the compression of the Timing Chain tensioner guide. Position the cmp actuator correctly onto the Camshaft locating pin while the sprocket teeth fit together and the two sprocket alignment marks on the Camshaft and crankshaft match up. Attach the new cmp actuator solenoid valve (234) to the Camshaft by threading it there with light hand pressure until it fits snugly. The sprocket alignment should be checked where the cmp actuator sprocket mark faces 6 o'clock while the crankshaft sprocket mark points at 12 o'clock. First tighten the cmp actuator solenoid valve to 65 nm (48 lb ft), followed by another 90-degree rotation when using tool j 45059. After this point remove the en 46330. Finally, reinstall the Oil Pump.
    Posted by ChevyPartsGiant Specialist
    Q:
    How to replace the cam gear and timing chain on GMC Yukon? Posted by Customer
    A:
    Begin the camshaft timing chain and sprocket replacement by uninstalling the Oil Pump and Starter motor so j 42386-a (Flywheel Holding Tool) teeth engage with the engine Flywheel. Attach the j 42386-a through a m10-1.5 x 120 mm bolt and a m10-1.5 x 45 mm bolt and torque them to 50 nm(37 lb ft). When the Crankshaft timing marks match those on the sprockets keep the Crankshaft stationary until you finish the chain removal to prevent damage. Begin by removing the camshaft sprocket bolt (206) and continue with the camshaft sprocket (205) and timing chain (208). Then remove the timing chain tension bolts (231) and tensioner (232). The operator needs j 41816-2 (Crankshaft End Protector), j 41558 (Crankshaft Sprocket Remover), bolts together with j 8433 (Puller Bar) for proper removal of the Crankshaft sprocket (207) and its key. To install the sprocket, drop the key into the Crankshaft keyway then push it until both ends touch, position the sprocket (207) alongside the keyway. Insert the j 41478 (Crankshaft Front Oil Seal Installer) together with the j 41665 (Crankshaft Balancer and Sprocket Installer) to correctly position the sprocket against the Crankshaft flange. First compress the Timing Chain Tensioner guide then install the en 46330 (Timing Chain Tensioner Retaining Pin). Following this installation, add the Timing Chain Tensioner (232) and its bolts (231) securing them with 25 nm (18 lb ft). Check that teeth on the sprockets align while their matching marks on the camshaft and Crankshaft sprockets remain accurate. Install the camshaft sprocket at the 6 o'clock mark while adding the timing chain and bolt (206) for examination of correct alignment. Start by using j 45059 (Angle Meter) to tighten the camshaft sprocket bolt to 90 nm (66 lb ft) and then continue the torque directly until the tool reads 40 degrees. The sequence of work concludes with Starter motor installation followed by reinstallation of the Oil Pump.
    Posted by ChevyPartsGiant Specialist
    Q:
    How do you conclude the process for the 2008 Buick LaCrosse? Posted by Customer
    A:
    Reinstall the engine front cover.
    Posted by ChevyPartsGiant Specialist
    See expert answers on similar Cam Gear
    Q:
    What should be done with the retaining bolts of the camshaft position actuators for the 2010 Chevrolet Camaro? Posted by Customer
    A:
    Loosen the retaining bolts, marking the chain's position relative to the actuators.
    Posted by ChevyPartsGiant Specialist
    See expert answers on similar Cam Gear
    Q:
    What comes after installing the primary upper camshaft drive chain guide for the 2009 Cadillac CTS? Posted by Customer
    A:
    Install the primary camshaft drive chain tensioner (LY7/LP1).
    Posted by ChevyPartsGiant Specialist
    See expert answers on similar Cam Gear
    Q:
    What tool is used to create slack in the chain for the 2010 Cadillac CTS? Posted by Customer
    A:
    Use an open-end wrench to rotate the camshafts toward each other to create slack in the chain.
    Posted by ChevyPartsGiant Specialist
    See expert answers on similar Cam Gear
    Q:
    What is the final step in the process for the 2010 Chevrolet Camaro? Posted by Customer
    A:
    Reinstall the engine front cover.
    Posted by ChevyPartsGiant Specialist
    See expert answers on similar Cam Gear
    Q:
    What should be done with the timing chain tensioner guide for the 2010 Chevrolet Corvette? Posted by Customer
    A:
    Compress the timing chain tensioner guide and install the EN 46330.
    Posted by ChevyPartsGiant Specialist
    See expert answers on similar Cam Gear
    Q:
    What tools are needed to hold the camshafts in place for the 2009 GMC Canyon? Posted by Customer
    A:
    Install the Camshaft Holding Tool (J 44221) to the rear of the camshafts.
    Posted by ChevyPartsGiant Specialist
    See expert answers on similar Cam Gear
    If you have any questions about this product, please don't hesitate to ask us. We will be happy to help you!

OEM GM 12591689, Excellent Performance and Perfect Fitment

To ensure reliability, purchase GM part # 12591689 Camshaft Gear. It is sometimes referred to as GM Cam Gear, GM Variable Timing Sprocket. Choosing OEM parts is the optimal decision for guaranteeing superior quality and perfect performance. These components undergo stringent quality checks and are carefully constructed to comply with GM's factory specifications, ensuring a smooth installation process.

ChevyPartsGiant.com is a leading supplier of genuine GM parts such as GM 12591689 Camshaft Gear. Our website boasts an extensive inventory of OEM GM parts, available at highly competitive prices in the market. Should you require any new genuine GM parts, rest assured we will deliver them swiftly and efficiently to your doorstep. Furthermore, all our parts come with the assurance of a manufacturer's warranty. For detailed Chevy parts information, click here.
Choose ChevyPartsGiant for discounted prices, exceptional service and fast delivery