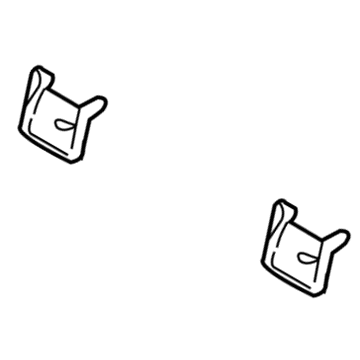
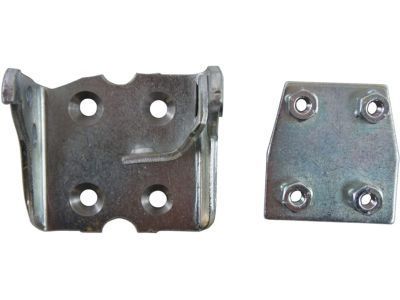
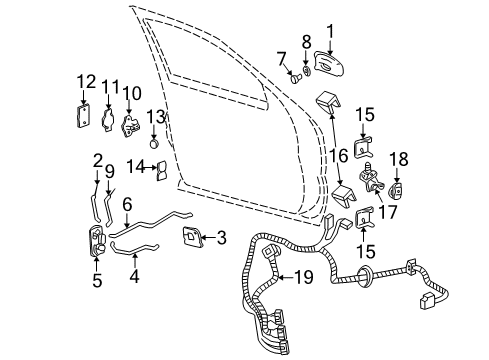
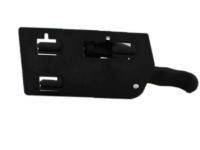
Make sure this part fits

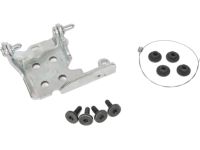
GM 12472843
Lower Hinge, Driver Side

1999-2007 GM

Customer Questions & Expert Answers (21)
GM 12472843 Lower Hinge, Driver Side
  • Part Description
    Hinge Kit, Door Hinge
  • Position
    Driver Side
  • Manufacturer
    General Motors
Make sure this part fits
$64.29 MSRP: $92.79
You Save: $28.50 (31%)
Ships in 1-2 Business Days
1
ADD TO CART
  • Related Parts
  • Product Specifications
  • Vehicle Fitment
  • Customer Questions & Expert Answers
  • Product Specifications

    BrandGenuine GM
    Manufacturer Part Number12472843
    Part DescriptionHinge Kit, Door Hinge
    Other NamesUpper Hinge; Hinge; Door Hinge
    Item Dimensions7.0 x 4.3 x 4.3 inches
    Item Weight1.60 Pounds
    PositionDriver Side
    ConditionNew
    Fitment TypeDirect Replacement
    ManufacturerGeneral Motors
    SKU12472843
    WarrantyThis genuine GM part is guaranteed by GM's factory warranty.
    Shipping & ReturnShipping Policy Return Policy
    Warning: California's Proposition 65
  • Vehicle Fitment

    Year Make Model Trim Engine
    2002-2006 Cadillac EscaladeBase8 Cyl 5.3 L GAS, 8 Cyl 6.0 L GAS
    2003-2006 Cadillac Escalade ESVBase8 Cyl 6.0 L GAS
    2002-2006 Cadillac Escalade EXTBase8 Cyl 6.0 L GAS
    2002-2006 Chevrolet Avalanche 1500Base, LS, LT, North Face, On Road Edition, WBH, Z66, Z718 Cyl 5.3 L FLEX, 8 Cyl 5.3 L GAS
    2002-2006 Chevrolet Avalanche 2500Base, LS, LT8 Cyl 8.1 L GAS
    1999-2007 Chevrolet Silverado 1500Base, Hybrid, LS, LT, LTZ, SS, WT, Z71 Off-Road6 Cyl 4.3 L GAS, 8 Cyl 4.8 L GAS, 8 Cyl 5.3 L FLEX, 8 Cyl 5.3 L FULL HYBRID EV-GAS (FHEV), 8 Cyl 5.3 L GAS, 8 Cyl 6.0 L GAS
    2007 Chevrolet Silverado 1500 ClassicHybrid, LS, LT, SS, WT6 Cyl 4.3 L GAS, 8 Cyl 4.8 L GAS, 8 Cyl 5.3 L FLEX, 8 Cyl 5.3 L FULL HYBRID EV-GAS (FHEV), 8 Cyl 5.3 L GAS, 8 Cyl 6.0 L GAS
    2005-2006, 2001-2003 Chevrolet Silverado 1500 HDBase, LS, LT8 Cyl 6.0 L GAS
    2007 Chevrolet Silverado 1500 HD ClassicLT8 Cyl 6.0 L GAS
    1999-2004 Chevrolet Silverado 2500Base, LS, LT, WT8 Cyl 5.3 L GAS, 8 Cyl 6.0 L BI-FUEL, 8 Cyl 6.0 L CNG, 8 Cyl 6.0 L GAS
    View More
  • Customer Questions & Expert Answers

    Q:
    Is this 12472843 designed for my car? Posted by ChevyPartsGiant Specialist
    A:
    Please Select Your Vehicle model to see if part number 12472843 is suitable before ordering.
    Posted by ChevyPartsGiant Specialist
    Q:
    How to replace the rear door hinge on the body side on Cadillac Escalade? Posted by Customer
    A:
    The first step to install a new rear door hinge on the body side involves removing every associated panel followed by removing all sealer from around the existing hinge and marking its position on the hinge pillar. A 100 grit or finer sandpaper should lightly sand the existing hinge to reveal its four door welds while you puncture the centers to help with drilling future removal steps. Apply center punches to the four weld marks on the original hinge without penetrating into the hinge pillar material. The hole drilling process requires a 13 mm (1/2 in) rotabroach hole saw to penetrate each punch mark on the hinge structure. After using a chisel to remove the hinge you must clean the pillar surface until it becomes level with the service hinge. Set the service hinge inside scribe marks and mark each stud position on the pillar before drilling pilot holes at the center punch marks. The first drilling step involves using a 3 mm (1/8 in) bit for drilling pilot holes at center punch locations but this needs to be followed by drilling 11.5 mm (29/64 in) holes at these same pilot locations for the studs. The procedure requires preparation of uncoated metal surfaces along with the use of an authorized anti-corrosion primer on these areas. Feed fish wire, GM P/N 15017229, through the hinge, the hinge stud hole, and out of the conduit hole in the pillar. Using the wire end on the stud part GM P/N 15017230 you should position the stud while holding the hinge's hole and removing the fish wire. After fitting the pillar with supplied nut GM P/N 11516746 draw the stud tight through each pillar hole before proceeding with other stud installments. Remove each of the service nuts before applying full-bodied caulk to the entire mounting surface of the hinge. Reinstall the pillar-mounted hinge by using the supplied nuts but tighten them to 25 N.m (18 lb ft). First clean all necessary surfaces before sealant application for refinishing purposes after which surfaces need finishing before reinstalling components and lining up their related panels.
    Posted by ChevyPartsGiant Specialist
    Q:
    How to replace the rear door hinge on the body side on Cadillac Escalade ESV? Posted by Customer
    A:
    The first step to install a new rear door hinge on the body side involves removing every associated panel followed by removing all sealer from around the existing hinge and marking its position on the hinge pillar. A 100 grit or finer sandpaper should lightly sand the existing hinge to reveal its four door welds while you puncture the centers to help with drilling future removal steps. Apply center punches to the four weld marks on the original hinge without penetrating into the hinge pillar material. The hole drilling process requires a 13 mm (1/2 in) rotabroach hole saw to penetrate each punch mark on the hinge structure. After using a chisel to remove the hinge you must clean the pillar surface until it becomes level with the service hinge. Set the service hinge inside scribe marks and mark each stud position on the pillar before drilling pilot holes at the center punch marks. The first drilling step involves using a 3 mm (1/8 in) bit for drilling pilot holes at center punch locations but this needs to be followed by drilling 11.5 mm (29/64 in) holes at these same pilot locations for the studs. The procedure requires preparation of uncoated metal surfaces along with the use of an authorized anti-corrosion primer on these areas. Feed fish wire, GM P/N 15017229, through the hinge, the hinge stud hole, and out of the conduit hole in the pillar. Using the wire end on the stud part GM P/N 15017230 you should position the stud while holding the hinge's hole and removing the fish wire. After fitting the pillar with supplied nut GM P/N 11516746 draw the stud tight through each pillar hole before proceeding with other stud installments. Remove each of the service nuts before applying full-bodied caulk to the entire mounting surface of the hinge. Reinstall the pillar-mounted hinge by using the supplied nuts but tighten them to 25 N.m (18 lb ft). First clean all necessary surfaces before sealant application for refinishing purposes after which surfaces need finishing before reinstalling components and lining up their related panels.
    Posted by ChevyPartsGiant Specialist
    Q:
    How to replace the rear door hinge on the body side on Chevrolet Silverado 1500? Posted by Customer
    A:
    The first step to install a new rear door hinge on the body side involves removing every associated panel followed by removing all sealer from around the existing hinge and marking its position on the hinge pillar. A 100 grit or finer sandpaper should lightly sand the existing hinge to reveal its four door welds while you puncture the centers to help with drilling future removal steps. Apply center punches to the four weld marks on the original hinge without penetrating into the hinge pillar material. The hole drilling process requires a 13 mm (1/2 in) rotabroach hole saw to penetrate each punch mark on the hinge structure. After using a chisel to remove the hinge you must clean the pillar surface until it becomes level with the service hinge. Set the service hinge inside scribe marks and mark each stud position on the pillar before drilling pilot holes at the center punch marks. The first drilling step involves using a 3 mm (1/8 in) bit for drilling pilot holes at center punch locations but this needs to be followed by drilling 11.5 mm (29/64 in) holes at these same pilot locations for the studs. The procedure requires preparation of uncoated metal surfaces along with the use of an authorized anti-corrosion primer on these areas. Feed fish wire, GM P/N 15017229, through the hinge, the hinge stud hole, and out of the conduit hole in the pillar. Using the wire end on the stud part GM P/N 15017230 you should position the stud while holding the hinge's hole and removing the fish wire. After fitting the pillar with supplied nut GM P/N 11516746 draw the stud tight through each pillar hole before proceeding with other stud installments. Remove each of the service nuts before applying full-bodied caulk to the entire mounting surface of the hinge. Reinstall the pillar-mounted hinge by using the supplied nuts but tighten them to 25 N.m (18 lb ft). First clean all necessary surfaces before sealant application for refinishing purposes after which surfaces need finishing before reinstalling components and lining up their related panels.
    Posted by ChevyPartsGiant Specialist
    Q:
    How to replace the rear door hinge on the body side on Chevrolet Suburban 2500? Posted by Customer
    A:
    The first step to install a new rear door hinge on the body side involves removing every associated panel followed by removing all sealer from around the existing hinge and marking its position on the hinge pillar. A 100 grit or finer sandpaper should lightly sand the existing hinge to reveal its four door welds while you puncture the centers to help with drilling future removal steps. Apply center punches to the four weld marks on the original hinge without penetrating into the hinge pillar material. The hole drilling process requires a 13 mm (1/2 in) rotabroach hole saw to penetrate each punch mark on the hinge structure. After using a chisel to remove the hinge you must clean the pillar surface until it becomes level with the service hinge. Set the service hinge inside scribe marks and mark each stud position on the pillar before drilling pilot holes at the center punch marks. The first drilling step involves using a 3 mm (1/8 in) bit for drilling pilot holes at center punch locations but this needs to be followed by drilling 11.5 mm (29/64 in) holes at these same pilot locations for the studs. The procedure requires preparation of uncoated metal surfaces along with the use of an authorized anti-corrosion primer on these areas. Feed fish wire, GM P/N 15017229, through the hinge, the hinge stud hole, and out of the conduit hole in the pillar. Using the wire end on the stud part GM P/N 15017230 you should position the stud while holding the hinge's hole and removing the fish wire. After fitting the pillar with supplied nut GM P/N 11516746 draw the stud tight through each pillar hole before proceeding with other stud installments. Remove each of the service nuts before applying full-bodied caulk to the entire mounting surface of the hinge. Reinstall the pillar-mounted hinge by using the supplied nuts but tighten them to 25 N.m (18 lb ft). First clean all necessary surfaces before sealant application for refinishing purposes after which surfaces need finishing before reinstalling components and lining up their related panels.
    Posted by ChevyPartsGiant Specialist
    Q:
    How to replace the front side door hinge on Chevrolet Tahoe? Posted by Customer
    A:
    The first step is to remove all parts connected to the front side door and mark the area around the current hinge on the hinge pillar and only after that remove any excess adhesive there. Run the sandpaper across the hinge by hand to find the four spots that attach it to the pillar and then puncture the center of each of these spots to prepare for effective drilling. Make a center punch on each one of the four old weld marks, but do not drill into the door (1). Use a 13 mm rotabroach hole saw or its alternative to cut through the hinge base (2) at each position, then chisel away the hinge if it is stuck. Wash the area around the door to allow for a right fit of the hinge and then mend all the damage done while removing it. Get the hinge mounting areas of the backing plates ready, fit the hinge onto the scribed marks and carefully mark each hole location on the door with a center punch. After placing the center punches, make a 3 mm (1/8 in) hole at every spot, then drill out each 3 mm hole to make it 11.5 mm (29/64 in). Wash all the exposed metal areas, coat them with an acceptable anti-corrosion primer and seal the hinge area with full-bodied caulk. Place the hinge on one side and the backing plate on the other side of the door, thread in the bolts and tighten them to 25 N.m (18 lb ft). Non-stick sealers should be used on the metal and all necessary panels and components should be refinished; after which, everything is reinstalled and adjusted correctly. Installation of new doors also requires the same steps: first remove all the door-related panels, clean off any old adhesive, sand the existing hinge and mark the spot. Punch the weld marks, use a 13 mm (1/2 in) rotabroach to drill through the bottom of the bed (2) and then detach the hinge. First, clean the surface of the pillar, deal with any issues, put on the service hinge and use center punches to find each stud location. First drill a pilot hole of 3 mm (1/8 in) and afterwards make a hole of 11.5 mm (29/64 in) for the studs. Clean the bare metal sections, treat them with anti-corrosion primer and insert fish wire (1), GM P/N 15017229, both through the hinge and the pillar. Take the stud (2), GM P/N 15017230 and insert it into the wire end, align it properly and finally mount it with the provided nuts GM P/N 11516746. Do the same for all the rest of the studs, remove the nuts, apply caulk under the hinges where they attach to the frame, connect the hinge (2) to the pillar (3) with the supplied nuts and tighten using 25 N.m (18 lb ft). Make surfaces clean and fit for refinishing, coat them with sealers and put back all the panels and components.
    Posted by ChevyPartsGiant Specialist
    Q:
    How to replace the rear side door hinge on Chevrolet Tahoe? Posted by Customer
    A:
    The first step to replace the rear side door hinge involves removing all panels while eliminating extra sealant from the current hinge before marking its location on the hinge pillar. Use 100 grit or finer sandpaper to smooth the existing hinge while finding its four pillar welds but avoid penetrating the door with the centers of punch marks. Drill holes through the hinge at each marked spot using a 13 mm rotabroach hole saw. Additional help can be provided through chiseling to detach the door from the hinge. Welded metal needs complete removal from the door plane to achieve a flat condition for the service hinge to fit. Repair all broken door sections before cleaning the mounting surface areas of the backing plate and installing the service hinge within scribe-marked areas. Drill 3 mm (1/8 in) pilot holes first and follow up with drilling 11.5 mm (29/64 in) holes for the studs at each correct door location marked by center punch. The process requires cleanups of each bare metal area followed by application of approved corrosion-fighting primer and complete application of full-bodied caulk onto the hinge mounting points for adequate sealing purposes. Secure the hinge to the pillar nuts at a torque of 25 N.m (18 lb ft) and then position the hinge alongside the backing plate through the door holes before finishing surfaces according to need and installing sealants followed by putting back all components. The procedure for bodyside hinge replacement involves panel removal before sealer elimination and existing hinge sanding and weld marking with a center punch. Drill through the hinge base only and finish by removing the hinge. Start by cleaning the pillar surface then position the service hinge followed by center punching the stud positions before drilling pilot holes and then drilling for the studs. The technician must clean bare metal surfaces first then apply anti-corrosion primer before installing the stud (GM P/N 15017230) into the hinge with fish wire (GM P/N 15017229). Install the hinge to the pillar using supplied nuts before tightening the stud with nuts (GM P/N 11516746) to 25 N.m (18 lb ft) while cleaning surfaces for subsequent refinishing that includes application of sealers to be followed by reinstallation of all related panels and components.
    Posted by ChevyPartsGiant Specialist
    Q:
    How to replace the rear door hinge on the body side on GMC Sierra 1500? Posted by Customer
    A:
    The first step to install a new rear door hinge on the body side involves removing every associated panel followed by removing all sealer from around the existing hinge and marking its position on the hinge pillar. A 100 grit or finer sandpaper should lightly sand the existing hinge to reveal its four door welds while you puncture the centers to help with drilling future removal steps. Apply center punches to the four weld marks on the original hinge without penetrating into the hinge pillar material. The hole drilling process requires a 13 mm (1/2 in) rotabroach hole saw to penetrate each punch mark on the hinge structure. After using a chisel to remove the hinge you must clean the pillar surface until it becomes level with the service hinge. Set the service hinge inside scribe marks and mark each stud position on the pillar before drilling pilot holes at the center punch marks. The first drilling step involves using a 3 mm (1/8 in) bit for drilling pilot holes at center punch locations but this needs to be followed by drilling 11.5 mm (29/64 in) holes at these same pilot locations for the studs. The procedure requires preparation of uncoated metal surfaces along with the use of an authorized anti-corrosion primer on these areas. Feed fish wire, GM P/N 15017229, through the hinge, the hinge stud hole, and out of the conduit hole in the pillar. Using the wire end on the stud part GM P/N 15017230 you should position the stud while holding the hinge's hole and removing the fish wire. After fitting the pillar with supplied nut GM P/N 11516746 draw the stud tight through each pillar hole before proceeding with other stud installments. Remove each of the service nuts before applying full-bodied caulk to the entire mounting surface of the hinge. Reinstall the pillar-mounted hinge by using the supplied nuts but tighten them to 25 N.m (18 lb ft). First clean all necessary surfaces before sealant application for refinishing purposes after which surfaces need finishing before reinstalling components and lining up their related panels.
    Posted by ChevyPartsGiant Specialist
    Q:
    How to replace the rear door hinge on GMC Yukon? Posted by Customer
    A:
    You should start by removing the rear door side components and related panel followed by removing excessive sealer around the original hinge while you scribe its location on the door. Using 100 grit sandpaper or higher, sand the body hinge gently until you locate the four welds that connect it to the door. Punch these welds within their centers because this will help drilling remove more material. Use the center punch to mark the middle points of the four welds on the original hinge base while avoiding any penetration into the door surface. Use a 13 mm (1/2 in) rotabroach hole saw or equivalent to drill only at the punch locations before extracting the hinge with help from a chisel if needed. Weld removal from the door must be complete to achieve proper fitment of the service hinge. After fixing any injuries sustained by door drilling or removal steps, prepare all backing plate mounting areas for perfect plate alignment. The service hinge should be placed inside scribe mark areas while you center punch each drilling point then create a 3 mm (1/8 in) pilot hole at each center punch spot using a drill before drilling a 13 mm (1/2 in) hole at these pilot positions. Refer to GM4901M-D-2000 for recommended solutions before painting the surface while avoiding paint system combinations according to manufacturer guidelines. All exposed metal areas need preparation before applying anti-corrosion primer and full-bodied caulk should be used to form an effective seal across the whole hinge mounting surface. After positioning the hinge with backing plate through the door holes, bolt them in place before torquing them to 25 N.m (20 ft lb). Sealers should be applied followed by necessary refinishing of metal surfaces before installing and aligning all related panels and components.
    Posted by ChevyPartsGiant Specialist
    Q:
    How to replace the rear door hinge on the body side on GMC Yukon XL 2500? Posted by Customer
    A:
    The first step to install a new rear door hinge on the body side involves removing every associated panel followed by removing all sealer from around the existing hinge and marking its position on the hinge pillar. A 100 grit or finer sandpaper should lightly sand the existing hinge to reveal its four door welds while you puncture the centers to help with drilling future removal steps. Apply center punches to the four weld marks on the original hinge without penetrating into the hinge pillar material. The hole drilling process requires a 13 mm (1/2 in) rotabroach hole saw to penetrate each punch mark on the hinge structure. After using a chisel to remove the hinge you must clean the pillar surface until it becomes level with the service hinge. Set the service hinge inside scribe marks and mark each stud position on the pillar before drilling pilot holes at the center punch marks. The first drilling step involves using a 3 mm (1/8 in) bit for drilling pilot holes at center punch locations but this needs to be followed by drilling 11.5 mm (29/64 in) holes at these same pilot locations for the studs. The procedure requires preparation of uncoated metal surfaces along with the use of an authorized anti-corrosion primer on these areas. Feed fish wire, GM P/N 15017229, through the hinge, the hinge stud hole, and out of the conduit hole in the pillar. Using the wire end on the stud part GM P/N 15017230 you should position the stud while holding the hinge's hole and removing the fish wire. After fitting the pillar with supplied nut GM P/N 11516746 draw the stud tight through each pillar hole before proceeding with other stud installments. Remove each of the service nuts before applying full-bodied caulk to the entire mounting surface of the hinge. Reinstall the pillar-mounted hinge by using the supplied nuts but tighten them to 25 N.m (18 lb ft). First clean all necessary surfaces before sealant application for refinishing purposes after which surfaces need finishing before reinstalling components and lining up their related panels.
    Posted by ChevyPartsGiant Specialist
    Q:
    What is the final step in the installation process for the 2004 Cadillac Escalade EXT? Posted by Customer
    A:
    Install the bolts, tightening the hinge to the pillar nuts to 25 N.m (18 lb ft), then clean and prepare all surfaces for refinishing, apply sealers, refinish as needed, and install and align all related panels and components.
    Posted by ChevyPartsGiant Specialist
    See expert answers on similar Door Hinge
    Q:
    What is the next step after positioning the service hinge for the 2003 Chevrolet Avalanche 1500? Posted by Customer
    A:
    Center punch each hole location and drill a 3 mm (1/8 in) pilot hole followed by an 11.5 mm (29/64 in) hole at each pilot location.
    Posted by ChevyPartsGiant Specialist
    See expert answers on similar Door Hinge
    Q:
    What is the next step after removing the hinge for the 2003 Chevrolet Avalanche 1500? Posted by Customer
    A:
    Clean the pillar surface to ensure a flush fit for the service hinge.
    Posted by ChevyPartsGiant Specialist
    See expert answers on similar Door Hinge
    Q:
    What should be done to the bare metal surfaces for the 2002 Chevrolet Avalanche 2500? Posted by Customer
    A:
    Clean and prepare all bare metal surfaces, applying approved anti-corrosion primer and a full-bodied caulk to the entire hinge mounting surface for a proper seal.
    Posted by ChevyPartsGiant Specialist
    See expert answers on similar Door Hinge
    Q:
    What manual should be consulted prior to refinishing for the 2002 Chevrolet Avalanche 2500? Posted by Customer
    A:
    GM 4901 MD-99 Refinish Manual for recommended products.
    Posted by ChevyPartsGiant Specialist
    See expert answers on similar Door Hinge
    Q:
    What should be applied to all bare metal surfaces for the 2004 Chevrolet Silverado 2500? Posted by Customer
    A:
    An approved anti-corrosion primer.
    Posted by ChevyPartsGiant Specialist
    See expert answers on similar Door Hinge
    Q:
    How do you install the hinge to the pillar for the 2000 Chevrolet Suburban 1500? Posted by Customer
    A:
    Install the hinge to the pillar using the supplied nuts, torquing them to 25 N.m (18 lb ft).
    Posted by ChevyPartsGiant Specialist
    See expert answers on similar Door Hinge
    Q:
    What is the next step after center punching the weld marks for the 2004 Chevrolet Silverado 3500? Posted by Customer
    A:
    Use a 13 mm (1/2 in) rotabroach hole saw to drill through the hinge base at each punch location.
    Posted by ChevyPartsGiant Specialist
    See expert answers on similar Door Hinge
    Q:
    What is the final step in the hinge installation process for the 2001 Chevrolet Suburban 1500? Posted by Customer
    A:
    Apply approved anti-corrosion primer, then a full-bodied caulk to the entire hinge mounting surface for a proper seal. Align the hinge and the backing plate with the holes in the door and install the bolts, tightening them to 25 N.m (18 lb ft). Finally, apply the sealers, refinish the metal surfaces as necessary, and reinstall and align all related panels and components.
    Posted by ChevyPartsGiant Specialist
    See expert answers on similar Door Hinge
    Q:
    What should be done after installing the hinge for the 2001 GMC Yukon XL 1500? Posted by Customer
    A:
    Clean and prepare surfaces for refinishing, apply sealers, and install and align all related panels and components.
    Posted by ChevyPartsGiant Specialist
    See expert answers on similar Door Hinge
    Q:
    What are the final steps after installing the hinge for the 2001 GMC Yukon XL 1500? Posted by Customer
    A:
    Clean and prepare all necessary surfaces for refinishing, apply sealers, refinish as needed, and install and align all related panels and components.
    Posted by ChevyPartsGiant Specialist
    See expert answers on similar Door Hinge
    If you have any questions about this product, please don't hesitate to ask us. We will be happy to help you!

OEM GM 12472843, Excellent Performance and Perfect Fitment

To ensure reliability, purchase GM part # 12472843 Lower Hinge, Driver Side. It is sometimes referred to as GM Door Hinge. Choosing OEM parts is the optimal decision for guaranteeing superior quality and perfect performance. These components undergo stringent quality checks and are carefully constructed to comply with GM's factory specifications, ensuring a smooth installation process.

ChevyPartsGiant.com is a leading supplier of genuine GM parts such as GM 12472843 Lower Hinge, Driver Side. Our website boasts an extensive inventory of OEM GM parts, available at highly competitive prices in the market. Should you require any new genuine GM parts, rest assured we will deliver them swiftly and efficiently to your doorstep. Furthermore, all our parts come with the assurance of a manufacturer's warranty. For detailed Chevy parts information, click here.
Choose ChevyPartsGiant for discounted prices, exceptional service and fast delivery