Popular OEM Cadillac STS Parts
- Body & Hardware Parts View More >
- Steering Parts View More >
- Electrical Parts View More >
- Air & Fuel Delivery Parts View More >
- Charging & Starting Parts View More >
- Engine Parts View More >
- Belts & Cooling Parts View More >
- Suspension Parts View More >
- Driveline & Axles Parts View More >
- Emission Control & Exhaust Parts View More >
- Transmission Parts View More >
- Brakes Parts View More >
Why Buy Genuine Cadillac STS Parts From ChevyPartsGiant.com
Looking for real Cadillac STS parts? ChevyPartsGiant.com may be a better choice to find genuine parts at wallet-friendly prices. We sell only OEM Cadillac STS parts, ensuring perfect fit, reliability, and long-term performance. With our website, you can easily get access to the same parts found at local Cadillac stores. All components are produced by Cadillac and are exclusively fitted on Cadillac STS automobiles. By shopping at our store, you can enjoy the quality of the Cadillac factory without the high prices of brick-and-mortar facilities. We achieve this because we are an online store operating at lower costs, which we pass on to you. We also have a user-friendly platform where you can find and order genuine Cadillac STS parts swiftly. We are here to make your process of restoring a Cadillac STS or dealing with simple repairs quick and inexpensive. We also make it easy to obtain Cadillac STS parts at competitive shipping prices and a team of knowledgeable staff ready to take your order. Choose ChevyPartsGiant.com to save time and money, as well as keep your Cadillac STS in the good condition.
From 2005 until 2011 Cadillac introduced the STS which established major changes in their engineering strategies for luxury sedan production. The Cadillac STS used GM's Sigma platform while providing customers the choice between a 3.6L V6 (LY7/LLT) and a 4.6L Northstar V8 (LH2) performance engine. The Cadillac STS gained better driving capabilities because it advanced from the 5-speed 5L40-E automatic transmission to the 6-speed 6L50 automatic transmission. Customers seeking this luxury sedan model chose between rear-wheel drive (RWD) as standard along with the option to choose all-wheel drive (AWD) for better traction capabilities. The model achieves enduring ride performance because it has a wheelbase measurement of 116.4 inches with a curb weight that reaches 3,922 pounds. The model excels in safety tests leading to its recognition as a safety-focused car. The Cadillac STS includes high-grade genuine parts which provide excellent durability because of its reliable construction. The STS keeps its reputation for excellence because Cadillac continues to upgrade its original equipment manufacturer components throughout the years. The Cadillac STS stands out in the Cadillac lineup with its blend of premium materials and advanced engineering thus attracting customers who want luxurious experiences combined with performance capabilities.
Cadillac STS groups concerns into drivetrain sealing, ignition service, and evaporative emission integrity for clear diagnosis. The STS may leak at the axle pinion seal, causing fluid loss and bearing damage. Look for wetness around the companion flange and dust shield after highway driving. Confirm level, use UV dye, then replace the axle pinion seal and set preload. Measure pinion backlash and inspect metal debris in the housing during service. Verify road noise reduction on the Cadillac STS after the repair. For ignition, the STS uses coil on plug hardware that favors long intervals. At 100,000 miles, install new spark plugs, and inspect coil boots for cracking. Use OEM torque values on plugs and coil fasteners. Check misfire counters, verify smooth idle, and ensure warm restart stability on the Cadillac STS. Evaporative faults appear when the gas cap seal leaks or is left loose. Inspect the gasket, replace the gas cap if damaged, and run an EVAP leak test. Clear codes, complete a city loop, and confirm monitors set on the STS. Across repairs, document fluid levels, ignition data, and EVAP sealing for dependable Cadillac operation.
Cadillac STS Parts Questions & Answers
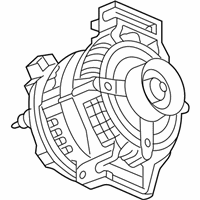
- Q: How to replace the alternator (LLT) (3.6L) on Cadillac STS?A:A procedure for replacing the generator (LLT) (3.6L) begins by removing the battery negative cable. Extract the Drive Belt which operates the generator. Lift and support the vehicle before disconnecting the electrical connector which controls the generator. The generator output bat terminal nut must be removed first for access while you remove the battery positive lead from the generator. Start by unscrewing lower generator bolts then lower the car while you detach the generator upper bolt to extract the generator unit from the engine. Begin generator installation by placing the device onto the engine and afterward securing the generator upper bolt. Set the vehicle back onto its supports and fasten the generator lower mounting bolts to 50 nm torque (37 lb ft torque value). Position the bat terminal boot on the generator while tightening the battery positive lead and the generator bat terminal nut to 13 nm (115 lb in). Begin by connecting the electrical connector to the generator and then conducting the vehicle drop. Next, attach the Drive Belt to the generator. The last step involves connecting the generator's negative Battery Cable.
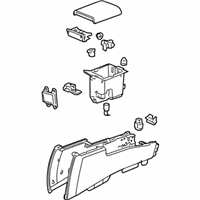
- Q: How to replace the front center console on Cadillac STS?A:Start by removing both the upper console trim and shifter bezel to replace the front floor console. The process requires moving front seats to access bolts after removing them and then disconnecting four console electrical connectors from the instrument panel harness before removing the console. After connecting the 4 console electrical connectors with the instrument panel harness install the center console to its mounting brackets and proceed with accessing the retaining bolts by moving the front seat. Screw in all retaining bolts before applying a torque of 9 N.m (80 lb in). Reinstall both the upper console trim and the shifter bezel to finish the installation.
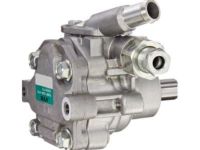
- Q: How to replace the power steering pump on a LY7 engine on Cadillac STS?A:The replacement of the Power Steering Pump (LY7 - Gas, 6 CYL, 3.6L, SFI, V6, Alum) requires the front air deflector and power steering pulley removal followed by placement of a drain pan underneath the vehicle. The air cleaner intake duct removal follows power steering reservoir outlet hose and pressure hose separation from the pump. Finally, you must separate three power steering bracket mounting bolts to extract the Power Steering Pump with its bracket. The Power Steering Pump bracket needs to be detached from its position on the pump. The Power Steering Pump needs attachment to its bracket before reinstalling the complete assembly into the vehicle. The Power Steering Pump bracket installation requires securing it to engine mounting bolts (1, 2 and 3) while tightening them sequentially to 50 n.m (37 lb ft). Replace the power steering pressure hose and reservoir outlet hose after which you must remove the drain pan. After power steering pulley installation a technician must install the air cleaner intake duct before performing power steering system bleeding operations. The last step includes front air deflector replacement.
- Q: How to replace an emblem or nameplate on Cadillac STS?A:Cover the installation area with tape while you use tape as alignment marks to put in the new emblem or nameplate. Apply J 25070 heat gun over the emblem/nameplate with circular strokes for 30 seconds while placing the gun 152 mm (6 in) from the surface. Gently lift the emblem/nameplate away with a plastic flat tool. Apply a 3M(TM) Scotch Brite molding adhesive remover disc for metal parts (3M(TM) part number 07501) or dip a lint-free cloth into VMP naphtha for plastic products before using VMP naphtha or 50/50 isopropyl alcohol mixture. Wipe down the installation space with the cloth and answer using the exact cleaning solution then dry it thoroughly. Place tape over the area when no emblem/nameplate position is indicated. Use the J 25070 (Heat Gun) until the mounting base reaches 27-41°C (80-105°F) if needed. Place the emblem/nameplate on surface sections that read between 85-90°F or 29-32°C without contact with its adhesive side. Set the emblem/nameplate properly based on the marks and securely place it on its mounting spot while distributing your pressure evenly over the entire bonded surface. Take off the protective tape from the selected surface for installation.


