ChevyParts
My Garage
My Account
Cart
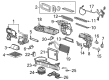
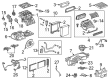
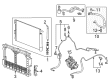
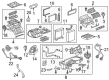
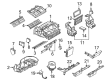
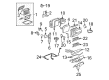
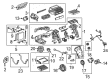
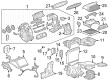
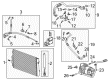
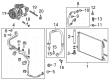
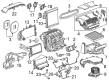
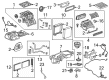
OEM Chevrolet A/C Expansion Valve
Air Conditioning Expansion Valve- Select Vehicle by Model
- Select Vehicle by VIN
Select Vehicle by Model
orMake
Model
Year
Select Vehicle by VIN
For the most accurate results, select vehicle by your VIN (Vehicle Identification Number).
77 A/C Expansion Valves found


Chevrolet Expansion Valve Part Number: 20879991
$55.65 MSRP: $114.37You Save: $58.72 (52%)Ships in 1-2 Business DaysProduct Specifications- Other Name: Valve Kit, Air Conditioner Expansion Refrigerant; A/C Expansion Valve; Valve Kit, A/C Expansion Refrigerant


Chevrolet Expansion Valve Part Number: 95018101
$69.00 MSRP: $141.78You Save: $72.78 (52%)Ships in 1-2 Business DaysProduct Specifications- Other Name: Valve Kit, Air Conditioner Expansion Refrigerant; A/C Expansion Valve; Valve Kit, A/C Expansion Refrigerant

Chevrolet Expansion Valve Part Number: 39141358
$111.48 MSRP: $201.78You Save: $90.30 (45%)Product Specifications- Other Name: Valve Kit, Air Conditioner Expansion Refrigerant; A/C Expansion Valve; Valve Kit, A/C Expansion Refrigerant

Chevrolet Expansion Valve Part Number: 95072672
$80.06 MSRP: $142.96You Save: $62.90 (44%)Ships in 1-3 Business DaysProduct Specifications- Other Name: Valve Kit, Air Conditioner Expansion Refrigerant; A/C Expansion Valve; Valve Kit, A/C Expansion Refrigerant

Chevrolet Expansion Valve Part Number: 15871957
$12.63 MSRP: $22.86You Save: $10.23 (45%)Ships in 1-2 Business DaysProduct Specifications- Other Name: Valve Kit-A/C Evaporator Thermal Expansion; A/C Expansion Valve; Valve Kit, A/C Expansion Refrigerant; Valve Kit, A/C Evaporator
- Replaces: 10364923

Chevrolet Expansion Valve Part Number: 89023423
$45.90 MSRP: $83.07You Save: $37.17 (45%)Ships in 1-2 Business DaysProduct Specifications- Other Name: Valve Kit, A/C Evaporator Thermal Expansion; A/C Expansion Valve; Valve Kit, A/C Expansion Refrigerant

Chevrolet Expansion Valve Part Number: 13363526
$128.23 MSRP: $263.51You Save: $135.28 (52%)Ships in 1-2 Business DaysProduct Specifications- Other Name: Valve Kit, Air Conditioner Expansion Refrigerant; A/C Expansion Valve; Valve Kit, A/C Expansion Refrigerant

Chevrolet Expansion Valve Part Number: 42812173
$55.13 MSRP: $98.44You Save: $43.31 (44%)Ships in 1-2 Business DaysProduct Specifications- Other Name: Valve Kit, Air Conditioner Expansion Refrigerant; Valve Kit, A/C Expansion Refrigerant

Chevrolet Expansion Valve Part Number: 19257722
$73.35 MSRP: $150.74You Save: $77.39 (52%)Ships in 1-2 Business DaysProduct Specifications- Other Name: Valve Assembly, A/C Evaporator Thermal Expansion; A/C Expansion Valve; Valve, A/C Evaporator
- Replaces: 89018286
Chevrolet Expansion Valve Part Number: 84087992
$87.84 MSRP: $164.96You Save: $77.12 (47%)Ships in 1-2 Business DaysProduct Specifications- Other Name: Valve Kit, Air Conditioner Expansion Refrigerant; A/C Expansion Valve; Valve Kit, A/C Expansion Refrigerant

Chevrolet Expansion Valve Part Number: 19318339
$63.71 MSRP: $113.76You Save: $50.05 (44%)Ships in 1-3 Business DaysProduct Specifications- Other Name: Valve Assembly, A/C Evaporator Thermal Expansion; Valve, A/C Expansion Refrigerant
- Replaces: 19316998

Chevrolet Drain Tube Part Number: 84689029
$25.80 MSRP: $46.09You Save: $20.29 (45%)Ships in 1-3 Business DaysProduct Specifications- Other Name: Valve, Air Conditioner Evaporator; Valve, A/C Evaporator Core Housing

Chevrolet Expansion Valve Part Number: 84903545
$28.28 MSRP: $50.51You Save: $22.23 (45%)Ships in 1-2 Business DaysProduct Specifications- Other Name: Valve, Air Conditioner Evaporator; Valve, A/C Expansion Refrigerant

Chevrolet Expansion Valve Part Number: 15278666
$53.36 MSRP: $96.58You Save: $43.22 (45%)Ships in 1-2 Business DaysProduct Specifications- Other Name: Valve Assembly-A/C Evaporator Thermal Expansion; A/C Expansion Valve; Valve, A/C Expansion Refrigerant

Chevrolet Expansion Valve Part Number: 19258417
$51.80 MSRP: $96.67You Save: $44.87 (47%)Ships in 1-2 Business DaysProduct Specifications- Other Name: Valve Kit, Air Conditioner Evaporator; A/C Expansion Valve; Valve Kit, A/C Expansion Refrigerant

Chevrolet Expansion Valve Part Number: 95193297
$44.89 MSRP: $132.94You Save: $88.05 (67%)Ships in 1-3 Business DaysProduct Specifications- Other Name: Valve Kit, Air Conditioner Evaporator; A/C Expansion Valve; Valve Kit, A/C Expansion Refrigerant
- Replaced by: 95423626

Chevrolet Expansion Valve Part Number: 94513099
$44.51 MSRP: $79.48You Save: $34.97 (44%)Ships in 1-3 Business DaysProduct Specifications- Other Name: Valve Kit, Air Conditioner Expansion Refrigerant; A/C Expansion Valve; Valve Kit, A/C Expansion Refrigerant


Chevrolet Expansion Valve Part Number: 20897791
$52.76 MSRP: $94.22You Save: $41.46 (44%)Product Specifications- Other Name: Valve Kit, Air Conditioner Expansion Refrigerant; A/C Expansion Valve; Valve Kit, A/C Expansion Refrigerant

Chevrolet Expansion Valve Part Number: 84432302
$54.36 MSRP: $111.72You Save: $57.36 (52%)Ships in 1-2 Business DaysProduct Specifications- Other Name: Valve Kit, Air Conditioner Expansion Refrigerant; A/C Evaporator; Valve Kit, A/C Expansion Refrigerant; Evaporator, A/C Evaporator

Chevrolet Expansion Valve Part Number: 95920153
$69.64 MSRP: $124.36You Save: $54.72 (44%)Ships in 1-3 Business DaysProduct Specifications- Other Name: Valve Kit, Air Conditioner Expansion Refrigerant; A/C Expansion Valve; Valve Kit, A/C Expansion Refrigerant
| Page 1 of 4 |Next >
1-20 of 77 Results
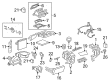
Chevrolet A/C Expansion Valve
Choose OEM A/C Expansion Valve, you're making the optimal decision for superior quality and perfect performance. You can feel confident because each component goes through stringent quality checks. Every part is carefully built to comply with Chevrolet's factory specifications. You'll enjoy a smooth, worry-free installation that fits just right. At ChevyPartsGiant.com, you'll find it easy to get top-quality OEM Chevrolet A/C Expansion Valve. You can shop at highly competitive prices and protect your budget. All our genuine Chevrolet parts include a dependable manufacturer's warranty. You'll also appreciate our straightforward return policy and swift delivery services for extra convenience.
Chevrolet A/C Expansion Valve Parts and Q&A
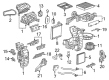
- Q: How to replace the A/C Expansion Valve on Chevrolet Colorado?A:The first step to replace the air conditioning Evaporator thermal expansion valve requires recovering the refrigerant. Start by removing the nut from the txv mounting stud before disconnecting both the Evaporator tube and the compressor suction hose from around the txv. You should begin by throwing away the seal washers before you uninstall and remove the txv and its bolts. New seal washers should be installed to Evaporator core fittings before placing the txv in position and tightening txv bolts to 7 nm (62 lb in). New sealing washers must be installed before connecting the Evaporator tube and compressor suction hose to their respective txv locations. Proper txv nut security occurs through a torque application set to 20 nm (15 lb ft). Evacuate the refrigeration system next while conducting a leak test on the fittings through the utilization of the j 39400-a halogen leak detector.
- Q: How to properly service the A/C Expansion Valve on Chevrolet Malibu?A:The first step to replace the A/C Expansion Valve requires a recovery of refrigerant from the system. You should first unmount the surge tank from its mounting bracket before undoing the suction line and liquid line dash clips. After removing the expansion valve (TXV) nuts from both suction line and liquid line you must disconnect the txv lines from the txv. Pull out the txv components after unfastening the screws while immediately sealing all a/c components to stop contamination and throw away the sealing washers. The installation process requires removing the a/c component covers to install fresh sealing washers. Fasten the txv screws with a torque of 7 nm (62 lb in) during txv installation. After installing the txv attach the liquid line then the suction line securing nuts to 20 nm (15 lb ft). Subsequently reinstall the liquid line and suction line to their dash clips while performing an evacuation and subsequent charge of the refrigerant system. The j 39400-a halogen leak detector should be used to conduct a leak test on all fittings before reinstalling the surge tank to its bracket.


Related Chevrolet Parts
 Chevrolet Blower Motor
 Chevrolet Heater Core
 Chevrolet Ambient Temperature Sensor
 Chevrolet A/C Accumulator
 Chevrolet A/C Compressor Cut-Out Switches
 Chevrolet A/C Condenser
 Chevrolet A/C Hose
 Chevrolet A/C Idler Pulley
 Chevrolet A/C Orifice Tube
 Chevrolet A/C System Valve Core
 Chevrolet Air Temperature Sensor
 Chevrolet Blower Control Switches
Browse Chevrolet A/C Expansion Valve by Models
Colorado Tahoe Cruze Malibu Camaro Equinox Impala SS SSR Silverado 1500 Silverado 2500 HD Caprice Cobalt Suburban Traverse Blazer HHR Sonic Tracker Volt Spark Trax Trailblazer Corvette Aveo Bolt EUV Bolt EV City Express Express 1500 Express 2500 Express 3500 G10 G20 G30 Metro Monte Carlo P30 Uplander Venture Lumina APV Suburban 1500 Trailblazer EXT Aveo5 C1500 Suburban C2500 Suburban Captiva Sport Cruze Limited Impala Limited K1500 Suburban K2500 Suburban Malibu Limited P20 Silverado 1500 LD Silverado 1500 LTD Silverado 3500 HD Spark EV Spectrum Suburban 2500 Suburban 3500 HD