ChevyParts
My Garage
My Account
Cart
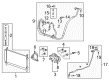
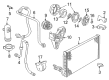
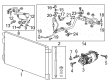
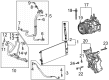
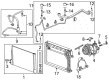
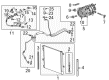
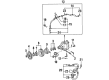
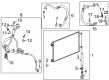
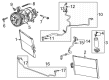
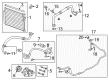
OEM Chevrolet A/C Condenser
Air Conditioning Condenser- Select Vehicle by Model
- Select Vehicle by VIN
Select Vehicle by Model
orMake
Model
Year
Select Vehicle by VIN
For the most accurate results, select vehicle by your VIN (Vehicle Identification Number).
145 A/C Condensers found


Chevrolet Condenser Part Number: 23456530
$217.20 MSRP: $371.95You Save: $154.75 (42%)Ships in 1-2 Business DaysProduct Specifications- Other Name: Condenser Assembly-A/C; A/C Condenser; Condenser, A/C Condenser
- Replaces: 22786866, 22850822, 22886747


Chevrolet Condenser Part Number: 89019255
$127.77 MSRP: $191.00You Save: $63.23 (34%)Ships in 1-2 Business DaysProduct Specifications- Other Name: Condenser Assembly, A/C; A/C Condenser; Condenser A/C; Condenser, A/C Condenser
- Replaces: 52495585, 89019055, 10371432


Chevrolet Condenser Part Number: 23479280
$201.96 MSRP: $345.86You Save: $143.90 (42%)Ships in 1-3 Business DaysProduct Specifications- Other Name: Condenser Assembly-A/C; A/C Condenser; Condenser, A/C Condenser
- Replaces: 22931656, 23428278


Chevrolet Condenser Part Number: 20842140
$285.96 MSRP: $427.44You Save: $141.48 (34%)Ships in 1-3 Business DaysProduct Specifications- Other Name: Condenser Assembly-A/C; A/C Condenser; Condenser, A/C Condenser

Chevrolet Condenser Part Number: 85524339
$168.66 MSRP: $288.86You Save: $120.20 (42%)Ships in 1-2 Business DaysProduct Specifications- Other Name: Condenser Assembly-A/C; Condenser, A/C Condenser
- Replaced by: 85829169
- Replaces: 84650609

Chevrolet Condenser Part Number: 84243592
$366.44 MSRP: $547.76You Save: $181.32 (34%)Ships in 1-2 Business DaysProduct Specifications- Other Name: Condenser Assembly-A/C; A/C Condenser; Condenser, A/C Condenser
- Replaced by: 84655553

Chevrolet Condenser Part Number: 42828834
$132.26 MSRP: $226.47You Save: $94.21 (42%)Ships in 1-3 Business DaysProduct Specifications- Other Name: Condenser Assembly-A/C
- Replaces: 95321794

Chevrolet Condenser Part Number: 89019343
$152.68 MSRP: $228.23You Save: $75.55 (34%)Ships in 1-3 Business DaysProduct Specifications- Other Name: Condenser Assembly, A/C; A/C Condenser; Condenser, A/C Condenser
- Replaces: 89018828, 89018405, 89019147

Chevrolet Oil Cooler Part Number: 84947857
$120.10 MSRP: $205.66You Save: $85.56 (42%)Ships in 1-3 Business DaysProduct Specifications- Other Name: Condenser Assembly-A/C; Condenser; Condenser, A/C Condenser
- Replaced by: 86551896
- Replaces: 23452331

Chevrolet Condenser Part Number: 85134377
$145.23 MSRP: $334.03You Save: $188.80 (57%)Ships in 1-2 Business DaysProduct Specifications- Other Name: Condenser Assembly-A/C; Condenser, A/C Condenser
- Replaced by: 42858343
- Replaces: 84537707

Chevrolet Condenser Part Number: 85557762
$103.23 MSRP: $208.09You Save: $104.86 (51%)Ships in 1-3 Business DaysProduct Specifications- Other Name: Condenser Assembly-A/C; Condenser, A/C Condenser
- Replaced by: 86532090
- Replaces: 22999490, 84504267, 84129805

Chevrolet Condenser Part Number: 52475984
$168.06 MSRP: $394.98You Save: $226.92 (58%)Ships in 1-2 Business DaysProduct Specifications- Other Name: Condenser, A/C; A/C Condenser; Condenser, A/C Condenser

Chevrolet Condenser Part Number: 84621303
$229.91 MSRP: $343.65You Save: $113.74 (34%)Ships in 1-3 Business DaysProduct Specifications- Other Name: Condenser Assembly-A/C; A/C Condenser; Condenser, A/C Condenser
- Replaces: 20936312, 20982844
Chevrolet Oil Cooler Part Number: 84947858
$197.67 MSRP: $338.51You Save: $140.84 (42%)Ships in 1-3 Business DaysProduct Specifications- Other Name: Condenser Assembly-A/C; Condenser; Condenser, A/C Condenser
- Replaced by: 86551897
- Replaces: 22966151, 22799449
Chevrolet Condenser Part Number: 22886747
$217.20 MSRP: $371.95You Save: $154.75 (42%)Ships in 1-2 Business DaysProduct Specifications- Other Name: Condenser, A/C; A/C Condenser
- Replaced by: 23456530

Chevrolet Condenser Part Number: 42798216
$102.82 MSRP: $176.08You Save: $73.26 (42%)Ships in 1-3 Business DaysProduct Specifications- Other Name: Condenser Assembly-A/C; Condenser, A/C Condenser
- Replaced by: 42883250

Chevrolet Condenser, Passenger Side Part Number: 85601834
$127.18 MSRP: $190.10You Save: $62.92 (34%)Ships in 1-2 Business DaysProduct Specifications- Other Name: Condenser Assembly-A/C (Right-Hand Proc); Condenser, A/C Condenser
- Position: Passenger Side
- Replaces: 85106898, 84752395

Chevrolet Condenser Part Number: 20759645
$293.24 MSRP: $457.14You Save: $163.90 (36%)Ships in 1-2 Business DaysProduct Specifications- Other Name: Condenser, A/C; A/C Condenser; Condenser A/C; Condenser, A/C Condenser
- Replaces: 96815553


Chevrolet Condenser Part Number: 25964057
$172.89 MSRP: $258.44You Save: $85.55 (34%)Product Specifications- Other Name: Condenser, A/C; A/C Condenser; Condenser A/C; Condenser, A/C Condenser
- Replaces: 10400147, 15806296, 25844415

Chevrolet Condenser Assembly Part Number: 92277537
$244.81 MSRP: $365.92You Save: $121.11 (34%)Product Specifications- Other Name: Condenser Assembly-A/C; A/C Condenser; Condenser; Condenser, A/C Condenser
- Replaces: 92263224
| Page 1 of 8 |Next >
1-20 of 145 Results
Chevrolet A/C Condenser
Want to cut long-term maintenance and repair costs? Choose OEM A/C Condenser. Those parts deliver top durability you can trust. On our site, you'll find a huge catalog of genuine Chevrolet parts. Prices are unbeatable, so you can keep more in your pocket. Every OEM Chevrolet A/C Condenser includes a manufacturer's warranty. You can also get an easy return policy that keeps buying risk free. Fast delivery, get your car on the road quickly. It's simple to search, compare, and order. Stop guessing about quality or fit. Order today and save with parts that last.
Chevrolet A/C Condenser Parts Questions & Experts Answers
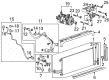
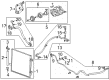
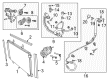
- Q: How to replace the A/C Condenser on Chevrolet Camaro?A:Start by recovering the refrigerant through a halogen leak detector (J 39400-A). The intake duct requires both removal of the air intake duct and disconnection of its iat sensor connector. Proceed by taking off the radiator support followed by raising then supporting the vehicle. First take the air conditioner compressor hose assembly nut off the condenser before throwing away the o-ring. Check out the condenser first and remove the bolt securing the a/c evaporator tube while discarding the o-ring. From the condenser remove both the component radiator air upper baffle and remove the condenser itself from the radiator. The first step for assembly involves setting the condenser directly on the radiator then putting on the radiator air upper baffle. Use a new o-ring and fasten the evaporator a/c tube bolt onto the condenser using 16 n.m of torque (12 lb ft). Attach the condenser to the a/c compressor hose assembly nut after installing a second fresh o-ring but maintain a torque setting of 16 n.m (12 lb ft). After lowering the vehicle you must reattach the radiator support with the air intake duct in place. Finish installation by connecting the intake air temperature (IAT) sensor connector to the air intake duct followed by evacuating and charging the refrigerant system while conducting a halogen leak detector (J 39400-A) inspection on component fittings.
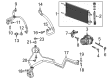
- Q: How to replace the A/C Condenser in the HVAC system on Chevrolet Colorado?A:The necessary tools for condenser replacement in the hvac system begin with the halogen leak detector (J39400-A). Start by taking away the Radiator while also recovering refrigerant from the hvac system. Starting with removal of the receiver dryer followed by the condenser inlet hose bolt and its accompanying inlet hose. After removing the outlet hose bolt first and outlet hose next take off the condenser from its mounts connecting to the Radiator. Refrigerant oil installation follows before new condenser placement enables mounting of the unit onto the Radiator during component migration from the previous condenser. Mount the condenser on the Radiator beforeinstalling its retaining bolts at a torque of 28 n.m (21 lb ft). Secure the receiver dryer onto position first before installing the condenser inlet hose with its bolt and tighten the connection to 20 n.m (15 lb ft). Install the condenser outlet hose with its corresponding bolt followed by bolt tightening to 20 n.m (15 lb ft). The last steps require you to replace the Radiator and perform system evacuations and recharges before running the halogen leak detector (J39400-A) on all fittings.
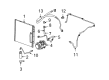
- Q: How to properly service and replace an A/C Condenser on Chevrolet Malibu?A:You must recover the refrigerant before replacing the condenser. Begin by removing the bolt connecting the compressor hose assembly and situate the assembly and evaporator hose assembly apart from the condenser. Disassemble the Radiator component then retrieve the condenser unit from the Radiator housing. Place the condenser in the proper position to the Radiator before tightening its mounting bolts to 10 n.m (89 lb in). Install the Radiator assembly to the vehicle and add cooling system fluid before joining the compressor hose assembly and the evaporator hose assembly to the condenser. The ultimate procedure includes evacuating then charging the refrigerant system.


Related Chevrolet Parts
 Chevrolet Blower Motor Resistor
 Chevrolet Blend Door Actuator
 Chevrolet Heater Control Valve
 Chevrolet A/C Clutch
 Chevrolet A/C Expansion Valve
 Chevrolet A/C Hose
 Chevrolet A/C Orifice Tube
 Chevrolet A/C Switch
 Chevrolet A/C System Valve Core
 Chevrolet Air Temperature Sensor
 Chevrolet Blower Control Switches
 Chevrolet HVAC Pressure Switch
Browse Chevrolet A/C Condenser by Models
S10 Colorado C10 Tahoe Cruze Malibu Camaro Equinox Impala SS SSR Avalanche Silverado 1500 Silverado 2500 HD Caprice Classic Cobalt Suburban Traverse Blazer HHR Sonic Tracker Volt El Camino K10 Spark Trax Trailblazer Astro Cavalier Corvette C20 Aveo Beretta Bolt EUV Bolt EV C1500 C2500 C30 C3500 Celebrity Chevette City Express Corsica Express 1500 Express 2500 Express 3500 G10 G20 G30 K1500 K20 K2500 K30 K3500 K5 Blazer Lumina Metro Monte Carlo P30 Prizm S10 Blazer Silverado 2500 Uplander Venture Lumina APV Silverado 3500 Suburban 1500 Trailblazer EXT Avalanche 1500 Avalanche 2500 Aveo5 C10 Suburban C1500 Suburban C20 Suburban C2500 Suburban Captiva Sport Citation II Cruze Limited Impala Limited K10 Suburban K1500 Suburban K20 Suburban K2500 Suburban Malibu Limited P20 R10 R10 Suburban R1500 Suburban R20 R20 Suburban R2500 R2500 Suburban R30 R3500 Silverado 1500 Classic Silverado 1500 HD Silverado 1500 HD Classic Silverado 1500 LD Silverado 1500 LTD Silverado 2500 HD Classic Silverado 3500 Classic Silverado 3500 HD Spark EV Spectrum Suburban 2500 Suburban 3500 HD V10 V10 Suburban V1500 Suburban V20 V20 Suburban V2500 Suburban V30 V3500