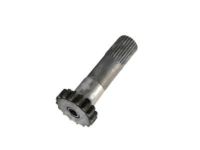
Make sure this part fits

GM 88967027
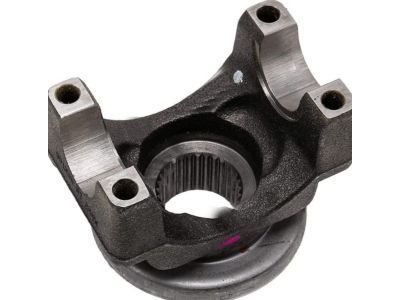
Companion Flange

1988-2014 GM

Customer Questions & Expert Answers (29)
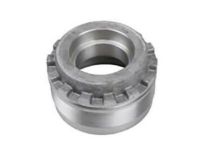
GM 88967027 Companion Flange
  • Part Description
    Flange, Propeller Shaft Pinion
  • Position
    Front
  • Replaces
    15588336
  • Manufacturer
    General Motors
Make sure this part fits
$47.60 MSRP: $116.14
You Save: $68.54 (60%)
1
ADD TO CART
  • Related Parts
  • Product Specifications
  • Vehicle Fitment
  • Customer Questions & Expert Answers
  • Product Specifications

    BrandGenuine GM
    Manufacturer Part Number88967027
    Part DescriptionFlange, Propeller Shaft Pinion
    Other NamesYoke, Propeller Shaft Pinion
    Item Dimensions6.8 x 4.8 x 4.5 inches
    Item Weight2.50 Pounds
    PositionFront
    ConditionNew
    Fitment TypeDirect Replacement
    Replaces15588336
    ManufacturerGeneral Motors
    SKU88967027
    WarrantyThis genuine GM part is guaranteed by GM's factory warranty.
    Shipping & ReturnShipping Policy Return Policy
    Warning: California's Proposition 65
  • Vehicle Fitment

    Year Make Model Trim Engine
    2002-2014 Cadillac EscaladeBase, Hybrid, Hybrid Platinum, Luxury, Platinum, Premium8 Cyl 5.3 L GAS, 8 Cyl 6.0 L FULL HYBRID EV-FLEX (FHEV), 8 Cyl 6.0 L FULL HYBRID EV-GAS (FHEV), 8 Cyl 6.0 L GAS, 8 Cyl 6.2 L FLEX, 8 Cyl 6.2 L GAS
    2003-2006 Cadillac Escalade ESVBase8 Cyl 6.0 L GAS
    2002-2013 Cadillac Escalade EXTBase, Luxury, Premium8 Cyl 6.0 L GAS, 8 Cyl 6.2 L FLEX, 8 Cyl 6.2 L GAS
    2007-2013 Chevrolet AvalancheBlack Diamond LS, Black Diamond LT, Black Diamond LTZ, LS, LT, LTZ8 Cyl 5.3 L FLEX, 8 Cyl 5.3 L GAS, 8 Cyl 6.0 L GAS
    2002-2006 Chevrolet Avalanche 1500Base, LS, LT, North Face, WBH, Z718 Cyl 5.3 L FLEX, 8 Cyl 5.3 L GAS
    2002-2006 Chevrolet Avalanche 2500Base, LS, LT8 Cyl 8.1 L GAS
    1992-1994 Chevrolet BlazerBase, Cheyenne, Silverado, Silverado Sport8 Cyl 5.7 L GAS, 8 Cyl 6.5 L DIESEL
    1988-1999 Chevrolet K1500Base, Cheyenne, LS, Scottsdale, Silverado, Sport, WT6 Cyl 4.3 L GAS, 8 Cyl 5.0 L GAS, 8 Cyl 5.7 L GAS, 8 Cyl 6.2 L DIESEL, 8 Cyl 6.5 L DIESEL
    1992-1999 Chevrolet K1500 SuburbanBase, LS, LT, Silverado8 Cyl 5.7 L GAS, 8 Cyl 6.5 L DIESEL
    1988-2000 Chevrolet K2500Base, Cheyenne, LS, Scottsdale, Silverado, WT6 Cyl 4.3 L GAS, 8 Cyl 5.0 L GAS, 8 Cyl 5.7 L CNG, 8 Cyl 5.7 L GAS, 8 Cyl 6.2 L DIESEL, 8 Cyl 6.5 L DIESEL, 8 Cyl 7.4 L GAS
    View More
  • Customer Questions & Expert Answers

    Q:
    Is 88967027 compatible with my car? Posted by ChevyPartsGiant Specialist
    A:
    Please Select Your Vehicle model to see if part number 88967027 is suitable before ordering.
    Posted by ChevyPartsGiant Specialist
    Q:
    How to replace the rear axle shaft or gasket on Chevrolet Avalanche 1500? Posted by Customer
    A:
    A mechanic should begin repairs on the rear Axle Shaft or gasket by lifting the vehicle and removing the tire and wheel because these steps will allow access to the necessary components. First separate the flange bolts then lightly strike the Axle Shaft using a soft-faced hammer to facilitate its removal. Start the removal process by holding the rib on the Axle Shaft flange with locking pliers then twisting it in order to extract the shaft. The Axle Shaft can be removed after freeing it from its position and you can discard the gasket to clean both the Axle Shaft flange and the outside section of the hub assembly. Begin the procedure by putting the gasket on the Axle Shaft before you put the combined assembly through the axle tube to synchronize the differential side gear with the shaft splines. Position the holes of the hub with the flange and gasket and screw the axle flange bolts by tightening them to 156 nm (115 ft. Lbs.). Replace the tire and wheel assembly before reviewing axle lubricant needs and adding it to the axle housing as necessary. Then lower the vehicle to its regular position.
    Posted by ChevyPartsGiant Specialist
    Q:
    How to replace the rear axle shaft or gasket on Chevrolet Silverado 1500 Classic? Posted by Customer
    A:
    The replacement process for the rear Axle Shaft and gasket starts with removing flange bolts before one taps the Axle Shaft softly with a hammer to separate it. Begin the removal by twisting locking pliers onto the rib on the Axle Shaft flange. Drive the Axle Shaft from the tube before you remove its gasket to maintain cleanliness between the Axle Shaft flange and hub assembly. Install the gasket onto the Axle Shaft before you put both gasket and Axle Shaft into the tube until the splines connect with the differential side gear. Insert the axle flange holes through the gasket holes before fixing it to the proper hub positions. Then torque in the axle flange bolts. During installation of the 10.5 inch axle bolt torque becomes 156 nm (115 ft. Lbs.) while the 11.5 inch axle requires 185 nm (136 ft. Lbs.). The last step involves checking the axle housing for needed lubrication before performing any required additions.
    Posted by ChevyPartsGiant Specialist
    Q:
    How to replace the rear axle shaft on a 9.75 Inch Axle on Chevrolet Silverado 3500? Posted by Customer
    A:
    Processing the rear Axle Shaft replacement requires initial park brake disengagement followed by vehicle lifting before tire and wheel removal. Begin by removing the rear steering gear assembly and then proceed with removing the Steering Knuckle assembly. The spring-loaded lock clip should be removed from the Axle Shaft's end so it can fit into the axle slot. A screwdriver-type tool may be needed to release the spring-loaded lock clip but pushing the Axle Shaft inward towards the gears helps with its removal process. Allowing any rotation of the Axle Shaft throughout removal will create gear misalignment which will make rebuilding more difficult. Hook the new Axle Shaft to its designated slot and tighten it into place with the spring loaded lock clip. To reassemble the system follow these steps: begin by installing the Steering Knuckle assembly and thereafter put on the rear steering gear assembly and finally secure the tire and wheel assembly before lowering the vehicle.
    Posted by ChevyPartsGiant Specialist
    Q:
    How to replace the rear axle shaft or gasket on Chevrolet Silverado 3500 Classic? Posted by Customer
    A:
    The replacement process for the rear Axle Shaft and gasket starts with removing flange bolts before one taps the Axle Shaft softly with a hammer to separate it. Begin the removal by twisting locking pliers onto the rib on the Axle Shaft flange. Drive the Axle Shaft from the tube before you remove its gasket to maintain cleanliness between the Axle Shaft flange and hub assembly. Install the gasket onto the Axle Shaft before you put both gasket and Axle Shaft into the tube until the splines connect with the differential side gear. Insert the axle flange holes through the gasket holes before fixing it to the proper hub positions. Then torque in the axle flange bolts. During installation of the 10.5 inch axle bolt torque becomes 156 nm (115 ft. Lbs.) while the 11.5 inch axle requires 185 nm (136 ft. Lbs.). The last step involves checking the axle housing for needed lubrication before performing any required additions.
    Posted by ChevyPartsGiant Specialist
    Q:
    How to replace the rear axle shaft and gasket on Chevrolet Suburban 1500? Posted by Customer
    A:
    The first step for replacing both rear Axle Shaft and gasket begins with vehicle elevation and tire and wheel removal. Using a soft-faced hammer you should gently hit the Axle Shaft after removing its flange bolts. Unlock the rib on the Axle Shaft flange using locking pliers for removing the Axle Shaft by rotating the flange. After removing the components proceed to clean the Axle Shaft flange together with the outer surface of the hub assembly. To install start by placing the gasket on the Axle Shaft followed by inserting the Axle Shaft and gasket into the axle tube until the shaft splines match the differential side gear and the holes of axle flange and gasket line up with the hub holes. Fit the axle flange bolts while torquing them to 156 nm (115 ft. Lbs.). Complete the procedure by reinstalling the tire and wheel and inspect the axle for necessary lubricant addition before lowering the vehicle.
    Posted by ChevyPartsGiant Specialist
    Q:
    How to replace the rear axle shaft on 8.6 Inch and 9.5 Inch axles on Chevrolet Silverado 2500? Posted by Customer
    A:
    The process starts with Axle Shaft replacement on 8.6 inch and 9.5 inch axles by lifting the vehicle while removing the tire-wheel assembly then the brake caliper. Start by removing both the rear cover and gasket after that unfasten the bolt which locks the pinion shaft. When the Differential contains no locking mechanism users must remove the pinion shaft. Users with locking differentials can draw back their shaft partially before rotating the case so the pinion shaft engages with the housing. A screwdriver-like tool should rotate the locking mechanism until it reaches alignment with the thrust block. Push the flange of the Axle Shaft towards the Differential direction then remove the c-lock from the button end of the Axle Shaft . Rotating the Axle Shaft during removal must be avoided because misaligned gears will make reassembly more difficult to complete. Pull the Axle Shaft out of the housing. Insert the Axle Shaft into the rear axle housing with care to avoid damaging the seal while letting the splines engage the Differential side gear. Lock the button end of the Axle Shaft when a vehicle lacks a locking Differential. Users with locking differentials should place their c-locks onto axle shafts while maintaining pinion shaft partial withdrawal to achieve thrust block surface flushness. Use shaft flange pressure to insert the lock into the Differential gear and position the pinion shaft hole against the Differential case bolt hole. The new pinion shaft locking bolt must receive 36 nm (27 ft. Lbs.) torque when installing it for 8.6 inch axles or 50 nm (37 ft. Lbs.) torque for 9.5 inch axles. Proceed by installing the rear cover along with its gasket and afterward install the brake caliper and tire and wheel system. Finish the replacement by filling the rear axle with specified fluid then lower the vehicle.
    Posted by ChevyPartsGiant Specialist
    Q:
    How to replace the rear axle shaft on a 9.75 Inch Axle on Chevrolet Tahoe? Posted by Customer
    A:
    Vehicle upkeep begins with releasing the park brake and platform lift of your vehicle while following standard lifting procedures. First remove the tire and wheel assembly before taking away the rear steering gear assembly and Steering Knuckle assembly. After you detach the lock clip from the Axle Shaft's ending slot access point, you need to extract the clip because its springs help it retain its position inside the Axle Shaft's slot. A screwdriver or similar tool must push off the shaft end lock clip before Axle Shaft installation which can be aided through pressing the Axle Shaft forward against the gears. Do not turn the Axle Shaft when removing it because rotation may produce gear alignment issues that create reassembly complications. Fasten the new Axle Shaft by inserting the adjustable spring lock clip onto its end. You should install the Steering Knuckle assembly before adding the rear steering gear assembly and tire and wheel assembly before lowering the vehicle.
    Posted by ChevyPartsGiant Specialist
    Q:
    How to replace the rear axle shaft on an 8.6 Inch Axle with Drum Brakes (NON-VSES) on GMC Sierra 3500 Classic? Posted by Customer
    A:
    You need to support and lift the vehicle before beginning the replacement of the rear Axle Shaft on an 8.6 inch axle with drum brakes (NON-VSES). Start by removing the rear cover together with its gasket and then proceed to unscrew the pinion shaft locking bolt. The pinion shaft removal process varies between axles with conventional locking differentials since you need to pull the shaft partly out then turn the case with the pinion touching the housing. A screwdriver should be used to rotate the lock in the Differential case until it sits correctly against the thrust block. When removing the Brake Drum, push the Axle Shaft flange toward the Differential until the c-lock tool can be extracted from the Axle Shaft button without rotating the shaft to prevent gear misalignment. After setting the Axle Shaft inside the housing you must remove it. To install the Axle Shaft properly insert it into the rear axle housing while letting the splines connect to the Differential side gear. The c-lock should rest on the button end of an Axle Shaft without a locking Differential but should stay off the pinion shaft for axles equipped with this Differential. Drive the Brake Drum onto its position before setting the c-lock onto the Axle Shaft with both ends aligning with the thrust block . Pull the shaft flange away from you to secure the lock into the Differential gear while positioning the hole from the pinion shaft above the Differential case bolt hole. Put on the new pinion shaft locking bolt before tightening it to 34 n.m (25 lb ft). Afterward install the rear cover and gasket then proceed with tire and wheel assembly and fluid addition into the rear axle before lowering the vehicle.
    Posted by ChevyPartsGiant Specialist
    Q:
    How to replace the rear axle shaft on 8.6 and 9.5/9.5LD inch axles on GMC Sierra 3500? Posted by Customer
    A:
    The replacement process for rear axle shafts on 8.6 and 9.5/9.5ld inch axles begins with vehicle suspension and tire and wheel components as well as brake caliper removal. The procedure starts by removing the rear cover together with its gasket before unfastening the pinion shaft locking bolt. The pinion shaft must be removed completely from axles without locking differentials while operatives should remove it partially then rotate the case for those with locking differentials. In this position the pinion shaft should touch the housing. A screwdriver serves to rotate the lock mechanism inside the Differential case until the machined surface directs toward the thrust block. Along with pressing the Axle Shaft flange toward the Differential direction you need to pull out the lock c while taking out the Axle Shaft from the housing without allowing any rotation that might lead to gear misalignment. To avoid damage to the seal while inserting the Axle Shaft into the rear axle housing it should be carefully guided so that spline engagement with the Differential side gear occurs. The button end locking mechanism requires a lock installed on desktop axle shafts yet axles with locking differentials should utilize a c-lock placed on top of the Axle Shaft while maintaining the pinion shaft slightly exposed. The procedure requires you to push the shaft flange out while inserting the lock into the Differential gear and aligning the pinion shaft hole with the Differential case bolt hole. Use the new locking bolt on the pinion shaft and tighten it to 36 nm (27 ft. Lbs.) when using the 8.6 inch axle or 50 nm (37 ft. Lbs.) with the 9.5/9.6ld inch axle. The technician should begin installation by placing the rear cover and gasket followed by the brake caliper before finally installing the tire and wheel assembly and completing the fluid fill in the axle then lowering the vehicle.
    Posted by ChevyPartsGiant Specialist
    Q:
    How to replace the rear axle shaft (8.6 Inch Axle W/JL4) on GMC Yukon XL 2500? Posted by Customer
    A:
    Your first step in replacing the rear Axle Shaft (8.6 Inch Axle W/JL4) starts with vehicle lift-up and removal of the tire and wheel assembly then the brake caliper and rear Wheel Speed Sensor. The process starts by removing the rear cover with its gasket and continues with the pinion shaft locking bolt followed by the pinion shaft itself. The Axle Shaft flange needs to move toward the Differential. A soft-faced mallet can help create clearance for the c-lock if needed. Take the c-lock off the button end of the Axle Shaft but do not rotate the shaft to prevent gear misalignment. Remove the shaft from its position in the housing. The installation requires the use of two tools: an axles remover (J 45859) and slide hammer (J 2619-01). Installation requires inserting the Axle Shaft into the rear axle housing where it should engage the Differential side gear followed by soft-faced mallet tapping to ensure proper seating of the Wheel Speed Sensor ring. Fix the lock onto the Axle Shaft's button end before pulling the shaft flange outward to position the lock correctly inside the Differential gear. Insert the pinion shaft through its hole so it matches the Differential case bolt hole before tightening a new locking bolt to 36 nm (27 ft. Lbs.). Reinstall the rear cover together with gasket followed by rear Wheel Speed Sensor or brake caliper before placing the tire and wheel assembly on. Fill the rear axle then lower the vehicle.
    Posted by ChevyPartsGiant Specialist
    Q:
    How to replace the rear axle shaft or gasket on GMC Sierra 1500 Classic? Posted by Customer
    A:
    The replacement process for the rear Axle Shaft and gasket starts with removing flange bolts before one taps the Axle Shaft softly with a hammer to separate it. Begin the removal by twisting locking pliers onto the rib on the Axle Shaft flange. Drive the Axle Shaft from the tube before you remove its gasket to maintain cleanliness between the Axle Shaft flange and hub assembly. Install the gasket onto the Axle Shaft before you put both gasket and Axle Shaft into the tube until the splines connect with the differential side gear. Insert the axle flange holes through the gasket holes before fixing it to the proper hub positions. Then torque in the axle flange bolts. During installation of the 10.5 inch axle bolt torque becomes 156 nm (115 ft. Lbs.) while the 11.5 inch axle requires 185 nm (136 ft. Lbs.). The last step involves checking the axle housing for needed lubrication before performing any required additions.
    Posted by ChevyPartsGiant Specialist
    Q:
    What is the procedure for axles with a locking differential during installation for the 2008 Cadillac Escalade? Posted by Customer
    A:
    Keep the pinion shaft partially withdrawn and ensure the C-lock is flush with the thrust block before seating it in the differential gear.
    Posted by ChevyPartsGiant Specialist
    See expert answers on similar Axle Shaft
    Q:
    How do you ensure the lock is seated properly in the differential gear for the 2007 Cadillac Escalade? Posted by Customer
    A:
    Pull the shaft flange outward to seat the lock in the differential gear and align the hole in the pinion shaft with the bolt hole in the differential case.
    Posted by ChevyPartsGiant Specialist
    See expert answers on similar Axle Shaft
    Q:
    What should you do to prevent the wheel drive shaft from turning while tightening for the 2005 Cadillac Escalade EXT? Posted by Customer
    A:
    Insert a drift or large screwdriver through the brake caliper into one of the brake rotor vanes.
    Posted by ChevyPartsGiant Specialist
    See expert answers on similar Axle Shaft
    Q:
    What is the final step in the installation process for the 2000 Chevrolet K3500? Posted by Customer
    A:
    Install the axle cap and bolts, tightening them to 20 Nm (15 ft. lbs.).
    Posted by ChevyPartsGiant Specialist
    See expert answers on similar Axle Shaft
    Q:
    What should be done if the bearing cup does not come out completely for the 2000 Chevrolet K3500? Posted by Customer
    A:
    Lift the cross and insert the U Joint Bearing Spacer Remover (J9522-5) between the seal and the bearing cup, then continue pressing.
    Posted by ChevyPartsGiant Specialist
    See expert answers on similar Slip Yoke
    Q:
    What is the torque specification for the hub nut for the 2000 Chevrolet K3500? Posted by Customer
    A:
    Tighten it to 225 Nm (165 ft. lbs.).
    Posted by ChevyPartsGiant Specialist
    See expert answers on similar Axle Shaft
    Q:
    What is the torque specification for the 11.5 inch axle flange bolts for the 2007 Chevrolet Silverado 1500? Posted by Customer
    A:
    Tighten them to 185 N.m (136 lb ft).
    Posted by ChevyPartsGiant Specialist
    See expert answers on similar Axle Shaft
    Q:
    What should be done after installing the axle flange bolts for the 2008 Chevrolet Silverado 1500? Posted by Customer
    A:
    Inspect and add axle lubricant to the axle housing if necessary, following the appropriate lubricant level inspection procedures for the specific axle size.
    Posted by ChevyPartsGiant Specialist
    See expert answers on similar Axle Shaft
    Q:
    What should be done if it has a locking differential for the 2010 Chevrolet Silverado 1500? Posted by Customer
    A:
    Follow the specific steps for its removal; otherwise, proceed to remove the differential pinion gear shaft.
    Posted by ChevyPartsGiant Specialist
    See expert answers on similar Axle Shaft
    Q:
    What is the torque specification for the axle flange bolts for the 11.5 inch axle for the 2008 GMC Sierra 1500? Posted by Customer
    A:
    Tighten them to 185 N.m (136 lb ft).
    Posted by ChevyPartsGiant Specialist
    See expert answers on similar Axle Shaft
    Q:
    How do you align the C-lock for the 2008 GMC Sierra 1500? Posted by Customer
    A:
    Use a screwdriver or similar tool to rotate the C-lock until it aligns with the thrust block.
    Posted by ChevyPartsGiant Specialist
    See expert answers on similar Axle Shaft
    Q:
    What should be done last for the 2006 GMC Sierra 1500? Posted by Customer
    A:
    Fill the rear axle with the proper fluid and lower the vehicle.
    Posted by ChevyPartsGiant Specialist
    See expert answers on similar Axle Shaft
    Q:
    What should be done if it is equipped with a drive axle center cap for the 2004 GMC Yukon? Posted by Customer
    A:
    Take off the drive axle center cap.
    Posted by ChevyPartsGiant Specialist
    See expert answers on similar Axle Shaft
    Q:
    What should be removed after raising for the 2007 GMC Sierra 3500 Classic? Posted by Customer
    A:
    Remove the tire and wheel assembly, followed by the brake caliper.
    Posted by ChevyPartsGiant Specialist
    See expert answers on similar Axle Shaft
    Q:
    What should be done after securing the differential pinion gear shaft for the 2009 GMC Sierra 1500? Posted by Customer
    A:
    Reattach the rear axle housing cover and gasket, then reinstall the wheel speed sensor, brake caliper mounting bracket, rear brake drum if equipped, and finally the tire and wheel assembly.
    Posted by ChevyPartsGiant Specialist
    See expert answers on similar Axle Shaft
    Q:
    What should be checked after installing the axle shaft for the 2010 GMC Yukon? Posted by Customer
    A:
    Check the rear axle shaft end play (0.012 inch per side) and radial play (0.002-0.003 inch).
    Posted by ChevyPartsGiant Specialist
    See expert answers on similar Axle Shaft
    Q:
    How do you remove the lock clip from the axle shaft end for the 2005 GMC Sierra 1500? Posted by Customer
    A:
    The lock clip is spring loaded and fits securely in the axle shaft slot; it may require pushing off with a screwdriver or related tool, and pushing the axle shaft inwards towards the gears can assist in removing the lock clip.
    Posted by ChevyPartsGiant Specialist
    See expert answers on similar Axle Shaft
    If you have any questions about this product, please don't hesitate to ask us. We will be happy to help you!

OEM GM 88967027, Excellent Performance and Perfect Fitment

To ensure reliability, purchase GM part # 88967027 Companion Flange. It is sometimes referred to as GM Axle Shaft, GM Slip Yoke, GM Driveshaft Yokes. Choosing OEM parts is the optimal decision for guaranteeing superior quality and perfect performance. These components undergo stringent quality checks and are carefully constructed to comply with GM's factory specifications, ensuring a smooth installation process.

ChevyPartsGiant.com is a leading supplier of genuine GM parts such as GM 88967027 Companion Flange. Our website boasts an extensive inventory of OEM GM parts, available at highly competitive prices in the market. Should you require any new genuine GM parts, rest assured we will deliver them swiftly and efficiently to your doorstep. Furthermore, all our parts come with the assurance of a manufacturer's warranty. For detailed Chevy parts information, click here.
Choose ChevyPartsGiant for discounted prices, exceptional service and fast delivery