Make sure this part fits

GM 10308247
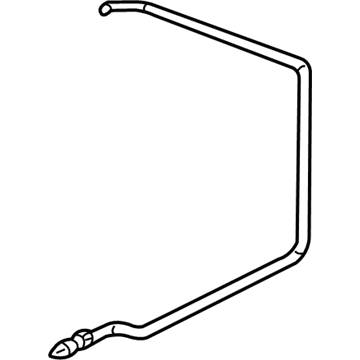
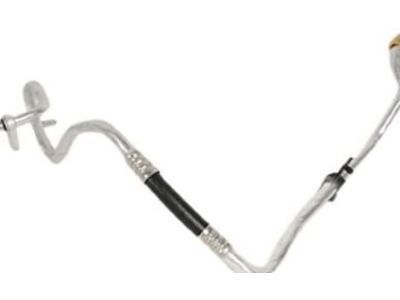
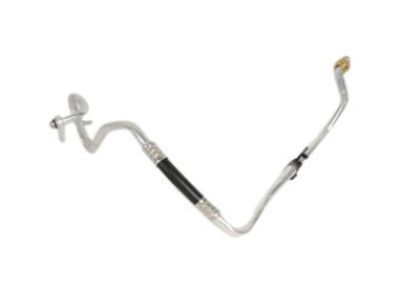
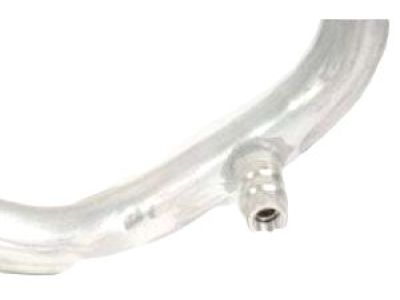
A/C Hose

1999-2005 GM

Customer Questions & Expert Answers (24)
GM 10308247 A/C Hose
  • Part Description
    Evaporator Outlet Hose; A/C Refrigerant Liquid Hose
  • Manufacturer
    General Motors
Make sure this part fits
$51.16 MSRP: $105.14
You Save: $53.98 (52%)
1
ADD TO CART
  • Related Parts
  • Product Specifications
  • Vehicle Fitment
  • Customer Questions & Expert Answers
  • Product Specifications

    BrandGenuine GM
    Manufacturer Part Number10308247
    Part DescriptionEvaporator Outlet Hose; A/C Refrigerant Liquid Hose
    Other NamesA/C Line; Accumulator Tube; Hose; Hose, A/C Refrigerant (Metal And Rubber Sections)
    Item Dimensions22.3 x 11.7 x 19.1 inches
    Item Weight1.20 Pounds
    ConditionNew
    Fitment TypeDirect Replacement
    ManufacturerGeneral Motors
    SKU10308247
    WarrantyThis genuine GM part is guaranteed by GM's factory warranty.
    Shipping & ReturnShipping Policy Return Policy
    Warning: California's Proposition 65
  • Vehicle Fitment

    Year Make Model Trim Engine
    1999-2005 Buick CenturyCustom, Limited, Special Edition6 Cyl 3.1 L GAS
    1999-2004 Buick RegalGS, GSE, LS, LSE6 Cyl 3.8 L GAS
    2000-2003 Chevrolet ImpalaBase, LS, LS Sport6 Cyl 3.4 L GAS, 6 Cyl 3.8 L GAS
    2000-2003 Chevrolet Monte CarloLS, LS Competition, LS Sport, SS, SS 35th Anniversary Edition, SS Dale Earnhardt Signature Edition, SS High Sport, SS Pace Car6 Cyl 3.4 L GAS, 6 Cyl 3.8 L GAS
  • Customer Questions & Expert Answers

    Q:
    Is this 10308247 designed for my car? Posted by ChevyPartsGiant Specialist
    A:
    Please Select Your Vehicle model to see if part number 10308247 is suitable before ordering.
    Posted by ChevyPartsGiant Specialist
    Q:
    How to Replace an A/C Hose in a Compressor Hose Assembly on Buick Century? Posted by Customer
    A:
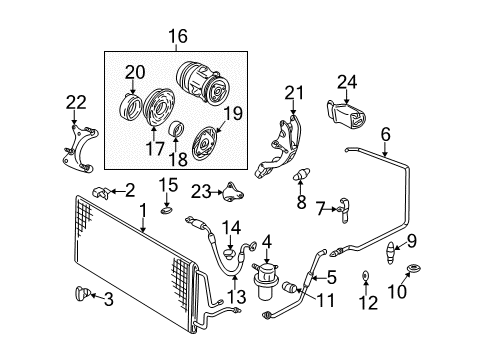
    The compressor hose replacement process starts by detaching the negative Battery Cable followed by removing the air cleaner and duct assembly and removing any present cross vehicle brace. First recover refrigerant and afterward remove the compressor hose nut from the condenser before placing the hose aside. The technician disconnects the compressor hose nut from the accumulator before placing the hose to the side. After raising the car for support the technician must remove the lower air deflector. Remove both compressor line and bolt from their positions before you can take out the compressor hose assembly. All discarded used equipment must be replaced with fresh sealing washers and new o-rings. The new compressor hose assembly requires installation by lubricating the new o-ring with mineral base 525 viscosity refrigerant oil before installing it along with new sealing washers. Secure and connect the compressor hose assembly with its bolt at the compressor location while tightening the bolt to 33 n.m (24 lbft). Install the lower air deflector then lower the vehicle before connecting the compressor hose to the accumulator while tightening the compressor hose nut to 16 n.m (12 lb ft). The compressor hose requires connection to the condenser followed by installation of the compressor hose nut while tightening it to 16 n.m (12 lb ft). Evacuate the system while recharging it before inspecting all components for any sign of leakage. Reinstallation includes the cross vehicle brace when present together with air cleaner and duct assembly followed by negative Battery Cable reconnection.
    Posted by ChevyPartsGiant Specialist
    Q:
    How to Properly Service and Replace the A/C Hose on Buick Regal? Posted by Customer
    A:
    The procedure to replace the compressor hose assembly starts with recovering the refrigerant followed by left front fender upper diagonal brace removal and subsequent air cleaner assembly removal. Remove the a/c compressor hose nut from the hose before detaching it from the condenser unit. You should begin by dislodging the a/c compressor hose nut followed by removing the a/c compressor hose from its connection to the accumulator. Separate the lower air deflector after which take the a/c compressor hose nut off the a/c compressor and detach the a/c compressor hose from the a/c compressor. The replacement process requires disposal of all the decommissioned o-rings and sealing washers. The installation procedure requires mounting new sealing washers to the a/c compressor hose assembly and then fastening the a/c compressor hose to the a/c compressor while tightening the a/c compressor hose nut to 33 n.m (24 lb ft). After installing the lower air deflector the a/c compressor hose assembly needs a new o-ring seal before connecting the hose to the accumulator using an a/c compressor hose nut which should be tightened to 16 n.m (12 lb ft). The a/c compressor hose connects to the condenser by using the a/c compressor hose nut while tightening it to 16 n.m (12 lb ft). The final step includes reinstalling the upper diagonal brace of the left front fender and air cleaner assembly while performing a/c system evacuation and recharging and running a halogen leak detector (J 39400-A) on component fittings.
    Posted by ChevyPartsGiant Specialist
    Q:
    How to replace the A/C Hose Assembly on Buick Regal? Posted by Customer
    A:
    Staring the replacement of the A/C Compressor hose assembly requires the initial step to recover refrigerant. You must begin by taking off the right front fender upper diagonal brace next to removing the air cleaner assembly. Begin by disconnecting the A/C Compressor hose from the condenser after you have taken off the A/C Compressor hose nut . The A/C Compressor hose requires two nut removals to disconnect the hose from both its condenser and accumulator endpoints. Raise the vehicle until stable and support it while you eliminate the lower air deflector. Then discard used o-rings and sealing washers when you remove the nut from the A/C Compressor hose assembly at the A/C Compressor and separate the hose assembly. Mineral base 525 viscosity refrigerant oil serves to lubricate new o-ring seals before installation of the seal and sealing washers onto the A/C Compressor hose assembly. The hose assembly attachment must secure to the A/C Compressor rear end using the hose assembly nut until it reaches 33 n.m (24 lb ft). Accomplish the lower air deflector reinstallation before you lower the vehicle. Then attach the A/C Compressor hose nut at the accumulator and tighten it to 16 n.m (12 lb ft). Connect the A/C Compressor hose and nut to the condenser using a torque of 16 n.m (12 lb ft) and follow the same procedure for attaching the hose and nut to the condenser tube leading from the condenser to the accumulator. To complete the repair install the right front fender upper diagonal brace followed by the air cleaner assembly while the a/c system requires evacuation and recharging before testing for fittings leaks through the halogen leak detector (J 39400-A).
    Posted by ChevyPartsGiant Specialist
    Q:
    How to replace the A/C Hose for the condenser on Chevrolet Impala? Posted by Customer
    A:
    The first step of condenser tube replacement requires refrigerant recovery and removal of air cleaner assembly and cross vehicle brace as well as vacuum Brake Booster. The procedure requires detachment of the condenser tube from support bracket and radiator air baffle along with the condenser tube nut from the condenser. First disconnect the condenser tube from the condenser, set the vehicle to a lower height, then disconnect the electrical connector from the a/c refrigerant pressure sensor. Proceedure begins with disconnecting the evaporator tube from the condenser tube by loosing the evaporator tube nut. Then remove the condenser tube while disposing of the o-ring. The a/c pressure sensor should be removed from the condenser tube. When installing the new condenser tube secure the a/c pressure sensor while placing a new o-ring between its elements before fastening the tube to the support bracket. After attaching the condenser tube to the evaporator tube tighten the evaporator inlet tube nut to 27 n.m (20 lb ft). Reinstall the a/c refrigerant pressure sensor electrical connector while raising and supporting the vehicle to install the condenser tube by tightening its nut to 27 n.m (20 lb ft). At the end the technician should replace the lower radiator air baffle alongside the vacuum Brake Booster while reinstalling cross vehicle brace and air cleaner assembly before conducting an a/c system leak test with the halogen leak detector (J 39400-A) after evacuation and recharging is performed.
    Posted by ChevyPartsGiant Specialist
    Q:
    What is the torque specification for the liquid line nut at the orifice for the 2000 Buick Century? Posted by Customer
    A:
    Tighten it to 27 N.m (20 lb ft).
    Posted by ChevyPartsGiant Specialist
    See expert answers on similar A/C Hose
    Q:
    What should be done before removing the lower air deflector for the 2001 Buick Century? Posted by Customer
    A:
    Raise and support the vehicle.
    Posted by ChevyPartsGiant Specialist
    See expert answers on similar A/C Hose
    Q:
    What should be done after connecting the A/C compressor hose to the compressor for the 2004 Buick Century? Posted by Customer
    A:
    Reinstall the lower air deflector, add a new O-ring seal to the A/C compressor hose assembly, and connect the A/C compressor hose to the accumulator, securing it with the A/C compressor hose nut tightened to 16 N.m (12 lb ft).
    Posted by ChevyPartsGiant Specialist
    See expert answers on similar A/C Hose
    Q:
    What should be done after reinstallation for the 2002 Buick Century? Posted by Customer
    A:
    Finally, evacuate and recharge the A/C system and perform a leak test on the fittings using the Halogen Leak Detector (J 39400-A).
    Posted by ChevyPartsGiant Specialist
    See expert answers on similar A/C Hose
    Q:
    How do you install the new condenser tube for the 2003 Buick Century? Posted by Customer
    A:
    Attach the A/C pressure sensor to the new condenser tube and install a new O-ring. Secure the condenser tube to the support clip, connect the evaporator tube, and tighten the evaporator tube nut to 27 N.m (20 lb ft).
    Posted by ChevyPartsGiant Specialist
    See expert answers on similar A/C Hose
    Q:
    What components need to be removed before disconnecting the A/C compressor hose for the 2002 Buick Regal? Posted by Customer
    A:
    Remove the left front fender upper diagonal brace and the air cleaner assembly.
    Posted by ChevyPartsGiant Specialist
    See expert answers on similar A/C Hose
    Q:
    What is the process for installing the new compressor hose assembly for the 2000 Buick Regal? Posted by Customer
    A:
    Install the new O-ring seals and sealing washers onto the compressor hose assembly, attach the compressor hose assembly to the rear of the compressor, install the compressor hose assembly nut, and tighten it to 33 N.m (24 lb ft).
    Posted by ChevyPartsGiant Specialist
    See expert answers on similar A/C Hose
    Q:
    What is the next step after installing the accumulator tube for the 2003 Buick Regal? Posted by Customer
    A:
    Reinstall the condenser tube to the support clip, followed by the vacuum brake booster and the air cleaner assembly.
    Posted by ChevyPartsGiant Specialist
    See expert answers on similar A/C Hose
    Q:
    How do you disconnect the condenser tube from the condenser for the 2005 Buick Century? Posted by Customer
    A:
    Loosen the condenser tube nut at the condenser and disconnect the condenser tube from the condenser.
    Posted by ChevyPartsGiant Specialist
    See expert answers on similar A/C Hose
    Q:
    What preparation is needed for the new O-ring seals for the 2001 Buick Regal? Posted by Customer
    A:
    Coat the new O-ring seals with mineral base 525 viscosity refrigerant oil before installing them onto the evaporator tube.
    Posted by ChevyPartsGiant Specialist
    See expert answers on similar A/C Hose
    Q:
    What components need to be removed before accessing the accumulator tube for the 2004 Buick Regal? Posted by Customer
    A:
    Remove the air cleaner assembly, vacuum brake booster, and brake pressure modulator valve bracket.
    Posted by ChevyPartsGiant Specialist
    See expert answers on similar A/C Hose
    Q:
    What components need to be removed initially for the 2001 Chevrolet Impala? Posted by Customer
    A:
    Remove the left front fender upper diagonal brace, the air cleaner assembly, and the vacuum brake booster.
    Posted by ChevyPartsGiant Specialist
    See expert answers on similar A/C Hose
    Q:
    What should be done with the accumulator tube for the 2003 Chevrolet Impala? Posted by Customer
    A:
    Install the accumulator tube to the evaporator block fitting.
    Posted by ChevyPartsGiant Specialist
    See expert answers on similar A/C Hose
    Q:
    What is the final step in the process for the 2001 Chevrolet Monte Carlo? Posted by Customer
    A:
    Evacuate and recharge the A/C system, and perform a leak test on the fittings using the Halogen Leak Detector (J 39400-A).
    Posted by ChevyPartsGiant Specialist
    See expert answers on similar A/C Hose
    Q:
    What is the next step after positioning the compressor hose for the 2000 Chevrolet Impala? Posted by Customer
    A:
    Raise and support the vehicle, then remove the lower air deflector.
    Posted by ChevyPartsGiant Specialist
    See expert answers on similar A/C Hose
    Q:
    How do you attach the new compressor hose assembly for the 2000 Chevrolet Monte Carlo? Posted by Customer
    A:
    Attach the compressor hose assembly to the rear of the compressor, install and tighten the compressor hose assembly nut to 33 N.m (24 lb ft).
    Posted by ChevyPartsGiant Specialist
    See expert answers on similar A/C Hose
    Q:
    What should be done after securing the hose to the compressor for the 2003 Chevrolet Monte Carlo? Posted by Customer
    A:
    Reinstall the lower air deflector, add a new O-ring seal to the A/C compressor hose assembly, and connect the A/C compressor hose to the accumulator, securing it with the A/C compressor hose nut tightened to 16 N.m (12 lb ft).
    Posted by ChevyPartsGiant Specialist
    See expert answers on similar A/C Hose
    Q:
    What is the next step after reinstalling the lower air deflector for the 2002 Chevrolet Monte Carlo? Posted by Customer
    A:
    Attach the new O-ring seal to the A/C compressor hose assembly, then connect the hose to the accumulator and secure it with the hose nut tightened to 16 N.m (12 lb ft).
    Posted by ChevyPartsGiant Specialist
    See expert answers on similar A/C Hose
    Q:
    What should be done at the end of the process for the 2002 Chevrolet Impala? Posted by Customer
    A:
    Evacuate and recharge the A/C system and perform a leak test on the fittings using the Halogen Leak Detector (J 39400-A).
    Posted by ChevyPartsGiant Specialist
    See expert answers on similar A/C Hose
    If you have any questions about this product, please don't hesitate to ask us. We will be happy to help you!

OEM GM 10308247, Excellent Performance and Perfect Fitment

To ensure reliability, purchase GM part # 10308247 A/C Hose. It is sometimes referred to as GM A/C Hose. Choosing OEM parts is the optimal decision for guaranteeing superior quality and perfect performance. These components undergo stringent quality checks and are carefully constructed to comply with GM's factory specifications, ensuring a smooth installation process.

ChevyPartsGiant.com is a leading supplier of genuine GM parts such as GM 10308247 A/C Hose. Our website boasts an extensive inventory of OEM GM parts, available at highly competitive prices in the market. Should you require any new genuine GM parts, rest assured we will deliver them swiftly and efficiently to your doorstep. Furthermore, all our parts come with the assurance of a manufacturer's warranty. For detailed Chevy parts information, click here.
Choose ChevyPartsGiant for discounted prices, exceptional service and fast delivery