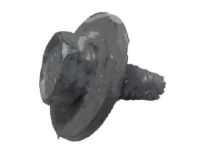
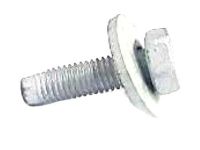
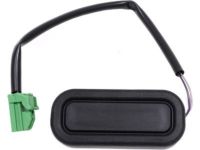
Make sure this part fits

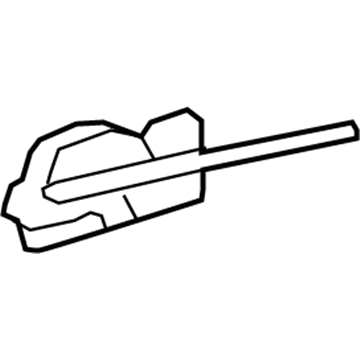
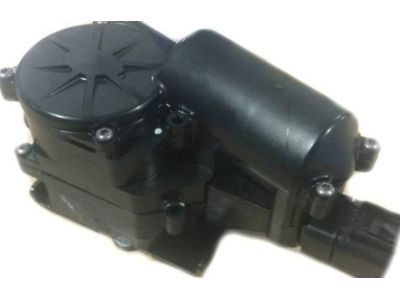
GM 84243380
Lower Cover

2006-2017 GM

Customer Questions & Expert Answers (14)
GM 84243380 Lower Cover
  • Part Description
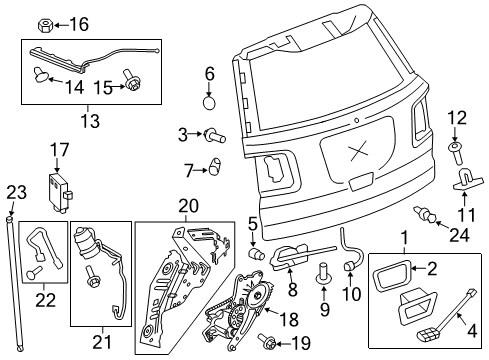
    Latch Assembly-Lift Gate; Trunk Latch; Door Lock
  • Replaces
    13581405, 13501872, 13503467, 15839037, 13502698, 15779874
  • Manufacturer
    General Motors
Make sure this part fits
$255.52 MSRP: $372.01
You Save: $116.49 (32%)
1
ADD TO CART
  • Vehicle Fitment

    Year Make Model Trim Engine
    2008-2017 Buick EnclaveBase, Convenience, CX, CXL, Leather, Premium6 Cyl 3.6 L GAS
    2010-2014 Cadillac CTSBase, Luxury, Performance, Premium, V6 Cyl 3.0 L GAS, 6 Cyl 3.6 L FLEX, 6 Cyl 3.6 L GAS, 8 Cyl 6.2 L GAS
    2006-2007 Cadillac DTSBase, Luxury8 Cyl 4.6 L GAS
    2007-2014 Cadillac EscaladeBase, Hybrid, Hybrid Platinum, Luxury, Platinum, Premium8 Cyl 6.0 L FULL HYBRID EV-FLEX (FHEV), 8 Cyl 6.0 L FULL HYBRID EV-GAS (FHEV), 8 Cyl 6.2 L FLEX, 8 Cyl 6.2 L GAS
    2007-2014 Cadillac Escalade ESVBase, Luxury, Platinum, Premium8 Cyl 6.2 L FLEX, 8 Cyl 6.2 L GAS
    2006-2016 Cadillac SRXBase, Luxury, Performance, Premium6 Cyl 2.8 L GAS, 6 Cyl 3.0 L GAS, 6 Cyl 3.6 L FLEX, 6 Cyl 3.6 L GAS, 8 Cyl 4.6 L GAS
    2010-2017 Chevrolet EquinoxL, LS, LT, LTZ, Premier4 Cyl 2.4 L FLEX, 4 Cyl 2.4 L GAS, 6 Cyl 3.0 L FLEX, 6 Cyl 3.0 L GAS, 6 Cyl 3.6 L FLEX, 6 Cyl 3.6 L GAS
    2007-2014 Chevrolet Suburban 1500LS, LT, LTZ8 Cyl 5.3 L FLEX, 8 Cyl 5.3 L GAS, 8 Cyl 6.0 L GAS
    2007-2013 Chevrolet Suburban 2500LS, LT, LTZ8 Cyl 6.0 L FLEX, 8 Cyl 6.0 L GAS
    2007-2014 Chevrolet TahoeHybrid, LS, LT, LTZ8 Cyl 4.8 L GAS, 8 Cyl 5.3 L FLEX, 8 Cyl 5.3 L GAS, 8 Cyl 6.0 L FULL HYBRID EV-FLEX (FHEV), 8 Cyl 6.0 L FULL HYBRID EV-GAS (FHEV), 8 Cyl 6.2 L FLEX, 8 Cyl 6.2 L GAS
    View More
    Warning: California's Proposition 65
  • Customer Questions & Expert Answers

    Q:
    Is 84243380 compatible with my car? Posted by ChevyPartsGiant Specialist
    A:
    Please Select Your Vehicle model to see if part number 84243380 is suitable before ordering.
    Posted by ChevyPartsGiant Specialist
    Q:
    How to replace the front side Door Latch Assembly on Cadillac SRX? Posted by Customer
    A:
    Replacement of the front side door latch begins with a window raise to full up position followed by removal of the door trim panel. The first task includes removing the water deflector before disconnecting the door latch rod from the lock cylinder when present. After opening the clip of the outside Door Handle rod you must disconnect it from the door latch and proceed to remove the lock knob rod from its rod guide and inside handle rod from its rod guide. Take out the door latch by removing its screws while keeping both inner Door Handle rod and lock rod connected to it. A flat-blade tool can raise the electrical connector lock for disconnecting the electrical connector followed by removing the handle rod along with the lock rod from the door latch. Install the inside Door Handle rod and lock rod to the door latch first. Then attach the electrical connector followed by installing the door latch within the door section. Follow this step by attaching the door latch screws then tighten them to 10 n.m (89 lb in). Finally fit the outside Door Handle rod within the latch clip before closing the clip. Place the rod guide together with lock knob rod while also inserting the inside handle rod inside the rod guide. After checking the door functions of handles and lock cylinder and latch the assembly ends with installing the water deflector and door trim panel.
    Posted by ChevyPartsGiant Specialist
    Q:
    How to replace the rear Door Latch Assembly on Cadillac DTS? Posted by Customer
    A:
    The process of replacing the rear door latch starts by positioning the window at the top position followed by door trim panel and door module removal along with water deflector disassembly. Begin by squeezing the tabs in the middle of the bell crank pivot then pull the assembly outward. Find access to the inside handle assembly by starting with front prying then pulling out before moving it to the front. The first step is to disconnect both the outside handle rod from its rear position in the inner panel. After that, easily remove the child security lock by pulling it out. The fasteners should be removed from the door latch while pulling the door latch assembly through the inner panel access hole. The door latch requires removal of its electrical connectors along with inside handle rod and inside lock rod. The door installation sequence starts with attaching the inside lock rod and inside handle rod to the door latch then moving onto electrical connector connection. To install the door latch assembly insert it through the access hole of the inner panel before securing it with fasteners while tightening each screw to 10 N.m (89 lb in). Press the pin on the child security lock through its opening on the lock mechanism so it reaches full engagement with the inner panel. Connect the outside door handle rod to the latch through the retainer clip on the door latch assembly by inserting the rod and finally close the clip. The trim panel harness should be placed between both the handle rods and lock rods before inserting the inside handle assembly's rear end into the inner panel opening as you push the front section completely inward until total engagement. You need to place the bell crank inside the inner panel opening after connecting the lock and handle rods to the clip guides then push it forward until complete engagement with the inner panel. Test the functionality of door handles and locking mechanism first before installing the water deflector and then proceed with door module and door trim panel installation.
    Posted by ChevyPartsGiant Specialist
    Q:
    How to Service and Repair the Door Latch Assembly on Cadillac SRX? Posted by Customer
    A:
    The procedure to replace the front side door latch begins by lifting the window to its highest point followed by removing the door trim panel along with the water deflector. When equipped with the lock cylinder rod detach it from the door latch and open the clip to separate the outside door handle rod from the door latch. The next step involves pulling the lock knob rod through the rod guide followed by the inside handle rod from a similar rod guide. You must remove the door latch screws before separating the door latch from its position in the door while maintaining both the inside door handle rod and lock rod connection. A flat-bladed small tool should be used to raise and disconnect the electrical connector lock while removing the door latch handle rod and lock rod. Installation begins with mounting the door latch and its accompanying inside door handle rod and lock rod. The electrical connector should follow this step. Insert the door latch into the door while connecting its lock cylinder rod and tighten screws to 10 N.m (89 lb in). Put the outside door handle rod into the latch clip before closing the clip. You need to position the lock knob rod within the rod guide while the inside handle rod should go into the rod guide too. The check of door handles, lock cylinder and door latch operation should be completed before reinstalling water deflector and door trim panel.
    Posted by ChevyPartsGiant Specialist
    Q:
    What is the first step in the installation process for the 2010 Cadillac CTS? Posted by Customer
    A:
    Attach the inside door handle cable to the door latch and reconnect the electrical connector.
    Posted by ChevyPartsGiant Specialist
    See expert answers on similar Door Latch Assembly
    Q:
    What should be disconnected from the door latch for the 2007 Cadillac DTS? Posted by Customer
    A:
    Disconnect the electrical connectors and the inside handle rod.
    Posted by ChevyPartsGiant Specialist
    See expert answers on similar Door Latch Assembly
    Q:
    What should you check after connecting the outside door handle rod for the 2006 Cadillac SRX? Posted by Customer
    A:
    Check for proper operation of the outside door handle.
    Posted by ChevyPartsGiant Specialist
    See expert answers on similar Door Latch Assembly
    Q:
    What is the first step to replace the liftgate latch for the 2007 Cadillac SRX? Posted by Customer
    A:
    Open the liftgate and remove the liftgate trim panel.
    Posted by ChevyPartsGiant Specialist
    See expert answers on similar Trunk Latch
    Q:
    What should be done after removing the trim panel for the 2006 Cadillac SRX? Posted by Customer
    A:
    Take out the liftgate latch bolts and detach the liftgate latch release cable from the latch.
    Posted by ChevyPartsGiant Specialist
    See expert answers on similar Trunk Latch
    Q:
    What is the first step to replace the rear side door latch for the 2009 Cadillac SRX? Posted by Customer
    A:
    Begin by removing the door trim panel, inside door handle, and water deflector.
    Posted by ChevyPartsGiant Specialist
    See expert answers on similar Door Latch Assembly
    Q:
    What is the torque specification for tightening the door latch screws for the 2007 Cadillac SRX? Posted by Customer
    A:
    Tighten the door latch screws to 10 N.m (89 lb in).
    Posted by ChevyPartsGiant Specialist
    See expert answers on similar Door Latch Assembly
    Q:
    What should be removed after the door trim panel for the 2008 Cadillac SRX? Posted by Customer
    A:
    Remove the inside door handle and the water deflector.
    Posted by ChevyPartsGiant Specialist
    See expert answers on similar Door Latch Assembly
    Q:
    What should be done after removing the door latch assembly for the 2007 GMC Acadia? Posted by Customer
    A:
    Take out the 2 screws that secure the actuator to the lock.
    Posted by ChevyPartsGiant Specialist
    See expert answers on similar Door Lock Actuator
    Q:
    What are the final steps after securing the actuator for the 2007 GMC Acadia? Posted by Customer
    A:
    Reinstall the lock to the door, followed by the water deflector and the door trim panel.
    Posted by ChevyPartsGiant Specialist
    See expert answers on similar Door Lock Actuator
    If you have any questions about this product, please don't hesitate to ask us. We will be happy to help you!

OEM GM Lower Cover 84243380 Designed for Proper Fit and Performance

Original OEM GM parts deliver superior quality and meet all performance standards needed for optimal automotive operation. The authentic part identified by 84243380 Lower Cover is available in the market under the name GM Door Lock, Door Lock Actuator, Tailgate Latch, Tailgate Lock, Trunk Latch, Door Latch Assembly. This genuine product has a full warranty coverage from the manufacturer available at all authorized GM dealers throughout the United States. This part 84243380 Lower Cover fits certain Chevrolet Tahoe, Equinox, Traverse models, as well as GMC Acadia, Yukon, Terrain. Additionally, it is compatible with Cadillac Escalade, CTS, SRX and Buick Enclave models.
The original GM component designated by manufacturer part number 84243380 maintains top performance when functioning as the Latch Assembly-Lift Gate; Trunk Latch; Door Lock unit. The component 84243380 is constructed from durable material and its dimensions span 4.9 x 4.8 x 11.5 inches while weighing 6.40 Pounds. The Direct Replacement component is ready in New condition to ensure full compatibility with your vehicle system. This component receives the designation of Lock; Actuator; Rear Compartment Lid or Tail Gate Latch; End Gate Lock. The part 84243380 has available replacement options 13581405, 13501872, 13503467, 15839037, 13502698, 15779874. GM manufacturer provides a warranty that ensures reliable operation of this product. The Shipping Policy and Return Policy pages outline complete details regarding shipping procedures and return processes.
If you want to save money in the long run on maintenance and repairs, you should choose OEM products because they're of the top level of durability. Are you on the quest of finding GM parts, our site is worth a visit. We stock an endless selection of high-quality GM components including things like ignition coils all the way through to fan shrouds and all at prices that can not be matched. You have nothing to worry about because all our OEM parts are covered with a manufacturer warranty, which guarantees superior quality and value.