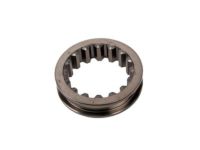
Make sure this part fits

GM 12547638
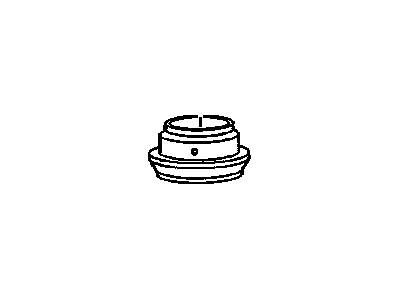
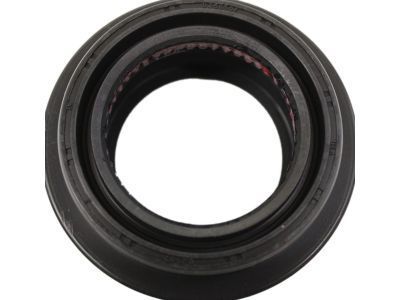
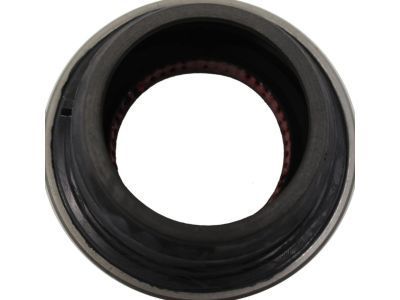
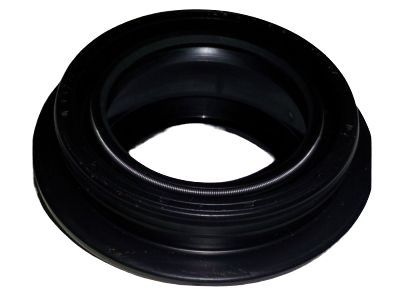
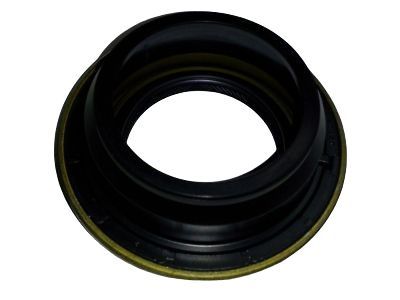
Output Shaft Seal, Rear

1998-2008 GM

Customer Questions & Expert Answers (34)
GM 12547638 Output Shaft Seal, Rear
  • Part Description
    Seal, Transfer Case Rear Output Shaft; Automatic Transmission Seal; Gasket
  • Position
    Rear
  • Manufacturer
    General Motors
Make sure this part fits
$81.04 MSRP: $137.98
You Save: $56.94 (42%)
Ships in 1-2 Business Days
1
ADD TO CART
  • Vehicle Fitment

    Year Make Model Trim Engine
    2002-2006 Cadillac EscaladeBase8 Cyl 5.3 L GAS, 8 Cyl 6.0 L GAS
    2003-2006 Cadillac Escalade ESVBase8 Cyl 6.0 L GAS
    2002-2006 Cadillac Escalade EXTBase8 Cyl 6.0 L GAS
    1999-2005 Chevrolet AstroBase, LS, LT6 Cyl 4.3 L GAS
    2002-2006 Chevrolet Avalanche 1500Base, LS, LT, North Face, On Road Edition, WBH, Z66, Z718 Cyl 5.3 L FLEX, 8 Cyl 5.3 L GAS
    2002-2006 Chevrolet Avalanche 2500Base, LS, LT8 Cyl 8.1 L GAS
    1998-2005 Chevrolet BlazerBase, LS, LT, Trailblazer, ZR26 Cyl 4.3 L GAS
    1998-2004 Chevrolet S10Base, LS, ZR2, ZR54 Cyl 2.2 L FLEX, 4 Cyl 2.2 L GAS, 6 Cyl 4.3 L GAS
    1999-2008 Chevrolet Silverado 1500Base, Hybrid, LS, LT, LTZ, SS, WT, Z71 Off-Road6 Cyl 4.3 L GAS, 8 Cyl 4.8 L GAS, 8 Cyl 5.3 L FLEX, 8 Cyl 5.3 L FULL HYBRID EV-GAS (FHEV), 8 Cyl 5.3 L GAS, 8 Cyl 6.0 L GAS
    2007 Chevrolet Silverado 1500 ClassicHybrid, LS, LT, SS, WT6 Cyl 4.3 L GAS, 8 Cyl 4.8 L GAS, 8 Cyl 5.3 L FLEX, 8 Cyl 5.3 L FULL HYBRID EV-GAS (FHEV), 8 Cyl 5.3 L GAS, 8 Cyl 6.0 L GAS
    View More
    Warning: California's Proposition 65
  • Customer Questions & Expert Answers

    Q:
    Is this 12547638 designed for my car? Posted by ChevyPartsGiant Specialist
    A:
    Please Select Your Vehicle model to see if part number 12547638 is suitable before ordering.
    Posted by ChevyPartsGiant Specialist
    Q:
    How to replace the rear output transfer case seal on Cadillac Escalade EXT? Posted by Customer
    A:
    The replacement process of the rear transfer case output shaft seal requires shields to be eliminated first if they exist as well as subsequent removal of the rear propeller shaft. Start by taking off the rear output shaft seal before examining the bushing of the rear output shaft for any damage or wear. You can use the transfer case rear bushing remover and installer (J 45380) to remove the rear output shaft bushing by placing its finger section ahead of the bushing then attaching tools before loosening the bushing with a wrench. The tool called transfer case rear bushing remover and installer (J 45380) should be used for installing the new output shaft bushing through a process where the tool and bushing align with the case while using a hammer to perform the installation step until the drain hole on the rear output shaft seal boot faces downward. To complete the repair process, employ the seal installer (J 37668-A) to put in a fresh front output shaft seal and then install the rear propeller shaft before inspecting and adding more fluid when needed and replacing the transfer case shield if applicable.
    Posted by ChevyPartsGiant Specialist
    Q:
    How to replace the rear transfer case output shaft seal with a new transfer case seal on Chevrolet Astro? Posted by Customer
    A:
    Initially raise the vehicle to access the rear transfer case output shaft seal installing and safely remove the rear propeller shaft before attending to the transfer case sealing surfaces or shafts. The next step is to eliminate the transfer case rear output shaft seal before performing an examination of the rear output shaft seal bushing for wear and scoring. You can use the j 45380 transfer case rear bushing remover and installer to extract the rear output shaft bushing by inserting its finger section in front before the bushing then attaching the tube and forcing screw before removing the bushing with a wrench. The installer (J 45380) serves installation of the new rear output shaft bushing by correctly positioning it so the drain hole on the rear output shaft seal boot points downward. The seal installer tool j 37668-a allows you to install the transfer case rear output shaft seal then reinstall the rear propeller shaft followed by fluid level check then vehicle lowering.
    Posted by ChevyPartsGiant Specialist
    Q:
    How to replace the input transfer case seal on Chevrolet S10? Posted by Customer
    A:
    Vehicle elevation serves as a first step before starting Transfer Case input shaft seal replacement work. After lifting the vehicle begin by removing the Transfer Case from its position followed by removing the Transfer Case input shaft seal. When installing the new input shaft seal position the part numbers to be visible toward the technician. After installation position the Transfer Case input shaft seal perfectly straight along the input shaft and verify its evenness with the Transfer Case surface. The j 42738 seal installer (J 42738) serves to properly install the Transfer Case input shaft seal. Reinstall the Transfer Case into the vehicle before checking fluid levels followed by vehicle lowering.
    Posted by ChevyPartsGiant Specialist
    Q:
    How do you remove the input shaft seal for the 2003 Cadillac Escalade? Posted by Customer
    A:
    Use a flat-tipped screwdriver to remove the input shaft seal.
    Posted by ChevyPartsGiant Specialist
    See expert answers on similar Transfer Case Seal
    Q:
    How should the drain hole on the boot of the rear output shaft seal be positioned for the 2005 Chevrolet Astro? Posted by Customer
    A:
    The drain hole should be facing down toward the ground.
    Posted by ChevyPartsGiant Specialist
    See expert answers on similar Transfer Case Seal
    Q:
    What tool is used to install the transfer case input shaft seal for the 2001 Chevrolet Astro? Posted by Customer
    A:
    Use the J 42738 Seal Installer to install the transfer case input shaft seal.
    Posted by ChevyPartsGiant Specialist
    See expert answers on similar Transfer Case Seal
    Q:
    What is the next step after installing the new seal for the 2000 Chevrolet Astro? Posted by Customer
    A:
    Reinstall the rear propeller shaft.
    Posted by ChevyPartsGiant Specialist
    See expert answers on similar Transfer Case Seal
    Q:
    What components need to be taken out next for the 2004 Chevrolet Astro? Posted by Customer
    A:
    The transfer case front output shaft dust seal and the front output shaft seal.
    Posted by ChevyPartsGiant Specialist
    See expert answers on similar Transfer Case Seal
    Q:
    What should be done after removing the rear propeller shaft for the 2006 Chevrolet Avalanche 2500? Posted by Customer
    A:
    Remove the rear output shaft seal and inspect the rear output shaft bushing for any scoring or wear.
    Posted by ChevyPartsGiant Specialist
    See expert answers on similar Transfer Case Seal
    Q:
    What is the first step to replace the rear transfer case output shaft seal for the 2003 Chevrolet Avalanche 1500? Posted by Customer
    A:
    Remove the transfer case shield if equipped, followed by the rear propeller shaft.
    Posted by ChevyPartsGiant Specialist
    See expert answers on similar Transfer Case Seal
    Q:
    What should be done after installing the new seal for the 2002 Chevrolet Astro? Posted by Customer
    A:
    Reinstall the rear propeller shaft.
    Posted by ChevyPartsGiant Specialist
    See expert answers on similar Transfer Case Seal
    Q:
    What is the first step to replace the rear transfer case output shaft seal for the 2005 Chevrolet Blazer? Posted by Customer
    A:
    First, raise the vehicle and remove the transfer case shield and the rear propeller shaft.
    Posted by ChevyPartsGiant Specialist
    See expert answers on similar Transfer Case Seal
    Q:
    What should be removed after raising for the 2005 Chevrolet Blazer? Posted by Customer
    A:
    Remove the transfer case shield and the front propeller shaft from the transfer case.
    Posted by ChevyPartsGiant Specialist
    See expert answers on similar Transfer Case Seal
    Q:
    What is the first step to replace the front transfer case output shaft seal for the 2002 Chevrolet S10? Posted by Customer
    A:
    Raise the vehicle.
    Posted by ChevyPartsGiant Specialist
    See expert answers on similar Transfer Case Seal
    Q:
    Which tool should be used based on the transfer case type for the 2007 Chevrolet Silverado 1500? Posted by Customer
    A:
    Use J 45380 for light duty or DT-48734 for heavy duty.
    Posted by ChevyPartsGiant Specialist
    See expert answers on similar Transfer Case Seal
    Q:
    What should be removed if equipped, before removing the front propeller shaft for the 2000 Chevrolet Suburban 1500? Posted by Customer
    A:
    The transfer case shields.
    Posted by ChevyPartsGiant Specialist
    See expert answers on similar Transfer Case Seal
    Q:
    What is the first step to replace the front transfer case output shaft seal for the 2006 Chevrolet Silverado 3500? Posted by Customer
    A:
    Remove the transfer case shield if equipped and the front propeller shaft.
    Posted by ChevyPartsGiant Specialist
    See expert answers on similar Transfer Case Seal
    Q:
    What tool is used to place on the transfer case front output shaft during installation for the 2001 GMC Jimmy? Posted by Customer
    A:
    The Front Output Shaft Seal Protector (J 44636-2).
    Posted by ChevyPartsGiant Specialist
    See expert answers on similar Transfer Case Seal
    Q:
    What tools are required to service and repair the front output shaft seal for the 2000 Chevrolet Suburban 1500? Posted by Customer
    A:
    J 43484 Front Output Shaft Seal Installer (midyear 1999 and later seal) and J 35870 Front Output Shaft Seal Installer (start of production to midyear 1999 seal).
    Posted by ChevyPartsGiant Specialist
    See expert answers on similar Transfer Case Seal
    Q:
    How should the new seal be installed for the 2004 GMC Safari? Posted by Customer
    A:
    Ensure that the part numbers on the seal face outward toward the technician and that the seal is even with the surface of the transfer case upon installation.
    Posted by ChevyPartsGiant Specialist
    See expert answers on similar Transfer Case Seal
    Q:
    What should be done after removing the transfer case input shaft seal for the 2002 GMC Safari? Posted by Customer
    A:
    Position the new seal on the input shaft, ensuring that the part numbers on the seal are facing outward toward the technician.
    Posted by ChevyPartsGiant Specialist
    See expert answers on similar Transfer Case Seal
    Q:
    How should the seal be positioned during installation for the 2000 GMC Jimmy? Posted by Customer
    A:
    Ensure the seal is positioned straight.
    Posted by ChevyPartsGiant Specialist
    See expert answers on similar Transfer Case Seal
    Q:
    What components need to be removed before accessing the front output shaft seal for the 2000 GMC Safari? Posted by Customer
    A:
    The front propeller shaft and the exhaust crossover pipe.
    Posted by ChevyPartsGiant Specialist
    See expert answers on similar Transfer Case Seal
    Q:
    How is the rear output shaft seal removed for the 2008 GMC Sierra 1500? Posted by Customer
    A:
    The rear output shaft seal can be removed by prying it out with a flat-tipped screwdriver.
    Posted by ChevyPartsGiant Specialist
    See expert answers on similar Transfer Case Seal
    Q:
    How is the front output shaft seal installed for the 2002 GMC Safari? Posted by Customer
    A:
    Install the front output shaft seal onto the protector using the Front Output Shaft Seal Installer (J 44636-1).
    Posted by ChevyPartsGiant Specialist
    See expert answers on similar Transfer Case Seal
    Q:
    What is the first step to replace the transfer case input shaft seal on the NVG 233-NP1 for the 2001 GMC Jimmy? Posted by Customer
    A:
    First, raise the vehicle.
    Posted by ChevyPartsGiant Specialist
    See expert answers on similar Transfer Case Seal
    Q:
    What are the final steps after replacing the seal for the 2001 GMC Safari? Posted by Customer
    A:
    Reinstall the transfer case front output shaft dust seal, the front propeller shaft, check the transfer case fluid level, and reattach the transfer case shield before lowering the vehicle.
    Posted by ChevyPartsGiant Specialist
    See expert answers on similar Transfer Case Seal
    Q:
    What is the final step in the process for the 2005 GMC Safari? Posted by Customer
    A:
    Check the transfer case fluid level, reinstall the transfer case shield, and lower the vehicle.
    Posted by ChevyPartsGiant Specialist
    See expert answers on similar Transfer Case Seal
    Q:
    What is the first step to replace the input shaft seal for the 2007 GMC Sierra 3500 Classic? Posted by Customer
    A:
    First, remove the transfer case.
    Posted by ChevyPartsGiant Specialist
    See expert answers on similar Transfer Case Seal
    Q:
    What tool may be necessary to assist in removing the seal for the 2008 GMC Sierra 1500? Posted by Customer
    A:
    A sharp punch may be necessary to poke a hole in the seal.
    Posted by ChevyPartsGiant Specialist
    See expert answers on similar Transfer Case Seal
    Q:
    What should be done after installing the new seal for the 2003 GMC Sonoma? Posted by Customer
    A:
    Reattach the rear propeller shaft to the transfer case, check the transfer case fluid level, and finally reinstall the transfer case shield before lowering the vehicle.
    Posted by ChevyPartsGiant Specialist
    See expert answers on similar Transfer Case Seal
    Q:
    What is the next step after removing the rear propeller shaft for the 2004 GMC Sonoma? Posted by Customer
    A:
    Remove the rear output shaft seal and inspect the rear output shaft bushing for any scoring or wear.
    Posted by ChevyPartsGiant Specialist
    See expert answers on similar Transfer Case Seal
    Q:
    What is the method to remove the outer part of the seal for the 2006 GMC Sierra 3500? Posted by Customer
    A:
    Insert a flat-tipped screwdriver or small pry bar between the outer race of the seal and the transfer case to remove the outer part of the seal.
    Posted by ChevyPartsGiant Specialist
    See expert answers on similar Transfer Case Seal
    If you have any questions about this product, please don't hesitate to ask us. We will be happy to help you!

OEM GM Output Shaft Seal, Rear 12547638 Designed for Proper Fit and Performance

Original OEM GM parts deliver superior quality and meet all performance standards needed for optimal automotive operation. The authentic part identified by 12547638 Output Shaft Seal, Rear is available in the market under the name GM Transfer Case Seal. This genuine product has a full warranty coverage from the manufacturer available at all authorized GM dealers throughout the United States. This part 12547638 Output Shaft Seal, Rear fits certain Chevrolet S10, Tahoe, Silverado 1500 models, as well as GMC Sierra 1500, Yukon, Sierra 2500 HD. Additionally, it is compatible with Cadillac Escalade, Escalade ESV, Escalade EXT and Oldsmobile Bravada models.
The original GM component designated by manufacturer part number 12547638 maintains top performance when functioning as the Seal, Transfer Case Rear Output Shaft; Automatic Transmission Seal; Gasket unit at its Rear. The component 12547638 is constructed from durable material and its dimensions span 4.0 x 3.8 x 1.6 inches while weighing 0.50 Pounds. The Direct Replacement component is ready in New condition to ensure full compatibility with your vehicle system. This component receives the designation of Extension Seal; Seal, Transfer Case. The part 12547638 has available replacement options. GM manufacturer provides a warranty that ensures reliable operation of this product. The Shipping Policy and Return Policy pages outline complete details regarding shipping procedures and return processes.
If you want to save money in the long run on maintenance and repairs, you should choose OEM products because they're of the top level of durability. Are you on the quest of finding GM parts, our site is worth a visit. We stock an endless selection of high-quality GM components including things like ignition coils all the way through to fan shrouds and all at prices that can not be matched. You have nothing to worry about because all our OEM parts are covered with a manufacturer warranty, which guarantees superior quality and value.