Make sure this part fits

GM 15767252
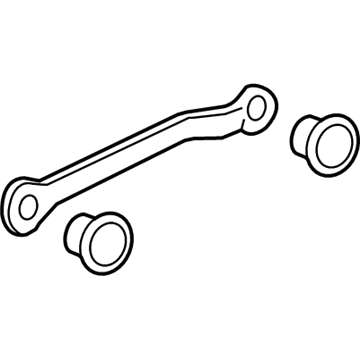
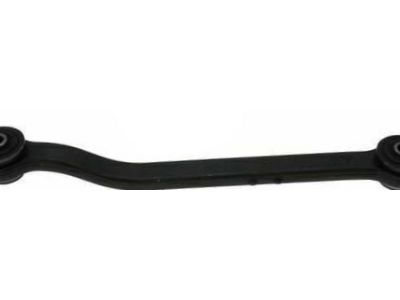
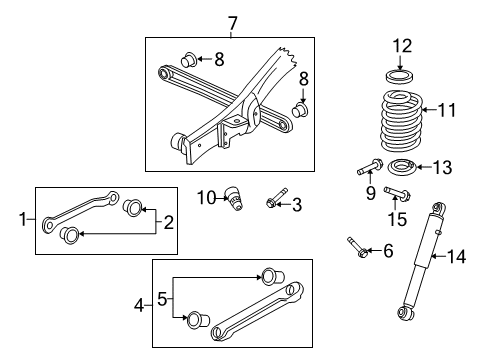
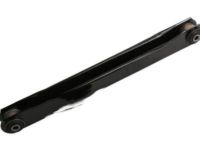
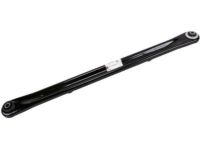
Upper Control Arm, Rear

2000-2010 GM

Customer Questions & Expert Answers (36)
GM 15767252 Upper Control Arm, Rear
  • Part Description
    Arm, Rear Axle Upper Control; Suspension Control Arm; Control Arm
  • Position
    Rear Upper
  • Replaces
    15133164, 15208540
  • Manufacturer
    General Motors
Make sure this part fits
$96.81 MSRP: $151.65
You Save: $54.84 (37%)
Ships in 1-3 Business Days
1
ADD TO CART
  • Related Parts
  • Product Specifications
  • Vehicle Fitment
  • Customer Questions & Expert Answers
  • Product Specifications

    BrandGenuine GM
    Manufacturer Part Number15767252
    Part DescriptionArm, Rear Axle Upper Control; Suspension Control Arm; Control Arm
    Other NamesArm, Rear Axle Control Arm
    Item Dimensions20.4 x 2.7 x 2.1 inches
    Item Weight6.50 Pounds
    PositionRear Upper
    ConditionNew
    Fitment TypeDirect Replacement
    Replaces15133164, 15208540
    Require Quantity2
    ManufacturerGeneral Motors
    SKU15767252
    WarrantyThis genuine GM part is guaranteed by GM's factory warranty.
    Shipping & ReturnShipping Policy Return Policy
    Warning: California's Proposition 65
  • Vehicle Fitment

    Year Make Model Trim Engine
    2002-2010 Cadillac EscaladeBase, Hybrid, Hybrid Platinum, Platinum8 Cyl 5.3 L GAS, 8 Cyl 6.0 L FULL HYBRID EV-FLEX (FHEV), 8 Cyl 6.0 L FULL HYBRID EV-GAS (FHEV), 8 Cyl 6.0 L GAS, 8 Cyl 6.2 L FLEX, 8 Cyl 6.2 L GAS
    2003-2010 Cadillac Escalade ESVBase, Platinum8 Cyl 6.0 L GAS, 8 Cyl 6.2 L FLEX, 8 Cyl 6.2 L GAS
    2002-2010 Cadillac Escalade EXTBase8 Cyl 6.0 L GAS, 8 Cyl 6.2 L FLEX, 8 Cyl 6.2 L GAS
    2007-2010 Chevrolet AvalancheLS, LT, LTZ8 Cyl 5.3 L FLEX, 8 Cyl 5.3 L GAS, 8 Cyl 6.0 L GAS
    2002-2006 Chevrolet Avalanche 1500Base, LS, LT, North Face, On Road Edition, WBH, Z66, Z718 Cyl 5.3 L FLEX, 8 Cyl 5.3 L GAS
    2002-2006 Chevrolet Avalanche 2500Base, LS, LT8 Cyl 8.1 L GAS
    2000-2006 Chevrolet Silverado 1500Base, Hybrid, LS, LT, SS, WT, Z71 Off-Road6 Cyl 4.3 L GAS, 8 Cyl 4.8 L GAS, 8 Cyl 5.3 L FLEX, 8 Cyl 5.3 L FULL HYBRID EV-GAS (FHEV), 8 Cyl 5.3 L GAS, 8 Cyl 6.0 L GAS
    2005-2006, 2001-2003 Chevrolet Silverado 1500 HDBase, LS, LT8 Cyl 6.0 L GAS
    2000-2004 Chevrolet Silverado 2500Base, LS, LT, WT8 Cyl 5.3 L GAS, 8 Cyl 6.0 L BI-FUEL, 8 Cyl 6.0 L CNG, 8 Cyl 6.0 L GAS
    2001-2006 Chevrolet Silverado 2500 HDBase, LS, LT, WT8 Cyl 6.0 L BI-FUEL, 8 Cyl 6.0 L CNG, 8 Cyl 6.0 L GAS, 8 Cyl 6.6 L DIESEL, 8 Cyl 8.1 L GAS
    View More
  • Customer Questions & Expert Answers

    Q:
    Is this 15767252 designed for my car? Posted by ChevyPartsGiant Specialist
    A:
    Please Select Your Vehicle model to see if part number 15767252 is suitable before ordering.
    Posted by ChevyPartsGiant Specialist
    Q:
    How to replace the upper control arm on a 2500 Series on Cadillac Escalade EXT? Posted by Customer
    A:
    To replace the upper Control Arm in a 2500 series removes the tire and wheel then lift up the vehicle, support it, remove the tire and wheel. Afterwards, remove the retainer bolt for the brake hose and the wheel speed sensor brackets and the upper Ball Joint nut that should be thrown away. Use the Ball Joint separator (J-42188-B) to disconnect the upper Control Arm from the Steering Knuckle, as well as remove the upper Control Arm nuts and adjustment cams before removing the upper Control Arm. For installation, start from the installation of the new upper Control Arm therefore insisting on the fastener notice. Mount the upper Control Arm bolts and tighten the nuts to 190 n.m (140 lb ft). Connect the upper Control Arm to the Steering Knuckle and screw in a new nut onto the upper Ball Joint stud, tightening it to 50 n.m (39 lb ft). Replace the retaining bolts for brake hose, tightening them to 9 n.m (80-lb in), place the tire and wheel back on, do the lowering of the vehicle, and check the wheel alignment.
    Posted by ChevyPartsGiant Specialist
    Q:
    How to replace the rear axle upper control arm on Chevrolet Avalanche 1500? Posted by Customer
    A:
    The first step to replace a rear axle upper control arm involves raising and supporting the vehicle. If your vehicle has an ESC sensor disconnect it before proceeding. Start by removing the upper control arm retaining bolt and nut from the frame bracket then move on to the axle bracket retaining nut and bolt before taking out the upper control arm. Installation begins by seating the upper control arm and applying retaining bolts to the axle bracket followed by frame bracket bolts and axle bracket nuts. The nuts must not be tightened until the suspension reaches curb height position during installation. Secure both retaining bolts that hold the upper control arm to 105 N.m torque (77 lb ft) after reconnecting the ESC sensor when present.
    Posted by ChevyPartsGiant Specialist
    Q:
    How to service and repair the rear upper control arm on Chevrolet Suburban 1500? Posted by Customer
    A:
    First, to service and repair rear upper control arm, raise and support the vehicle. If equipped, remove the Real Time Damping (RTD) sensor. Use the wrench mobility to remove the upper control arm retaining nut and bolt from the frame bracket, remove of the retaining nut and bolt from the axle bracket, then the upper control arm is removed. For installation, start with the upper control arm at the position and install the retaining bolt and nut to the axle bracket, then install the retaining bolt to the frame bracket. It is very important not to tighten nuts until you are at the curb height in the suspension. When you've fixed the upper control arm retaining nut, tighten the retaining bolts to 105 Nm(77 ft. lbs.); Last but not least, reconnect the RTD sensor where available and return the vehicle to the ground.
    Posted by ChevyPartsGiant Specialist
    Q:
    How to replace the upper control arm on Chevrolet Silverado 2500? Posted by Customer
    A:
    To replace the upper Control Arm, start by lifting and supporting the car, then take away the tires, then the wheels. Then unfasten the retaining bolt for brake hose and wheel speed sensor brackets, then slacken the nut on top of the Ball Joint, which should be discarded. Use the Ball Joint separator (J-42188-B) to remove the upper Control Arm out of Steering Knuckle. For 15-series 2wd/4wd and 25/35 series 2wd, remove the upper Control Arm nuts and the adjustment cams and then remove the Control Arm bolts and the upper Control Arm itself. Follow the same procedure to remove the upper Control Arm from 25/35 series 4wd. Upon installing the new upper Control Arm, make sure to use the right fasteners in the right positions based on the sequence and torque values to prevent damaging Control Arm or other parts. Mount upper Control Arm bolts for 25/35 series 4 wd, and then upper Control Arm nuts & adjustment cams, tighten nuts to 190 nm (140 lb ft). For 25/35 series 4wd, to install the upper Control Arm, upper Control Arm bolts, upper control art nuts and adjuster cams. For 15 series 2wd/4wd as well as for 25/35 series 2wd, repeat the installation procedure. Mount the upper Control Arm to the Steering Knuckle and add a new nut to a strategic location of the upper Ball Joint stud and tighten to 50 nm (37 lb ft). Unfasten the retaining bolts for brake hose and wheel speed sensor brackets and tighten them to 9 nm (80 lb in), then reinstall the tire and wheel. Lastly, take out the safety stands, lower the vehicle, and check the wheel alignment.
    Posted by ChevyPartsGiant Specialist
    Q:
    How to replace the upper control arm on Chevrolet Tahoe? Posted by Customer
    A:
    To replace the upper Control Arm, the first step is to lift the vehicle and support it, remove the tire and wheel. If found, disconnect the real time damping (RTD) link rod from the sensor and remove the retaining bolt of the brake hose and wheel speed sensor brackets. Next, unfasten the wheel drive shaft and the nut in the upper Ball Joint and discard the nut. Detaching the upper Control Arm from the Steering Knuckle using the Ball Joint separator (J43631). For 15 series 2wd, 4wd, and 25/35 series 2wd , take off upper control arms nuts and adjustment cams , upper Control Arm bolts . Do the same for the cut worms on the 25/35 series 4wd upper Control Arm nuts and adjustment cams and 25/35 series 4wd upper Control Arm bolts. When the upper Control Arm is removed, the new upper Control Arm should be put in place, including the upper Control Arm bolts for the 25/35 series 4 wd. Mount the upper Control Arm nuts and adjustment cams for 25/35 series 4wd and tighten nuts with the torque of 190 nm (140 ft. Lbs.). Then, tighten the bolts for the upper Control Arm for the 15 series 2wd, 4wd, and 25/35 series 2wd, nuts, and the adjustment cams for them, all to 190 nm (140 ft. Lbs.). Fasten the upper Ball Joint stud onto the upper Control Arm and attach another new nut and tighten it to 50 nm (37 ft. Lbs.), and installing the wheel drive shaft onto the Steering Knuckle and tighten it. Re-install the retaining bolts for the brake hose and wheel speed sensor bolts, tightening it up to 9 nm (80 inch lbs.), and attach the rtd link rod of the sensor if there is. Finally, install the tire and wheel, take out the safety stands, put the vehicle to the ground, and make sure that the wheel alignment is all right.
    Posted by ChevyPartsGiant Specialist
    Q:
    How do you disconnect the upper control arm from the steering knuckle for the 2008 Cadillac Escalade ESV? Posted by Customer
    A:
    Use the Ball Joint Separator (J-42188-B).
    Posted by ChevyPartsGiant Specialist
    See expert answers on similar Control Arm
    Q:
    What should be removed after raising for the 2003 Cadillac Escalade? Posted by Customer
    A:
    The lower control arm retaining nuts and the retaining bolt.
    Posted by ChevyPartsGiant Specialist
    See expert answers on similar Control Arm
    Q:
    What is the torque specification for the lower control arm retaining nuts for the 2010 Cadillac Escalade? Posted by Customer
    A:
    Tighten them to 175 Nm (129 lb ft).
    Posted by ChevyPartsGiant Specialist
    See expert answers on similar Control Arm
    Q:
    What is the final step after tightening the bolts for the 2009 Cadillac Escalade? Posted by Customer
    A:
    Remove the rear axle support and lower the vehicle.
    Posted by ChevyPartsGiant Specialist
    See expert answers on similar Control Arm
    Q:
    What is the torque specification for tightening the upper control arm retaining bolts for the 2007 Cadillac Escalade? Posted by Customer
    A:
    160 N.m (118 lb ft).
    Posted by ChevyPartsGiant Specialist
    See expert answers on similar Control Arm
    Q:
    How do you install the new lower control arm for the 2007 Cadillac Escalade? Posted by Customer
    A:
    Place the new lower control arm and secure it with the control arm bolts and washers, ensuring to follow the Fastener Notice.
    Posted by ChevyPartsGiant Specialist
    See expert answers on similar Control Arm
    Q:
    What is the first step to replace the lower control arm for the 2007 Cadillac Escalade? Posted by Customer
    A:
    Begin by raising and supporting the vehicle, then support the lower control arm with a safety stand.
    Posted by ChevyPartsGiant Specialist
    See expert answers on similar Control Arm
    Q:
    What is the first step to replace the rear axle lower control arm for the 2007 Cadillac Escalade ESV? Posted by Customer
    A:
    Raise and support the vehicle.
    Posted by ChevyPartsGiant Specialist
    See expert answers on similar Control Arm
    Q:
    What is the torque specification for tightening the lower control arm to frame bolts for the 2010 Cadillac Escalade ESV? Posted by Customer
    A:
    100 Nm (74 lb ft) plus 55 degrees.
    Posted by ChevyPartsGiant Specialist
    See expert answers on similar Control Arm
    Q:
    What should be reinstalled after the lower control arm for the 2008 Cadillac Escalade ESV? Posted by Customer
    A:
    Reinstall the torsion bars, lower ball joint into the steering knuckle, and the wheel drive shaft.
    Posted by ChevyPartsGiant Specialist
    See expert answers on similar Control Arm
    Q:
    What is the first step to replace the lower control arm for the 2003 Chevrolet Avalanche 1500? Posted by Customer
    A:
    First raise and support the vehicle, then support the lower control arm with a safety stand.
    Posted by ChevyPartsGiant Specialist
    See expert answers on similar Control Arm
    Q:
    How do you detach the lower ball joint for the 2006 Chevrolet Avalanche 2500? Posted by Customer
    A:
    Detach the lower ball joint retaining nut and disconnect the lower ball joint stud from the steering knuckle using the J 43631 Ball Joint Separator and J 45851 Ball Joint Separator Protector Adapters.
    Posted by ChevyPartsGiant Specialist
    See expert answers on similar Control Arm
    Q:
    What is the first step to replace the rear axle lower control arm for the 2002 Chevrolet Suburban 2500? Posted by Customer
    A:
    Raise and support the vehicle.
    Posted by ChevyPartsGiant Specialist
    See expert answers on similar Control Arm
    Q:
    What is the torque specification for the lower control arm retaining nuts for the 2009 Chevrolet Tahoe? Posted by Customer
    A:
    Tighten to 175 Nm (129 lb ft).
    Posted by ChevyPartsGiant Specialist
    See expert answers on similar Control Arm
    Q:
    What is the procedure for installing the new lower control arm for the 2004 Chevrolet Silverado 3500? Posted by Customer
    A:
    Position the new lower control arm and secure it with the 15-series bolts and 25/35-series bolts, ensuring the washers are installed with the shoulder facing the arm.
    Posted by ChevyPartsGiant Specialist
    See expert answers on similar Control Arm
    Q:
    What is the torque specification for the upper control arm retaining nut for the 2010 Chevrolet Tahoe? Posted by Customer
    A:
    Tighten the upper control arm retaining nut to 160 Nm (118 lb ft).
    Posted by ChevyPartsGiant Specialist
    See expert answers on similar Control Arm
    Q:
    What should be detached from the lower control arm for the 2009 Chevrolet Tahoe? Posted by Customer
    A:
    Detach the stabilizer shaft link from the lower control arm and, if equipped, remove the wheel drive shaft.
    Posted by ChevyPartsGiant Specialist
    See expert answers on similar Control Arm
    Q:
    When should the nuts be tightened during installation for the 2002 Chevrolet Tahoe? Posted by Customer
    A:
    Nuts should not be tightened until the suspension is at the curb height position.
    Posted by ChevyPartsGiant Specialist
    See expert answers on similar Control Arm
    Q:
    What is the torque specification for tightening the bolts for the 2000 Chevrolet Suburban 1500? Posted by Customer
    A:
    Tighten the bolts to 105 Nm (77 ft. lbs.).
    Posted by ChevyPartsGiant Specialist
    See expert answers on similar Control Arm
    Q:
    After detaching the stabilizer shaft links, what should be removed for the 2002 Chevrolet Suburban 2500? Posted by Customer
    A:
    The shock absorber lower nut and bolt.
    Posted by ChevyPartsGiant Specialist
    See expert answers on similar Control Arm
    Q:
    What is the first step to service and repair the rear lower control arm for the 2001 Chevrolet Suburban 1500? Posted by Customer
    A:
    Raise and support the vehicle.
    Posted by ChevyPartsGiant Specialist
    See expert answers on similar Control Arm
    Q:
    What should be done after securing the lower control arm for the 2005 GMC Sierra 3500? Posted by Customer
    A:
    Reinstall the wheel drive shaft and connect the lower ball joint stud to the steering knuckle, securing it with the retaining nut tightened to 100 Nm (74 ft. lbs.).
    Posted by ChevyPartsGiant Specialist
    See expert answers on similar Control Arm
    Q:
    What should be done after positioning the new upper control arm for the 2010 GMC Yukon? Posted by Customer
    A:
    Install the upper control arm bolts and tighten them to 190 Nm (140 lb ft).
    Posted by ChevyPartsGiant Specialist
    See expert answers on similar Control Arm
    Q:
    What should be installed last for the 2001 GMC Yukon XL 1500? Posted by Customer
    A:
    Install the front stabilizer shaft link, the shock absorber, the tire and wheel.
    Posted by ChevyPartsGiant Specialist
    See expert answers on similar Control Arm
    Q:
    What is the first step to replace the lower control arm for the 2010 GMC Yukon? Posted by Customer
    A:
    First, raise and support the vehicle, then remove the tire and wheel.
    Posted by ChevyPartsGiant Specialist
    See expert answers on similar Control Arm
    Q:
    When should the nuts be tightened during the installation for the 2008 GMC Yukon? Posted by Customer
    A:
    Ensure not to tighten the nuts until the suspension is at curb height.
    Posted by ChevyPartsGiant Specialist
    See expert answers on similar Control Arm
    Q:
    What needs to be removed to take out the upper control arm for the 2009 GMC Yukon? Posted by Customer
    A:
    The upper control arm retaining nut and bolt from both the frame bracket and the axle bracket.
    Posted by ChevyPartsGiant Specialist
    See expert answers on similar Control Arm
    Q:
    What is the final step after completing the installation for the 2004 GMC Yukon XL 2500? Posted by Customer
    A:
    Remove the rear axle support and lower the vehicle.
    Posted by ChevyPartsGiant Specialist
    See expert answers on similar Control Arm
    Q:
    What should be done with the nut at the upper ball joint for the 2009 GMC Yukon? Posted by Customer
    A:
    Remove and discard it.
    Posted by ChevyPartsGiant Specialist
    See expert answers on similar Control Arm
    Q:
    What should be done with the upper ball joint stud for the 2001 GMC Yukon XL 1500? Posted by Customer
    A:
    Install a new nut and tighten it to 100 Nm (74 ft. lbs.).
    Posted by ChevyPartsGiant Specialist
    See expert answers on similar Control Arm
    If you have any questions about this product, please don't hesitate to ask us. We will be happy to help you!

OEM GM 15767252, Excellent Performance and Perfect Fitment

To ensure reliability, purchase GM part # 15767252 Upper Control Arm, Rear. It is sometimes referred to as GM Control Arm, GM Trailing Arm. Choosing OEM parts is the optimal decision for guaranteeing superior quality and perfect performance. These components undergo stringent quality checks and are carefully constructed to comply with GM's factory specifications, ensuring a smooth installation process.

ChevyPartsGiant.com is a leading supplier of genuine GM parts such as GM 15767252 Upper Control Arm, Rear. Our website boasts an extensive inventory of OEM GM parts, available at highly competitive prices in the market. Should you require any new genuine GM parts, rest assured we will deliver them swiftly and efficiently to your doorstep. Furthermore, all our parts come with the assurance of a manufacturer's warranty. For detailed Chevy parts information, click here.
Choose ChevyPartsGiant for discounted prices, exceptional service and fast delivery