Make sure this part fits

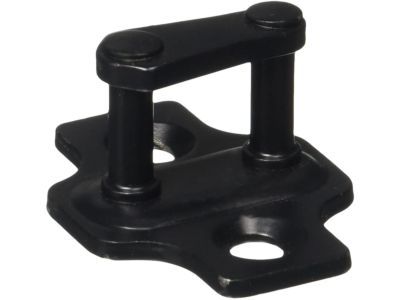
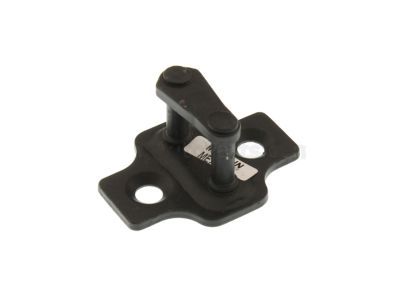
GM 21090040
Striker

1991-2005 GM

Customer Questions & Expert Answers (63)
GM 21090040 Striker
GM 21090040 Striker
  • Part Description
    Striker, Door Lock Striker
  • Position
    Rear
  • Manufacturer
    General Motors
Make sure this part fits
$31.92 MSRP: $47.49
You Save: $15.57 (33%)
Ships in 1-3 Business Days
1
ADD TO CART
  • Related Parts
  • Product Specifications
  • Vehicle Fitment
  • Customer Questions & Expert Answers
  • Product Specifications

    BrandGenuine GM
    Manufacturer Part Number21090040
    Part DescriptionStriker, Door Lock Striker
    Other NamesStriker, End Gate Lock
    Item Dimensions3.4 x 3.1 x 3.1 inches
    Item Weight0.60 Pounds
    PositionRear
    ConditionNew
    Fitment TypeDirect Replacement
    ManufacturerGeneral Motors
    SKU21090040
    WarrantyThis genuine GM part is guaranteed by GM's factory warranty.
    Shipping & ReturnShipping Policy Return Policy
    Warning: California's Proposition 65
  • Vehicle Fitment

    Year Make Model Trim Engine
    1991-1996 Buick Commercial ChassisBase8 Cyl 5.0 L GAS, 8 Cyl 5.7 L GAS
    1992-2005 Buick LeSabreCustom, Limited6 Cyl 3.8 L GAS
    1991-2004 Buick Park AvenueBase, Ultra6 Cyl 3.8 L GAS
    2004 Buick RainierCXL, CXL Plus6 Cyl 4.2 L GAS, 8 Cyl 5.3 L GAS
    1995-1999 Buick RivieraBase6 Cyl 3.8 L GAS
    1991-1996 Buick RoadmasterBase, Collector's Edition, Estate Wagon, Estate Wagon Collector's Edition, Limited, Limited Collector's Edition8 Cyl 5.0 L GAS, 8 Cyl 5.7 L GAS
    1993 Cadillac 60 SpecialBase8 Cyl 4.9 L GAS
    1993 Cadillac AllanteBase, Indianapolis 500 Pace Car, Value Leader8 Cyl 4.6 L GAS
    1991 Cadillac BroughamBase, d'Elegance8 Cyl 5.0 L GAS, 8 Cyl 5.7 L GAS
    1991-2004 Cadillac DeVilleBase, Concours, d'Elegance, DHS, DTS, Protection Series, Spring Edition, Touring8 Cyl 4.6 L GAS, 8 Cyl 4.9 L GAS
    View More
  • Customer Questions & Expert Answers

    Q:
    Can you help me check if this 21090040 is the right part for my car? Posted by ChevyPartsGiant Specialist
    A:
    Please Select Your Vehicle model to see if part number 21090040 is suitable before ordering.
    Posted by ChevyPartsGiant Specialist
    Q:
    How to replace the front door striker on Buick Park Avenue? Posted by Customer
    A:
    Inspect the location of the front door striker and count the spacers before taking it out. The first step involves taking out the 2 mini wedge striker bolts before moving to the mini wedge striker followed by the spacer and the washer . Install the front door striker while using a washer at the lock pillar to shield paint surfaces from harm. Place the mini wedge striker and spacer next to the washer aligning the narrow wedge section outward before attaching the bolts in a loose manner. Safely align the mini edge striker and screw in its two bolts while tightening them to 25 N.m (19 lb ft).
    Posted by ChevyPartsGiant Specialist
    Q:
    How to replace the front door striker on Buick Rainier? Posted by Customer
    A:
    The installation of a new front door striker starts with opening the door to mark the spot of the striker on the door frame. Two bolts (Bolts) holding the striker to the door frame must be removed before extracting the striker and spacer. First step of installation involves plugging the striker and spacer into the door frame but do not secure the bolts at this time. The next step should include installing two bolts (Bolts) that secure the striker to the door frame. Keep the striker and spacer aligned with their marked spot on the frame. The bolt needs complete tightening at 25 N.m (18 lb ft) before the door closure.
    Posted by ChevyPartsGiant Specialist
    Q:
    How to replace the rear door striker on Buick LeSabre? Posted by Customer
    A:
    The process to replace the rear door striker begins by noticing the striker location along with the number of spacers followed by striker fastener removal. Use a grease pencil to mark the door striker placement on the pillar before you take out its fasteners . You must then detach the striker piece at a time while removing each connector and washer. To install the gripper system the washer must be combined with spacer and striker placing the striker onto the lock pillar so that its narrow side faces outward towards the specified marks that were made when stripping it away. Screw in the striker fasteners while aligning the door striker until they reach 28 N.m (21 lb ft).
    Posted by ChevyPartsGiant Specialist
    Q:
    How to replace the front door striker on Buick LeSabre? Posted by Customer
    A:
    The process to replace front door strikers requires observing their position along with spacer counts before unfastening the striker from its place. Draw a grease pencil mark at the door striker location on the pillar before you remove the fasteners of the door striker followed by the striker piece and the spacer and washer. To install the assembly begin by placing the washer then the spacer and finally the striker on the lock pillar so that the narrow part extends outward along the marks from removal. Fasten the striker fasteners before securing them correctly into the door striker position. Conclude the install by tightening the fasteners of the striker to 28 N.m (21 lb ft) but always follow the notice regarding fasteners in the service precautions.
    Posted by ChevyPartsGiant Specialist
    Q:
    How to replace the rear door striker anchor plate on Cadillac DeVille? Posted by Customer
    A:
    The first step in replacing the rear door striker anchor plate should be disabling the SIR system because it activates air bags and creates safety risks. Start the process by uninstalling the door striker from its position. Begin by removing the rear seat back and moving on to the rear door striker removal step. The first step should be to take out any existing rear side impact inflator module from the vehicle when present. You should disconnect the anchor plate from its position inside the rear pillar chute. Put the anchor plate into the rear pillar chute then add the door striker for installation. Reinstall the rear side impact inflator module together with the seat back when it applies.
    Posted by ChevyPartsGiant Specialist
    Q:
    How to replace the front door striker using the Mini-Wedge Striker Aligner (J 39346-A) on Cadillac Eldorado? Posted by Customer
    A:
    Replace the front door striker using the Mini-Wedge Striker Aligner tool (J 39346-A) while following exact removal steps because correct door system operation depends on proper striker alignment. The procedure starts with checking the striker location along with spacer count before softly unfastening the two mini wedge striker fasteners along with the mini wedge striker and spacer and washer. Reassemble the washer with spacer and striker where the striker should be placed on the lock pillar with the wedge narrow end facing outward. Apply sufficient tightening force to 27 N.m (20 lb ft) when you fasten the striker. You should take off the mini-wedge door striker aligner (J 39346-A) and apply body color paint to every unpainted portion of the lock pillar that is exposed.
    Posted by ChevyPartsGiant Specialist
    Q:
    How to replace the body-mounted rear door striker on Cadillac Escalade? Posted by Customer
    A:
    For body-mounted rear door striker replacement start by taking off the upper garnish trim panel followed by removing the striker screws to extract the striker. Proceed by mounting the new striker on the vehicle while following the Fastener Notice from Service Precautions. Reinstall the upper garnish trim panel after securing the striker screws which should be tightened to 25 N.m (18 lb ft).
    Posted by ChevyPartsGiant Specialist
    Q:
    How to replace the front door striker on Cadillac Seville? Posted by Customer
    A:
    You must observe the striker location and spacer count before taking out the striker bolts when replacing the front door striker. Start by taking off the door striker fasteners before proceeding with removing the striker together with spacer and washer. After installing the striker check its position to ensure that too much door resistance and personal injury hazards are prevented; avoid striking the striker with hammers and steering clear of forced alignment. Secure the washer to the striker and spacer while arranging the striker with narrow edges on the exterior part and then install the striker fasteners. Install the door striker following the instructions in the Lock Striker Adjustment - Door (Rear Door/Rear Door Striker/Adjustments) then fasten the striker bolts to 27 N.m (20 lb ft).
    Posted by ChevyPartsGiant Specialist
    Q:
    How to replace the body-mounted rear door striker on Chevrolet Avalanche 1500? Posted by Customer
    A:
    Start the replacement of body-mounted rear door striker by disassembling the upper garnish trim panel and striker screws before removing the striker. Insert the striker onto the vehicle before tightening it with the striker screws to 25 N.m (18 lb ft) torque as stated in the Fastener Notice in Service Precautions. Put back the upper garnish trim panel as your final step.
    Posted by ChevyPartsGiant Specialist
    Q:
    How to replace the front door striker on Chevrolet Blazer? Posted by Customer
    A:
    You need to take out the front door lower striker bolt together with the rear door lower striker bolt before changing the front door striker. The striker and spacer (if equipped) require enough bolt rotation freedom so easily move away from the lower bolt opening before installing the lower bolt tightly to secure the backing plate position. The next step requires you to take off both the upper striker bolt while simultaneously removing the spacer (if present) and the striker. Install procedures begin with attaching the front elements including the striker and optional spacer and the upper striker bolt. When the striker backing plate moves you should rotate the lower bolt until its upper threaded hole aligns correctly then remove the lower bolt. The installation of front and rear lower striker bolts requires first centering both the striker and spacer on the lower threaded hole in the backing plate and then proceeding with bolt installation starting with the front door. You should adjust the door striker bolts to seek proper engagement with the door latch by first loosening these bolts and afterwards tightening them to 22 N.m (16 lb ft).
    Posted by ChevyPartsGiant Specialist
    Q:
    How to adjust the Door Striker on Chevrolet Camaro? Posted by Customer
    A:
    Begin by slightly loosening the door lock striker bolts/screws until the lock striker becomes free to move while making sure the door stays aligned before any modification. Then, attach the mini-wedge Door Striker aligner (J 39346-A) onto the surface of the lock striker . Wear gloves when installing the mini-wedge Door Striker aligner (J 39346-A) along the lock striker while keeping the outside handle open and gently closing the door. Place the lock striker bolts/screws loosely enough to adjust position but finally tighten them to 29 n.m (21 lb ft). The last step involves removing the mini-wedge Door Striker aligner (J 39346-A).
    Posted by ChevyPartsGiant Specialist
    Q:
    How to Replace the Rear Door Striker on the Lower Side on Chevrolet Express 3500? Posted by Customer
    A:
    The first step for replacing the rear side door latch striker requires users to take out the side door stepwell mat from the vehicle. The process starts with bolt removal that secures the lower striker to the stepwell. After that remove the lower striker from the vehicle. The installation process begins with installing the lower striker on the vehicle after proper orientation according to the fastener notice. Fasten the two bolts onto the lower striker by torquing them to 10 N.m (89 lb in). Reinstall the side door stepwell mat as the last step.
    Posted by ChevyPartsGiant Specialist
    Q:
    How to replace the front door striker on Chevrolet Corvette? Posted by Customer
    A:
    The procedure to replace the front door striker begins by removing its cover from hook and loop fastener patches. Proceed by disconnecting the screws attached to the striker component. Then you can remove the striker and its associated shims. Position the striker along with shims on the lock pillar before installing the attaching screws loosely. Check the striker alignment by shutting the door and then open it to tighten all screws with a torque of 24 N.m (18 lb ft). Finally, reinstall the striker cover.
    Posted by ChevyPartsGiant Specialist
    Q:
    How to replace the upper front door striker on Chevrolet S10? Posted by Customer
    A:
    The first step to replace the upper front door striker requires you to remove the rear side door upper latch striker cover using a flat-bladed tool to release retainers from the roof panel. Secondly you need to extract the bolts which bind the striker to the roof panel before removing the striker together with its attached shims from the panel. When installing the striker you need to return it to the roof panel together with the shim(s) while adhering to the Fastener Notice guidance mentioned in Service Precautions. Secure bolts to the roof panel mounting of the striker before adjusting its position by tightening down the bolts until it reaches a proper fit while self-aligning the striker and performing door fit checks. The number of shims can be adjusted up to 3 items before you tighten the striker bolts to 10 N.m (89 lb in). Finish this operation by adding the upper door latch striker cover.
    Posted by ChevyPartsGiant Specialist
    Q:
    How to Service and Repair the Upper Front Door Striker on a Chevrolet S10? Posted by Customer
    A:
    You can start replacing the upper front door striker by taking out the rear side door upper latch striker cover through the roof panel retainers that a flat-bladed tool can release. Proceed to uninstall the bolts securing the striker onto the roof panel until the striker with its shim(s) easily separate from the roof panel. You must reinstall the striker and shim(s) on the roof panel while following the Service Precautions related to Fastener Notice. Use the bolts to secure the striker onto the roof panel after which you should set the bolt tension for a proper fit while performing a self-aligning door check of the striker position and verifying door alignment. Follow the Fastener Notice in Service Precautions for positioning the striker before securing it with 10 N.m (89 lb in) bolts to the roof panel.
    Posted by ChevyPartsGiant Specialist
    Q:
    How to replace the upper rear side door striker on Chevrolet Suburban 1500? Posted by Customer
    A:
    The first step in upper rear side door latch striker replacement involves opening the side access door followed by removing upper door striker bolts and finally taking out the upper door striker from the vehicle. The installation process begins with fitting the new upper door striker according to the specified Fastener Notice. The next step involves putting in place the upper door striker bolts while torquing them to 24 N.m (18 lb ft). After completion close the door for an inspection of normal operation.
    Posted by ChevyPartsGiant Specialist
    Q:
    How to replace the rear side access door upper door striker on GMC Envoy? Posted by Customer
    A:
    The first step to replace the rear side access door upper striker requires users to open the rear side access door while removing its upper door striker trim cover. Begin by uninstalling the bolts holding the upper side access door striker to the body then unfasten the striker itself. Follow the Fastener Notice in Service Precautions when you put the upper side access door striker onto the body for installation. Fasten the striker when installing its bolts to a torque of 25 N.m (18.14 lb ft). Place the rear side access upper door striker trim cover back and shut the rear side access door.
    Posted by ChevyPartsGiant Specialist
    Q:
    How to replace the front door striker on Chevrolet Trailblazer? Posted by Customer
    A:
    First mark the striker position on the door frame when the door is open before you remove the two bolts (Bolts) securing the striker to the frame to take out the striker and spacer. The front door striker needs to be released from its door frame position through removing the 2 bolts (Bolts) then pulling out the striker and spacer. You should first attach the striker and spacer to their positions on the door frame but avoid screwing the bolts during the placement process. After positioning the striker against the door frame, start by placing the bolts (Bolts) to secure the door frame and the striker alignment should match the previously marked mark. The bolts need full tightening to 25 N.m (18 lb ft) with complete alignment fully checked before final closure of the door. Finally, close the door.
    Posted by ChevyPartsGiant Specialist
    Q:
    How to replace the body-mounted rear door striker on Chevrolet Suburban 2500? Posted by Customer
    A:
    For body-mounted rear door striker replacement start by taking off the upper garnish trim panel followed by removing the striker screws to extract the striker. Proceed by mounting the new striker on the vehicle while following the Fastener Notice from Service Precautions. Reinstall the upper garnish trim panel after securing the striker screws which should be tightened to 25 N.m (18 lb ft).
    Posted by ChevyPartsGiant Specialist
    Q:
    How to replace the front door striker on GMC Jimmy? Posted by Customer
    A:
    The striker replacement process begins with taking out the front door lower striker bolt and the rear door lower striker bolt. Rotating the striker and spacing (if present) away from the lower bolt hole is possible after loosening the upper striker bolts sufficiently. Install the lower striker bolt before tightening it to keep the striker backing plate stable. You should now proceed to eliminate the upper striker bolt and the spacer (if equipped) in addition to the striker. Start by putting in the striker and then install the upper striker bolt followed by any attached spacer. The striker backing plate requires realignment by turning the lower striker bolt before eliminating the bolt. After aligning the lower threaded hole on the striker backing plate you can begin retaining the front and rear door lower striker bolts in this order. You should adjust the door striker engagement by loosening and tightening its bolts to 22 N.m (16 lb ft).
    Posted by ChevyPartsGiant Specialist
    Q:
    How to replace the body-mounted rear door striker on GMC Yukon XL 2500? Posted by Customer
    A:
    For body-mounted rear door striker replacement start by taking off the upper garnish trim panel followed by removing the striker screws to extract the striker. Proceed by mounting the new striker on the vehicle while following the Fastener Notice from Service Precautions. Reinstall the upper garnish trim panel after securing the striker screws which should be tightened to 25 N.m (18 lb ft).
    Posted by ChevyPartsGiant Specialist
    Q:
    How to replace the front door striker on GMC Sonoma? Posted by Customer
    A:
    The front Door Striker replacement process demands initial removal of the front door lower striker bolt as well as the rear door lower striker bolt. The upper bolts need just a bit of loosening to pivot the striker together with its spacer toward the bottom hole where you should install and tighten the lower bolt as needed for plate support. The next step includes removal of the upper striker bolt followed by the spacer (if equipped) as well as the striker itself. The first step for installation begins with attaching the striker along with the spacer (if present) and finally adding the upper striker bolt. The installer should rotate the bottom striker bolt to match the upper threaded position before removing it if the striker backing plate shifted position. The lower threaded hole of the striker backing plate should be aligned while installing both the front door lower striker bolt and then the rear lower striker bolt. To achieve correct door latch engagement you should adjust the Door Striker by loosening the bolts and tightening them to 22 n.m (16 lb ft).
    Posted by ChevyPartsGiant Specialist
    Q:
    How to replace the body-mounted rear door striker on GMC Yukon XL 1500? Posted by Customer
    A:
    Begin the replacement of the body-mounted rear door striker by removing the upper garnish trim panel followed by the striker screws before taking out the striker itself. Install the striker to the vehicle according to the Fastener Notice in Service Precautions by inserting striker screws and torquing each screw to 25 N.m (18 lb ft) before reattaching the upper garnish trim panel.
    Posted by ChevyPartsGiant Specialist
    Q:
    How do you assemble the components for installation for the 2000 Buick Park Avenue? Posted by Customer
    A:
    Assemble the washer, spacer, and striker, positioning the striker on the lock pillar with the narrow part facing outward.
    Posted by ChevyPartsGiant Specialist
    See expert answers on similar Door Striker
    Q:
    What should be done last in the process for the 2005 Buick LeSabre? Posted by Customer
    A:
    Finally, adjust the lock striker as needed.
    Posted by ChevyPartsGiant Specialist
    See expert answers on similar Door Striker
    Q:
    What is the assembly order for installation for the 2001 Buick LeSabre? Posted by Customer
    A:
    Assemble the washer, spacer, and striker.
    Posted by ChevyPartsGiant Specialist
    See expert answers on similar Door Striker
    Q:
    What should be done after positioning the striker for the 2003 Buick LeSabre? Posted by Customer
    A:
    Secure the striker fasteners and align the door striker.
    Posted by ChevyPartsGiant Specialist
    See expert answers on similar Door Striker
    Q:
    What is the first step to replace the rear door striker anchor plate for the 2004 Buick Park Avenue? Posted by Customer
    A:
    First, remove the door striker.
    Posted by ChevyPartsGiant Specialist
    See expert answers on similar Door Striker
    Q:
    What is the first step to replace the rear side door lock striker anchor plate for the 2001 Buick Park Avenue? Posted by Customer
    A:
    First, remove the door striker.
    Posted by ChevyPartsGiant Specialist
    See expert answers on similar Door Striker
    Q:
    What should be done after removing the door striker and rear seat back for the 2000 Buick LeSabre? Posted by Customer
    A:
    Next, take out the anchor plate from the rear pillar chute.
    Posted by ChevyPartsGiant Specialist
    See expert answers on similar Door Striker
    Q:
    What is the first step to replace the front door striker for the 2003 Buick Park Avenue? Posted by Customer
    A:
    Observe the striker position and the number of spacers before removal.
    Posted by ChevyPartsGiant Specialist
    See expert answers on similar Door Striker
    Q:
    What should be removed after disabling the SIR system for the 2004 Cadillac DeVille? Posted by Customer
    A:
    Remove the door striker.
    Posted by ChevyPartsGiant Specialist
    See expert answers on similar Door Striker
    Q:
    Why is proper alignment of the striker important during installation for the 2002 Cadillac DeVille? Posted by Customer
    A:
    Misalignment can lead to excessive door effort or damage, posing a risk of personal injury.
    Posted by ChevyPartsGiant Specialist
    See expert answers on similar Door Striker
    Q:
    How do you secure the striker after installation for the 2002 Cadillac Eldorado? Posted by Customer
    A:
    Install the fasteners and tighten them to 27 N.m (20 lb ft).
    Posted by ChevyPartsGiant Specialist
    See expert answers on similar Door Striker
    Q:
    What is the torque specification for securing the striker for the 2000 Cadillac Eldorado? Posted by Customer
    A:
    27 N.m (20 lb ft).
    Posted by ChevyPartsGiant Specialist
    See expert answers on similar Door Striker
    Q:
    What is the final step after aligning the door striker for the 2000 Cadillac Seville? Posted by Customer
    A:
    Tighten the fasteners to 27 N.m (20 lb ft).
    Posted by ChevyPartsGiant Specialist
    See expert answers on similar Door Striker
    Q:
    What is the first step to replace the front door striker for the 2001 Cadillac Seville? Posted by Customer
    A:
    Observe the striker location and the number of spacers before removing the door striker fasteners.
    Posted by ChevyPartsGiant Specialist
    See expert answers on similar Door Striker
    Q:
    What is the first step to replace the rear door striker anchor plate for the 2002 Cadillac Seville? Posted by Customer
    A:
    First, remove the door striker.
    Posted by ChevyPartsGiant Specialist
    See expert answers on similar Door Striker
    Q:
    What is the first step to replace the front door striker for the 2001 Cadillac DeVille? Posted by Customer
    A:
    Observe the striker location and the number of spacers before removing the door striker bolts.
    Posted by ChevyPartsGiant Specialist
    See expert answers on similar Door Striker
    Q:
    What is the first step to replace the front door striker for the 2003 Chevrolet Avalanche 1500? Posted by Customer
    A:
    First, remove the lower striker bolt.
    Posted by ChevyPartsGiant Specialist
    See expert answers on similar Door Striker
    Q:
    What should be done after removing the upper garnish trim panel for the 2002 Chevrolet Avalanche 2500? Posted by Customer
    A:
    Remove the striker screws.
    Posted by ChevyPartsGiant Specialist
    See expert answers on similar Door Striker
    Q:
    What is the next step after loosening the upper striker bolt for the 2002 Chevrolet Avalanche 2500? Posted by Customer
    A:
    Reinstall the lower striker bolt and tighten it sufficiently to hold the striker backing plate in place.
    Posted by ChevyPartsGiant Specialist
    See expert answers on similar Door Striker
    Q:
    What is the final step after tightening the screws for the 2001 Chevrolet Camaro? Posted by Customer
    A:
    Perform the lock striker adjustment.
    Posted by ChevyPartsGiant Specialist
    See expert answers on similar Door Striker
    Q:
    What is the first step to replace the front door striker for the 2002 Chevrolet Camaro? Posted by Customer
    A:
    Open the door to access the striker.
    Posted by ChevyPartsGiant Specialist
    See expert answers on similar Door Striker
    Q:
    What is the final step after checking the alignment for the 2004 Chevrolet Corvette? Posted by Customer
    A:
    Open the door and tighten the screws to a torque of 24 N.m (18 lb ft).
    Posted by ChevyPartsGiant Specialist
    See expert answers on similar Door Striker
    Q:
    What is the final step in the process for the 2004 Chevrolet Express 1500? Posted by Customer
    A:
    Tighten the retaining bolts to 10 N.m (89 lb in).
    Posted by ChevyPartsGiant Specialist
    See expert answers on similar Door Striker
    Q:
    How do you install the new side door upper striker for the 2004 Chevrolet Express 3500? Posted by Customer
    A:
    Position the side door upper striker back into the door opening and install the two bolts to secure it.
    Posted by ChevyPartsGiant Specialist
    See expert answers on similar Door Striker
    Q:
    What should be done after tightening the bolts for the 2001 Chevrolet Suburban 1500? Posted by Customer
    A:
    Close the door and inspect for proper operation.
    Posted by ChevyPartsGiant Specialist
    See expert answers on similar Door Striker
    Q:
    What is the first step to replace the rear door latch striker (Lower) for the 2000 Chevrolet Express 3500? Posted by Customer
    A:
    First, remove the two bolts that secure the rear door lower striker to the floor panel.
    Posted by ChevyPartsGiant Specialist
    See expert answers on similar Door Striker
    Q:
    What should be done after removing the lower door striker bolts for the 2000 Chevrolet Suburban 1500? Posted by Customer
    A:
    Take out the lower door striker from the vehicle.
    Posted by ChevyPartsGiant Specialist
    See expert answers on similar Door Striker
    Q:
    What is the required torque for tightening the retaining bolts for the 2000 Chevrolet Tahoe? Posted by Customer
    A:
    Tighten them to 25 N.m (18 lb ft).
    Posted by ChevyPartsGiant Specialist
    See expert answers on similar Door Striker
    Q:
    How do you install the new lower door striker for the 2000 Chevrolet Tahoe? Posted by Customer
    A:
    Position the lower door striker back onto the vehicle, ensuring to follow the Fastener Notice in Service Precautions.
    Posted by ChevyPartsGiant Specialist
    See expert answers on similar Door Striker
    Q:
    What is the final step after securing the lower striker for the 2002 Chevrolet Express 2500? Posted by Customer
    A:
    Reinstall the side door stepwell mat.
    Posted by ChevyPartsGiant Specialist
    See expert answers on similar Door Striker
    Q:
    What is the final step after installing the striker for the 2000 GMC Savana 3500? Posted by Customer
    A:
    Reinstall the rear door opening frame garnish molding.
    Posted by ChevyPartsGiant Specialist
    See expert answers on similar Door Striker
    Q:
    How should the rear door lower striker be secured for the 2001 GMC Savana 2500? Posted by Customer
    A:
    By installing the bolts and tightening them to 10 N.m (89 lb in).
    Posted by ChevyPartsGiant Specialist
    See expert answers on similar Door Striker
    Q:
    How do you secure the lower striker for the 2004 GMC Savana 1500? Posted by Customer
    A:
    Install the two bolts and tighten them to 10 N.m (89 lb in).
    Posted by ChevyPartsGiant Specialist
    See expert answers on similar Door Striker
    Q:
    What is the final step in securing the door lock striker for the 2003 GMC Savana 2500? Posted by Customer
    A:
    Install the bolts to secure the door lock striker and tighten them to 10 N.m (89 lb in).
    Posted by ChevyPartsGiant Specialist
    See expert answers on similar Door Striker
    Q:
    What is the first step to replace the lower front door striker for the 2003 GMC Sonoma? Posted by Customer
    A:
    Open the side access door and remove the bolts retaining the lower door striker.
    Posted by ChevyPartsGiant Specialist
    See expert answers on similar Door Striker
    Q:
    What should be done after removing the garnish molding for the 2002 GMC Savana 3500? Posted by Customer
    A:
    Take out the two bolts that secure the side door upper striker to the door.
    Posted by ChevyPartsGiant Specialist
    See expert answers on similar Door Striker
    Q:
    What should be done after removing the door lock striker for the 2004 GMC Savana 3500? Posted by Customer
    A:
    Install the new striker onto the left rear door.
    Posted by ChevyPartsGiant Specialist
    See expert answers on similar Door Striker
    Q:
    What is the first step to replace the lower front door striker for the 2001 GMC Yukon XL 1500? Posted by Customer
    A:
    Open the side access door and remove the lower door striker bolts.
    Posted by ChevyPartsGiant Specialist
    See expert answers on similar Door Striker
    Q:
    What should be done after positioning the lower striker for the 2003 GMC Savana 3500? Posted by Customer
    A:
    Install the two bolts to secure the lower striker to the stepwell, tightening them to 10 N.m (89 lb in).
    Posted by ChevyPartsGiant Specialist
    See expert answers on similar Door Striker
    If you have any questions about this product, please don't hesitate to ask us. We will be happy to help you!

OEM GM 21090040, Excellent Performance and Perfect Fitment

To ensure reliability, purchase GM part # 21090040 Striker. It is sometimes referred to as GM Door Striker. Choosing OEM parts is the optimal decision for guaranteeing superior quality and perfect performance. These components undergo stringent quality checks and are carefully constructed to comply with GM's factory specifications, ensuring a smooth installation process.

ChevyPartsGiant.com is a leading supplier of genuine GM parts such as GM 21090040 Striker. Our website boasts an extensive inventory of OEM GM parts, available at highly competitive prices in the market. Should you require any new genuine GM parts, rest assured we will deliver them swiftly and efficiently to your doorstep. Furthermore, all our parts come with the assurance of a manufacturer's warranty. For detailed Chevy parts information, click here.
Choose ChevyPartsGiant for discounted prices, exceptional service and fast delivery