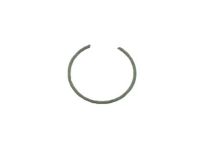
Make sure this part fits

GM 19122437
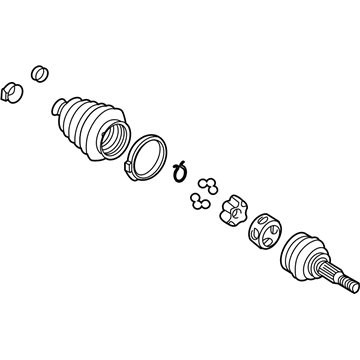
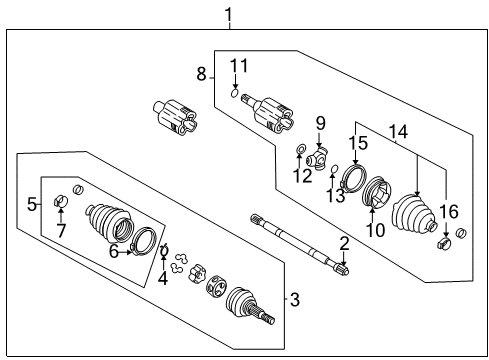
C.V. Joint, Outer

1995-2009 GM

Customer Questions & Expert Answers (31)
GM 19122437 C.V. Joint, Outer
  • Part Description
    Outer CV Joint; CV Joint
  • Position
    Outer
  • Replaces
    26044410, 26045070
  • Manufacturer
    General Motors
  • Manufacturer's Notes
    This part is discontinued.
Make sure this part fits
  • Related Parts
  • Product Specifications
  • Vehicle Fitment
  • Customer Questions & Expert Answers
  • Product Specifications

    BrandGenuine GM
    Manufacturer Part Number19122437
    Part DescriptionOuter CV Joint; CV Joint
    Other NamesCV Joints; Outer Joint; Outer Joint Assembly
    Item Dimensions7.6 x 7.2 x 6.5 inches
    Item Weight6.50 Pounds
    PositionOuter
    ConditionNew
    Replaces26044410, 26045070
    ManufacturerGeneral Motors
    SKU19122437
    WarrantyThis genuine GM part is guaranteed by GM's factory warranty.
    Shipping & ReturnShipping Policy Return Policy
    Warning: California's Proposition 65
  • Vehicle Fitment

    Year Make Model Trim Engine
    1995-2005 Buick CenturyCustom, Limited, Special, Special Edition4 Cyl 2.2 L GAS, 6 Cyl 3.1 L GAS
    2005-2009 Buick LaCrosseCX, CXL6 Cyl 3.8 L GAS
    1995-2005 Buick LeSabreCustom, Limited6 Cyl 3.8 L GAS
    2006-2008 Buick LucerneCX, CXL6 Cyl 3.8 L GAS
    1999-2004 Buick RegalGS, GSE, LS, LSE6 Cyl 3.8 L GAS
    1995 Cadillac DeVilleBase8 Cyl 4.9 L GAS
    2000-2005 Chevrolet ImpalaBase, LS, LS Sport, Police, SS6 Cyl 3.4 L GAS, 6 Cyl 3.8 L GAS
    1995-1996 Chevrolet Lumina APVBase, LS6 Cyl 3.1 L GAS, 6 Cyl 3.4 L GAS, 6 Cyl 3.8 L GAS
    2000-2005 Chevrolet Monte CarloLS, LS Competition, LS Sport, LT, SS, SS 35th Anniversary Edition, SS Dale Earnhardt Signature Edition, SS High Sport, SS Pace Car6 Cyl 3.4 L GAS, 6 Cyl 3.8 L GAS
    1997-2005 Chevrolet VentureBase, LS, LT, Plus, Value, Warner Bros.6 Cyl 3.4 L GAS
    View More
  • Customer Questions & Expert Answers

    Q:
    Is this 19122437 designed for my car? Posted by ChevyPartsGiant Specialist
    A:
    Please Select Your Vehicle model to see if part number 19122437 is suitable before ordering.
    Posted by ChevyPartsGiant Specialist
    Q:
    What Tools Are Required for Replacing the Outer CV Joint and Seal on Buick LeSabre? Posted by Customer
    A:
    The replacement operation of the Wheel Drive Shaft Outer Joint and Seal requires Drive Axle Seal Clamp Pliers (J 35910) and Drive Axle Swage Ring Clamp (J 41048) and Snap Ring Pliers (J 8059). Three tools required for the job include Drive Axle Seal Clamp Pliers (J 35910), Drive Axle Swage Ring Clamp (J 41048), and Snap Ring Pliers (J 8059). Start by cutting off the large seal retaining clamp on the CV joint with a side cutter until you discard it before you remove the small retaining clamp from the halfshaft bar. Caretaker away the outboard seal from the CV joint outer race while sliding it away from the joint. Remove the grease from the CV joint inner race and use Snap Ring Pliers (J 8059) with spread function to deactivate the race retaining ring ears for CV joint assembly extraction. Place the bar's seal on a bench and lightly strike the CV joint cage to extract chrome alloy balls until all have been removed. Position both cage and inner race components at right angles to the outer race so the windows match up perfectly with the lands. After removing both components you must align the inner race with the cage window openings before pivoting it into position. Use cleaning solvent to cleanse CV joint assemblies and CV joint cage together with balls until all remnants of old grease and contaminants disappear along with complete drying of all components. Assembly begins with the placement of the new swage ring onto the small end of the joint seal followed by joint seal and halfshaft bar slide. The Drive Axle Swage Ring Clamp (J 41048) inserted into a vise positions the assembly without putting the seal at risk. Start by tightening the clamp bolts pushed and pulled alternately until the clamp grips properly then position the components correctly in the center to perform a 180-degree bolt rotation until their full tightness appears. The ball grooves on both inner and outer races need a thin coat of grease before putting the inner race into the cage at a right angle. Line up the cage together with the inner race toward the outer race while placing the retaining ring side of the inner race toward the halfshaft bar. Place chrome balls into the CV joint while adding grease until it reaches the proper thickness and outboard seal positioning looks correct. As the last step slide the large diameter outboard seal onto the CV joint outer race then crimp the seal retaining clamp while using Drive Axle Seal Clamp Pliers (J 35910) and implementing a breaker bar and torque wrench to produce a final clamp tightness of 176 Nm (130 ft. lbs.) and verify the clamp ear gap before making any required adjustments.
    Posted by ChevyPartsGiant Specialist
    Q:
    How to replace the outer CV Joint and seal on Buick Regal? Posted by Customer
    A:
    To replace the wheel drive shaft outer joint and seal, unscrew the large single retaining clamp from the CV Joint with a side cutter and discard it. Cut away the swage ring with hand grinder and take that off before you take the halfshaft outboard seal off of the CV Joint outer race at the big diameter. Push the boot away from the joint along its halfshaft bar and clean the face of the CV Joint inner race from grease. Remove the old outboard boot by using j 8059 (Snap Ring Pliers), spread the ears on the race retaining ring. Then pull cv-joint assembly out from the halfshaft bar. Tapping gently on a brass drift will switch the CV Joint cage and displace all six chrome alloy balls. Clean the inner and outer race assemblies, the CV Joint cage, and chrome alloy balls to remove all old grease and contaminants, followed by drying all parts and inspecting the CV Joint assembly for unusual wear, cracks, or damage, with replacement of damaged parts. Clean the halfshaft bar using the wire brush to remove rust around the mounting area of the seal. For assembly install a new swage ring on the neck of the out board boot and do not swager it then place the boot on the half shaft bar that is in the seal groove. Position the two pin shaft halves without the use of shims or any other interference-fit device, and swage the ring by placing the two parts together, and tightening the bolts to the hand-tight tolerance, alternately between each bolt using j 41048 (Small Swage Tool). Inspect the swaged ring for deformations and re-swage wherever required. Lightly grease with service kit grease in the ball grooves of the inner and outer races, then install the inner race into the cage taking care to ensure correct alignment. Put the cage and inner race into the outer cage, pop in chrome balls, fill the CV Joint with grease. Push the CV Joint onto the halfshaft bar all the way until the retaining ring is seated while assuring that the outboard boot is no dimpled or stretched. Slide the outboard boot with the large seal retaining clamp over the CV Joint outer race and crimp the clamp using j 35910 (Seal Clamp Tool) to 174 nm (130 ft. Lbs), checking the gap dimension on the clamp ear neuveau-steel tightening as necessary.
    Posted by ChevyPartsGiant Specialist
    Q:
    What tools are required to service and repair the CV Joint for the wheel drive shaft outer joint and seal replacement on Chevrolet Impala? Posted by Customer
    A:
    To service and repair constant velocity joint, namely the wheel drive shaft outer joint and seal replacement, the following tools are needed: j41048 drive axle swage ring clamp, j8059 snap ring pliers, and j35910 drive axle seal clamp pliers. Starting with the removal of the large seal retaining clamp from the CV Joint by using a side cutter and disposing of it thereby beware not to cut into the contact of the wheel drive shaft inboard seal. Use a hand grinder to cut through swage ring to remove. Pull the halfshaft outboard seal from the CV Joint outer race and slide it out from the joint over the halfshaft bar. Take off the grease from the face of the CV Joint inner race and spread the ears on the race retaining ring with the j8059. Take out the CV Joint assembly from the halfshaft bar and get rid of the old outboard seal. Tap and tilt the CV Joint cage with a brass drift gently to remove the chrome alloy balls until all six are removed. Clean the inner and outer race assemblies, as well as the CV Joint cage and the chrome alloy balls with cleaning solvent and dry all parts out before inspecting for any unusual wear, cracks or damage and replacing any of the damages parts. Clean the area around the seal mounting with wire brush and rust from halfshaft bar. For the assembly, the swage ring, new, should be mounted on the neck of the outboard seal, unswaged, followed by sliding of the outboard seal onto the halfshaft bar, and positioning in the seal groove. Swage the ring into the position using the j41048 and tighten the bolts aligning them and checking any deformities upon completion. Put a light coat of grease from the service kit onto the inner and outer races' ball grooves, then install the inner race into the cage with proper alignment with the outer one. Install the chrome balls, with grease packing the CV Joint and with the outboard seal properly formed. Lastly, slip the large diameter of the outboard seal with the large seal retaining clamp on over the CV Joint outer race, and crimp the clamp with the j35910 to the specified torque, verifying the gap dimension on the clamp ear.
    Posted by ChevyPartsGiant Specialist
    Q:
    How to replace the outer CV Joint and seal on the wheel drive shaft on Chevrolet Monte Carlo? Posted by Customer
    A:
    To replace the wheel drive shaft outer joint, and seal, start by getting all the equipment required for the job, which include; j 35910 earred clamp tool, j 41048 small swage tool and j 8059 snap ring pliers. First and foremost, detach the large seal retaining clamp on the CV Joint with a side cutter and throw it away, and then duplicate the same action on the small seal retaining clamp on the halfshaft bar. Disengage the outboard seal from the CV Joint outer race and move it off of the bar . Remove the grease from the cervical vertebra joint inner race and used j 8059 to spread the ears on race retaining ring before attempting to remove the CV Joint assembly from the bar. Tap out the balls using a brass drift and hammer. Remove the seal from the bar and. Completely remove all six balls and conform the CV Joint cage as well as the inner race at a 90-degree angle to the outer race including alignment of windows with the lands of the outer race. Wash the inner and outer race assemblies, CV Joint cage, and balls clear of all old grease and contaminants with cleaning solvent and then dries it. For assembly insert the new swage ring on the small end of the joint seal and slide them onto the halfshaft bar. Secure the outboard end of the halfshaft assembly into j 41048 vise mounted from the back, to make sure it aligns with the seal neck. Put the position of j 41048 and loosen all the bolts to the middle position shock value until snug than grease lightly from the service kit value ball to groove of inner and outer races. Put the inner race into the cage so that it is properly aligned and then set the cage and inner race into the outer race. Mount the chrome balls, packing the CV Joint with grease and making sure the outboard seal is in the right shape. Lastly make sure to slide the outboard seal of large diameter over the outer race of the cv joints and crimp the clamp of the seal retaining using the j 35910, breaker bar and a torque wrench to 176 nm (130 ft lbs) with monitoring of the gap dimension on the clamp ear.
    Posted by ChevyPartsGiant Specialist
    Q:
    What is the final step in the process for the 2005 Buick LaCrosse? Posted by Customer
    A:
    Slide the large diameter of the outboard seal with the large seal retaining clamp over the CV joint outer race and crimp the clamp using the Seal Clamp Tool (J35910) to the specified torque, checking the gap dimension on the clamp ear until the required measurement is achieved.
    Posted by ChevyPartsGiant Specialist
    See expert answers on similar CV Joint
    Q:
    What is the first step in the process for the 2007 Buick Lucerne? Posted by Customer
    A:
    Inspect the transmission sealing surface for corrosion and clean it with 320 grit cloth if necessary.
    Posted by ChevyPartsGiant Specialist
    See expert answers on similar CV Joint
    Q:
    How do you prepare the halfshaft bar for installation for the 2002 Buick Century? Posted by Customer
    A:
    Clean the halfshaft bar with a wire brush to remove rust in the seal mounting area.
    Posted by ChevyPartsGiant Specialist
    See expert answers on similar CV Joint
    Q:
    What should be inspected for damage or wear for the 2001 Buick Century? Posted by Customer
    A:
    Inspect the inboard seal, tripot joint spider assembly, housing, and trilobal tripot bushing.
    Posted by ChevyPartsGiant Specialist
    See expert answers on similar CV Joint
    Q:
    What tools are required for servicing and repairing the constant velocity joint boot for the 2007 Buick LaCrosse? Posted by Customer
    A:
    J 41048 Drive Axle Swage Ring Clamp, J 8059 Snap Ring Pliers, and J 35910 Drive Axle Seal Clamp Pliers.
    Posted by ChevyPartsGiant Specialist
    See expert answers on similar CV Joint
    Q:
    How should the halfshaft bar be prepared for the 2005 Buick Century? Posted by Customer
    A:
    Clean the halfshaft bar with a wire brush to remove rust and inspect the needle rollers, needle bearings, and trunnion for damage, replacing any damaged parts with the appropriate kit.
    Posted by ChevyPartsGiant Specialist
    See expert answers on similar CV Joint
    Q:
    How should the halfshaft bar and tripot components be cleaned for the 2005 Buick LeSabre? Posted by Customer
    A:
    Clean the halfshaft bar with a wire brush and the tripot balls, needle rollers, and housing with cleaning solvent, ensuring all old grease is removed.
    Posted by ChevyPartsGiant Specialist
    See expert answers on similar CV Joint
    Q:
    What tools are needed to replace the wheel drive shaft outer joint and seal for the 2002 Buick LeSabre? Posted by Customer
    A:
    Drive Axle Seal Clamp Pliers (J35910), Drive Axle Swage Ring Clamp (J41048), and Snap Ring Pliers (J8059).
    Posted by ChevyPartsGiant Specialist
    See expert answers on similar CV Joint
    Q:
    What is the next step after installing the spacer ring for the 2002 Buick Regal? Posted by Customer
    A:
    Use Snap Ring Pliers (J 8059) to install the halfshaft bar retaining ring in the groove, reseat the spacer ring, and apply grease from the service kit to the inboard seal and housing.
    Posted by ChevyPartsGiant Specialist
    See expert answers on similar CV Joint
    Q:
    What should be done with the trilobal tripot bushing and both rings for the 2004 Buick LeSabre? Posted by Customer
    A:
    Discard the trilobal tripot bushing and both rings along with the inboard boot.
    Posted by ChevyPartsGiant Specialist
    See expert answers on similar CV Joint
    Q:
    How do you ensure the outboard seal is properly secured for the 2006 Buick LaCrosse? Posted by Customer
    A:
    Ensure the outboard seal is properly shaped, crimp the large seal retaining clamp using J 35910 to 174 Nm (130 ft. lbs.), and check the gap dimension on the clamp ear, tightening until the specified dimension of 1.9 mm (5/64 inch) is reached.
    Posted by ChevyPartsGiant Specialist
    See expert answers on similar CV Joint
    Q:
    What should be done with the grease from the service kit for the 2007 Buick LaCrosse? Posted by Customer
    A:
    Place approximately half of the grease in the halfshaft inboard seal and use the remainder to repack the housing.
    Posted by ChevyPartsGiant Specialist
    See expert answers on similar CV Joint
    Q:
    What is the final step in securing the seal retaining clamp for the 2007 Buick Lucerne? Posted by Customer
    A:
    Crimp the seal retaining clamp using J 35910, a breaker bar, and a torque wrench, tightening to 176 N.m (130 lb ft) while checking the gap dimension on the clamp ear to ensure it reaches 2.60 mm (0.102 in).
    Posted by ChevyPartsGiant Specialist
    See expert answers on similar CV Joint
    Q:
    What should be done while latching the inboard seal, housing, and large seal retaining clamp for the 2003 Buick Century? Posted by Customer
    A:
    Align them and then crimp the seal retaining clamp with Seal Clamp Tool (J 35910) to 174 Nm (130 ft. lbs.), checking the gap dimension on the clamp ear and tightening as needed.
    Posted by ChevyPartsGiant Specialist
    See expert answers on similar CV Joint
    Q:
    How do you secure the seal and swage ring for the 2001 Buick LeSabre? Posted by Customer
    A:
    Place the top half of the tool on the lower half, ensuring no pinch points on the seal, then insert and tighten the bolts by hand until snug. Align the seal and swage ring, tightening each bolt of J 41048 180 degrees at a time with a ratchet wrench.
    Posted by ChevyPartsGiant Specialist
    See expert answers on similar CV Joint
    Q:
    What is the first step in the process for the 2001 Chevrolet Impala? Posted by Customer
    A:
    Inspect the transmission sealing surface of the halfshaft for corrosion and clean it with 320 grit cloth if necessary.
    Posted by ChevyPartsGiant Specialist
    See expert answers on similar CV Joint
    Q:
    How do you remove the large seal retaining clamp for the 2004 Chevrolet Monte Carlo? Posted by Customer
    A:
    Use side cutters to remove the large seal retaining clamp from the tripot joint and discard it.
    Posted by ChevyPartsGiant Specialist
    See expert answers on similar CV Joint
    Q:
    What should be done with the inboard seal for the 2003 Chevrolet Impala? Posted by Customer
    A:
    Separate the inboard seal from the trilobal tripot bushing and slide it away from the joint along the halfshaft bar.
    Posted by ChevyPartsGiant Specialist
    See expert answers on similar CV Joint
    Q:
    How do you ensure the CV joint is properly seated for the 2004 Chevrolet Impala? Posted by Customer
    A:
    Push the CV joint onto the halfshaft bar until the retaining ring is seated, ensuring the outboard seal is properly shaped.
    Posted by ChevyPartsGiant Specialist
    See expert answers on similar CV Joint
    Q:
    What is the first step in replacing the wheel drive shaft outer joint and seal for the 2006 Buick Lucerne? Posted by Customer
    A:
    Use side cutters to remove and discard the large seal retaining clamp from the CV joint and the small seal retaining clamp from the halfshaft bar.
    Posted by ChevyPartsGiant Specialist
    See expert answers on similar CV Joint
    Q:
    How do you pack the CV joint for the 2001 Chevrolet Venture? Posted by Customer
    A:
    Pack it with grease from the service kit, ensuring the outboard seal is properly shaped.
    Posted by ChevyPartsGiant Specialist
    See expert answers on similar CV Joint
    Q:
    What is the installation process for the new joint seal for the 2005 Chevrolet Venture? Posted by Customer
    A:
    Place the new small swage ring onto the small end of the joint seal and slide both onto the halfshaft bar, positioning the small end of the joint seal into the joint seal groove.
    Posted by ChevyPartsGiant Specialist
    See expert answers on similar CV Joint
    Q:
    What is the process for removing the chrome alloy balls for the 2004 Chevrolet Venture? Posted by Customer
    A:
    Use a brass drift to gently tap and tilt the CV joint cage to remove the chrome alloy balls, repeating until all six are removed.
    Posted by ChevyPartsGiant Specialist
    See expert answers on similar CV Joint
    Q:
    What components need to be removed after the seals for the 2004 Chevrolet Venture? Posted by Customer
    A:
    Remove the housing from the tripot joint spider and the wheel drive shaft bar, followed by the guide from the spring and the spring from the tripot housing.
    Posted by ChevyPartsGiant Specialist
    See expert answers on similar CV Joint
    Q:
    What is the final step in the assembly process for the 2003 Chevrolet Venture? Posted by Customer
    A:
    Slide the large diameter of the outboard seal with the large seal retaining clamp in place over the CV joint outer race and crimp the clamp using the Drive Axle Seal Clamp Pliers to the specified torque, checking the gap dimension on the clamp ear and adjusting as necessary.
    Posted by ChevyPartsGiant Specialist
    See expert answers on similar CV Joint
    Q:
    How should the trilobal tripot bushing be positioned for the 2002 Chevrolet Venture? Posted by Customer
    A:
    Install it to the housing and position the larger new seal retaining clamp on the inboard seal.
    Posted by ChevyPartsGiant Specialist
    See expert answers on similar CV Joint
    If you have any questions about this product, please don't hesitate to ask us. We will be happy to help you!

OEM GM 19122437, Excellent Performance and Perfect Fitment

To ensure reliability, purchase GM part # 19122437 C.V. Joint, Outer. It is sometimes referred to as GM CV Joint. Choosing OEM parts is the optimal decision for guaranteeing superior quality and perfect performance. These components undergo stringent quality checks and are carefully constructed to comply with GM's factory specifications, ensuring a smooth installation process.

ChevyPartsGiant.com is a leading supplier of genuine GM parts such as GM 19122437 C.V. Joint, Outer. Our website boasts an extensive inventory of OEM GM parts, available at highly competitive prices in the market. Should you require any new genuine GM parts, rest assured we will deliver them swiftly and efficiently to your doorstep. Furthermore, all our parts come with the assurance of a manufacturer's warranty. For detailed Chevy parts information, click here.
Choose ChevyPartsGiant for discounted prices, exceptional service and fast delivery