Make sure this part fits

GM 25820031
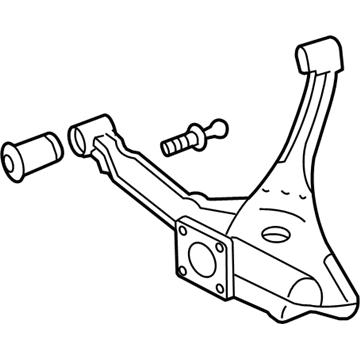
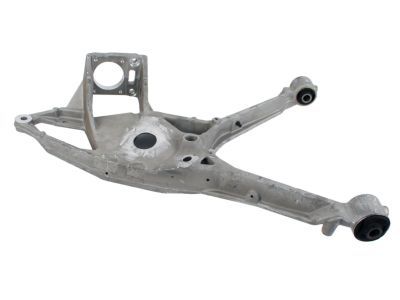
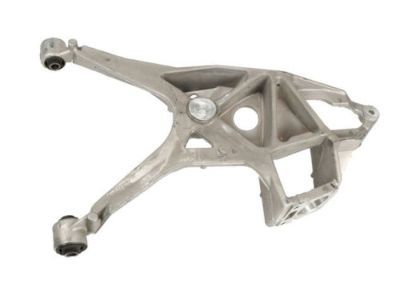
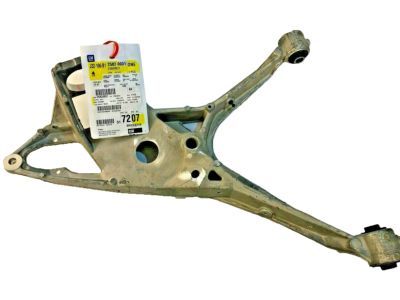
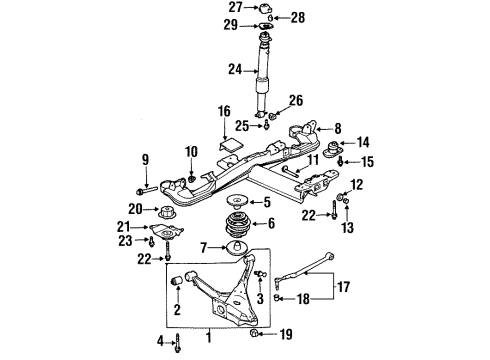
Control Arm, Rear Driver Side

1995-2011 GM

Customer Questions & Expert Answers (23)
GM 25820031 Control Arm, Rear Driver Side
  • Part Description
    Arm Assembly-Rear Suspension Control
  • Position
    Rear Driver Side
  • Replaces
    15897788, 25626733, 25743300, 25675172, 25690655, 25765590, 25699091, 25628897
  • Manufacturer
    General Motors
  • Manufacturer's Notes
    This part is discontinued.
Make sure this part fits
  • Vehicle Fitment

    Year Make Model Trim Engine
    2000-2005 Buick LeSabreCustom, Limited6 Cyl 3.8 L GAS
    2006-2011 Buick LucerneCX, CXL, CXL Special Edition, CXS, Super6 Cyl 3.8 L GAS, 6 Cyl 3.9 L FLEX, 6 Cyl 3.9 L GAS, 8 Cyl 4.6 L GAS
    1997-2005 Buick Park AvenueBase, Ultra6 Cyl 3.8 L GAS
    1995-1999 Buick RivieraBase6 Cyl 3.8 L GAS
    2006-2011 Cadillac DTSBase, Livery, Luxury, Platinum, Premium8 Cyl 4.6 L GAS
    2000-2005 Cadillac DeVilleBase, DHS, DTS, Protection Series8 Cyl 4.6 L GAS
    1998-2004 Cadillac SevilleSLS, STS8 Cyl 4.6 L GAS
    2001-2003, 1995-1999 Oldsmobile AuroraBase6 Cyl 3.5 L GAS, 8 Cyl 4.0 L GAS
    2000-2005 Pontiac BonnevilleGXP, SE, SLE, SSEi6 Cyl 3.8 L GAS, 8 Cyl 4.6 L GAS
    Warning: California's Proposition 65
  • Customer Questions & Expert Answers

    Q:
    Can you help me check if this 25820031 is the right part for my car? Posted by ChevyPartsGiant Specialist
    A:
    Please Select Your Vehicle model to see if part number 25820031 is suitable before ordering.
    Posted by ChevyPartsGiant Specialist
    Q:
    What components need to be reinstalled after securing the adjustment link for the 2001 Buick LeSabre? Posted by Customer
    A:
    Reinstall the wheel bearing/hub, the stabilizer shaft link, and the Automatic Level Control height sensor link on the left control arm, then reattach the rear suspension support assembly.
    Posted by ChevyPartsGiant Specialist
    See expert answers on similar Control Arm
    Q:
    What is the final step after reattaching the rear suspension support assembly for the 2004 Buick Park Avenue? Posted by Customer
    A:
    Lower the vehicle and tighten the lower control arm retaining nuts to 106 Nm (78 ft. lbs.).
    Posted by ChevyPartsGiant Specialist
    See expert answers on similar Control Arm
    Q:
    What should be done during the installation of the lower control arm for the 2004 Buick LeSabre? Posted by Customer
    A:
    Attach the lower control arm to the frame without tightening the control arm nuts initially; support the vehicle's weight by the control arms to achieve the correct trim heights before installing the lower bolts, control arm, and nuts.
    Posted by ChevyPartsGiant Specialist
    See expert answers on similar Control Arm
    Q:
    What is the next step after removing the wheel bearing and hub for the 2001 Cadillac Seville? Posted by Customer
    A:
    Remove the lower control arm mounting bolts and nuts, followed by the lower control arm itself.
    Posted by ChevyPartsGiant Specialist
    See expert answers on similar Control Arm
    Q:
    What caution should be exercised during this process for the 2005 Buick LeSabre? Posted by Customer
    A:
    Exercise caution to prevent over-extension of the Tri-Pot joints, as this could lead to internal component separation and joint failure.
    Posted by ChevyPartsGiant Specialist
    See expert answers on similar Control Arm
    Q:
    What should be removed after the tire and wheel for the 2005 Buick Park Avenue? Posted by Customer
    A:
    Remove the stabilizer shaft link.
    Posted by ChevyPartsGiant Specialist
    See expert answers on similar Control Arm
    Q:
    What should be detached after removing the rear suspension support assembly for the 2004 Buick LeSabre? Posted by Customer
    A:
    Detach the Automatic Level Control height sensor link from the left control arm, followed by the stabilizer shaft link.
    Posted by ChevyPartsGiant Specialist
    See expert answers on similar Control Arm
    Q:
    What is the next step after removing the lower ball joint for the 2001 Buick LeSabre? Posted by Customer
    A:
    Remove the lower ball joint retaining nut, followed by the lower control arm mounting bolts and nuts to detach the lower control arm from the frame.
    Posted by ChevyPartsGiant Specialist
    See expert answers on similar Control Arm
    Q:
    What is the next step after removing the lower ball joint for the 2001 Buick Park Avenue? Posted by Customer
    A:
    Remove the lower control arm mounting bolts and nuts, then take out the lower control arm from the frame.
    Posted by ChevyPartsGiant Specialist
    See expert answers on similar Control Arm
    Q:
    What should be done after inserting the cotter pin for the 2002 Buick Park Avenue? Posted by Customer
    A:
    Reinstall the stabilizer shaft link, tire, and wheel.
    Posted by ChevyPartsGiant Specialist
    See expert answers on similar Control Arm
    Q:
    What is the first step to replace the rear axle lower control arm for the 2001 Cadillac DeVille? Posted by Customer
    A:
    First, raise the vehicle on a suitable hoist and remove the tires and wheels.
    Posted by ChevyPartsGiant Specialist
    See expert answers on similar Control Arm
    Q:
    What are the torque specifications for tightening the stabilizer shaft link assembly nut and the ball joint stud nut for the 2002 Cadillac DeVille? Posted by Customer
    A:
    Tighten the stabilizer shaft link assembly nut to 23 Nm (17 ft. lbs.) and the ball joint stud nut to 30 Nm (22 inch lbs.), followed by an additional 190°.
    Posted by ChevyPartsGiant Specialist
    See expert answers on similar Control Arm
    Q:
    What should be done with the stabilizer link bolt during installation for the 2008 Cadillac DTS? Posted by Customer
    A:
    Install a new stabilizer link bolt and nut, tightening it to 15 N.m (11 lb ft).
    Posted by ChevyPartsGiant Specialist
    See expert answers on similar Control Arm
    Q:
    What is the torque specification for the new stabilizer link bolt and nut for the 2010 Cadillac DTS? Posted by Customer
    A:
    Install a new stabilizer link bolt and nut, tightening it to 15 Nm (11 lb ft).
    Posted by ChevyPartsGiant Specialist
    See expert answers on similar Control Arm
    Q:
    What should be done after removing the control arm for the 2009 Cadillac DTS? Posted by Customer
    A:
    For installation, ensure the control arm nuts are tightened with the vehicle unsupported and resting on the wheels at normal trim height.
    Posted by ChevyPartsGiant Specialist
    See expert answers on similar Control Arm
    Q:
    What is the torque specification for the control arm nuts for the 2010 Cadillac DTS? Posted by Customer
    A:
    The control arm nuts should be tightened to 106 Nm (78 lb ft).
    Posted by ChevyPartsGiant Specialist
    See expert answers on similar Control Arm
    Q:
    What is the next step after installing the lower control arm for the 2007 Cadillac DTS? Posted by Customer
    A:
    If needed, install the wheel bearing and hub.
    Posted by ChevyPartsGiant Specialist
    See expert answers on similar Control Arm
    Q:
    What is the condition for installing the lower control arm for the 2006 Cadillac DTS? Posted by Customer
    A:
    Ensure the vehicle is unsupported and resting on the wheels at normal trim height.
    Posted by ChevyPartsGiant Specialist
    See expert answers on similar Control Arm
    Q:
    How do you attach the automatic level control height sensor for the 2002 Cadillac DeVille? Posted by Customer
    A:
    Attach the automatic level control height sensor link to the left lower control arm.
    Posted by ChevyPartsGiant Specialist
    See expert answers on similar Control Arm
    Q:
    How do you install the lower control arm for the 2002 Cadillac Seville? Posted by Customer
    A:
    Attach the lower control arm to the support, ensuring that the control arm nuts are tightened with the vehicle unsupported and resting on the wheels at normal trim height.
    Posted by ChevyPartsGiant Specialist
    See expert answers on similar Control Arm
    Q:
    What is the first step to replace the front lower control arm for the 2002 Cadillac Seville? Posted by Customer
    A:
    Raise and support the vehicle.
    Posted by ChevyPartsGiant Specialist
    See expert answers on similar Control Arm
    Q:
    How do you install the new lower control arm for the 2005 Buick Park Avenue? Posted by Customer
    A:
    Attach the lower control arm to the rear suspension support assembly, ensuring to tighten the lower control arm nuts with the vehicle unsupported and resting on the wheels at the normal trim height.
    Posted by ChevyPartsGiant Specialist
    See expert answers on similar Control Arm
    If you have any questions about this product, please don't hesitate to ask us. We will be happy to help you!

OEM GM Control Arm, Rear Driver Side 25820031 Designed for Proper Fit and Performance

Original OEM GM parts deliver superior quality and meet all performance standards needed for optimal automotive operation. The authentic part identified by 25820031 Control Arm, Rear Driver Side is available in the market under the name GM Control Arm, Trailing Arm. This genuine product has a full warranty coverage from the manufacturer available at all authorized GM dealers throughout the United States. This part 25820031 Control Arm, Rear Driver Side fits certain Cadillac DTS, DeVille, Seville models, as well as Buick Riviera, LeSabre, Lucerne. Additionally, it is compatible with Pontiac Bonneville and Oldsmobile Aurora models.
The original GM component designated by manufacturer part number 25820031 maintains top performance when functioning as the Arm Assembly-Rear Suspension Control unit at its Rear Driver Side. The component 25820031 is constructed from durable material and its dimensions span 31.2 x 22.1 x 8.2 inches while weighing 16.80 Pounds. The Direct Replacement component is ready in New condition to ensure full compatibility with your vehicle system. This component receives the designation of Lower Control Arm; Arm, Rear Axle Control Arm. The part 25820031 has available replacement options 15897788, 25626733, 25743300, 25675172, 25690655, 25765590, 25699091, 25628897. GM manufacturer provides a warranty that ensures reliable operation of this product. The Shipping Policy and Return Policy pages outline complete details regarding shipping procedures and return processes.
If you want to save money in the long run on maintenance and repairs, you should choose OEM products because they're of the top level of durability. Are you on the quest of finding GM parts, our site is worth a visit. We stock an endless selection of high-quality GM components including things like ignition coils all the way through to fan shrouds and all at prices that can not be matched. You have nothing to worry about because all our OEM parts are covered with a manufacturer warranty, which guarantees superior quality and value.